How To Install The Plugin
There are two ways to install your plugin. The first and easiest method is to uploading a WordPress plugin from wp-admin area. The second is manually installing a WordPress plugin using FTP.
For that first you need to manually download the new plugin package from your Codecanyon account. Once you have the new plugin package, you can choose to upload the plugin via WordPress or via FTP. Please see the information below for how to download new files, and install it via WP or via FTP.
How To Download New Plugin Files From Codecanyon
Step 1 – Log into your Codecanyon account and navigate to your downloads tab. Find your Purchased Item Name.
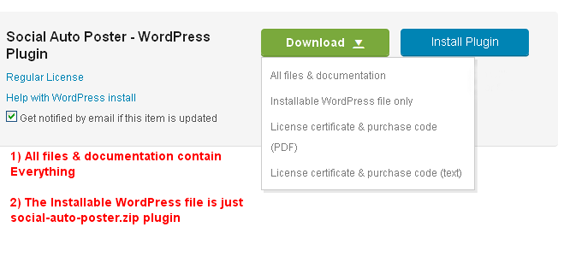
Step 2 – Click the “Download” button next to it and choose to download the “Installable WordPress file only” which is just the WordPress file, or choose the “Main Files” which is the entire package that contains everything.
Step 3 – Then you need to decide if you want to install via FTP or via WordPress. Directions for both methods are below.
Method 1: WordPress Install Method
Step 1 – Retrieve the “social-auto-poster.zip” file from your new Codecanyon download. If you downloaded the “Main Files” from Codecanyon, then you need to unzip the archive file you received, the social-auto-poster.zip will be inside of it.
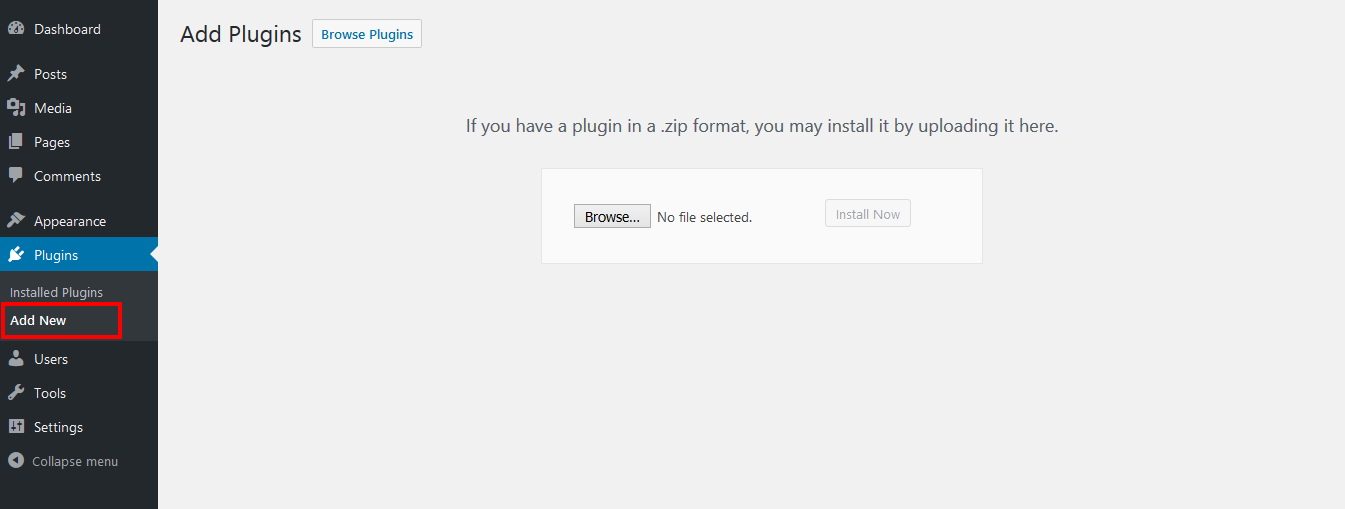
Step 2 – Then simply upload the “social-auto-poster.zip” file in the “Plugins > Add New” section. Click on the “Upload Plugin” tab at the top and choose to upload the zip file.

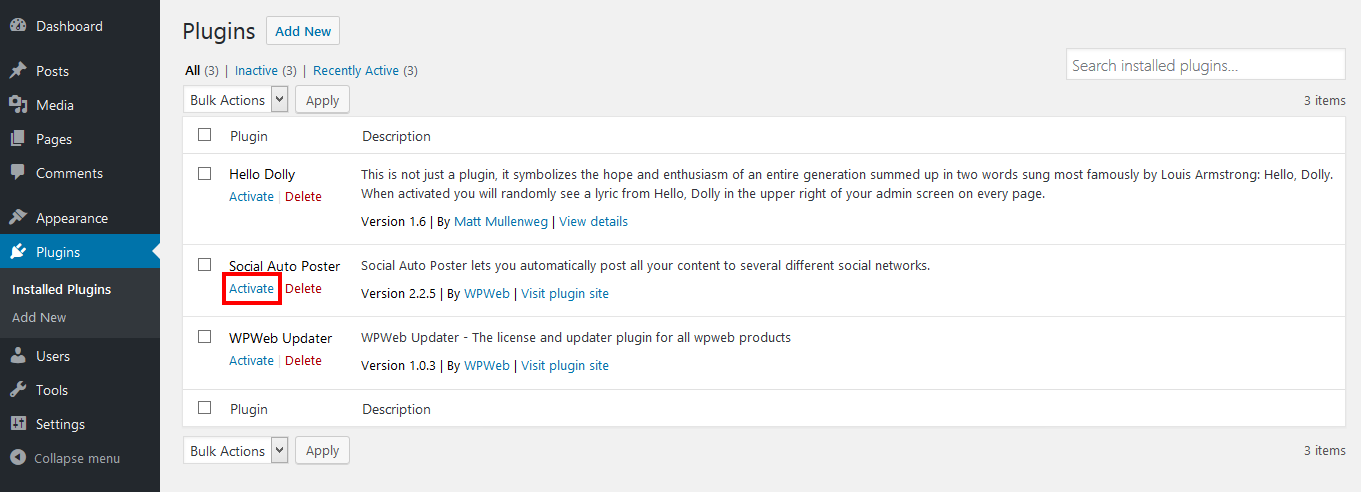
Step 3 – Once it uploads, choose to activate the plugin.

Method 2: FTP Install Method
Step 1 – Go to “wp-content > plugins” location.
Step 2 – Retrieve the “social-auto-poster.zip” file from your new Codecanyon download and extract the file to get the “social auto poster” plugin folder.
Step 3 – Then simply drag and drop the new “social-auto-poster” plugin folder into “wp-content > plugins” location.
Activating Plugin after Installation
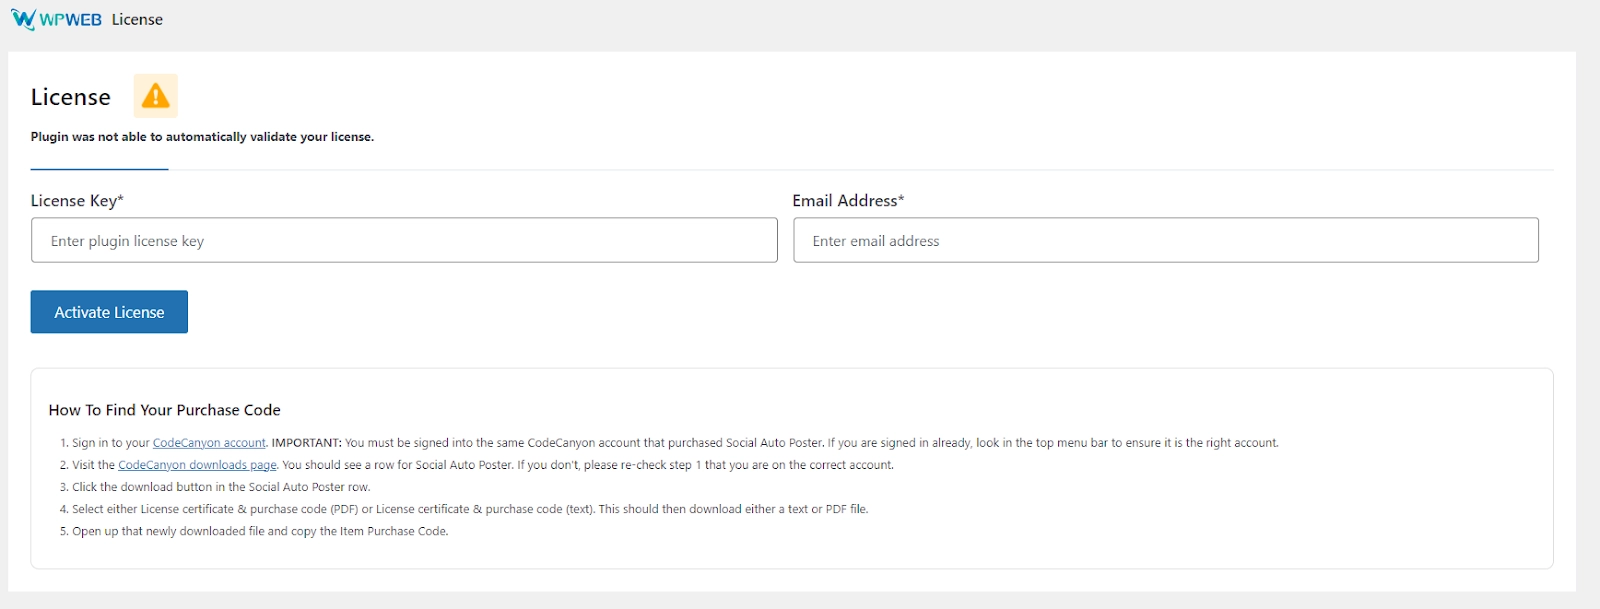
WPWeb Plugins require License Activation upon activation of plugin on your wordpress store, the activation process stand out clear upon the needs to be inserting the purchase code and affiliate email address from the purchase.

How To Find Your Purchase Code
- Sign in to your CodeCanyon account. IMPORTANT: You must be signed into the same CodeCanyon account that purchased the plugin. If you are signed in already, look in the top menu bar to ensure it is the right account.
- Visit the CodeCanyon downloads page. You should see a row for relevant plugin. If you don’t, please re-check step 1 that you are on the correct account.
- Click the download button in the relevant plugin row.
- Select either License certificate & purchase code (PDF) or License certificate & purchase code (text). This should then download either a text or PDF file.
- Open up that newly downloaded file and copy the Item Purchase Code.
Is my staging site considered a license activation?
What is a staging site?
Staging sites allow you to work on, experiment with, and perfect your site before taking it live.
Normally, you need activation our plugin for every WordPress installation, regardless of whether it is a live site, development site, sub-domain, sub-directory, etc. However, in order to help creators work with staging sites, there are a number of staging and development domains that do not count towards your license activations.
What domains can be used?
Following is a list of staging/development sites that won’t count towards your license activations – just replace “example” with your site name. Keep in mind that the domain name must match one of the following formats in order for it not to count as an activation.
TLD (Top-level Domains) that are not considered as an activation:
- .dev (example.dev)
- .local (example.local)
- .test (example.test)
- .staging (example.staging)
- .example (example.example)
- .invalid (example.invalid)
Subdomains that are not considered an activation:
- dev.* (dev.example.com). This can also be implemented as:
- exampledev.* (exampledev.example.com)
- local.* (local.example.com)
- test.* (test.example.com). This can also be implemented as:
- .test. (example.test.example.com)
- staging.* (staging.example.com). This can also be implemented as:
- .staging. (example.staging.example.com)
- staging[0-9].* (staging6.example.com). This can also be implemented as:
- .staging[0-9].(example.staging6.example.com)
- stage.* (stage.example.com). This can also be implemented as:
- .stage. (example.stage.example.com)
There are also specific hosting companies or other web services with domains that do not count toward license activation.
- *.staging.wpengine.com (example.staging.wpengine.com)
- *stg.wpengine.com (examplestg.wpengine.com)
- *dev.wpengine.com (exampledev.wpengine.com)
- dev-*.pantheonsite.io (dev-example.patheonsite.io)
- test-*.pantheonsite.io (test-example.pantheonsite.io)
- staging-*.kinsta.com (staging-example.kinsta.com)
- staging-*.kinsta.cloud (staging-example.kinsta.cloud)
- *.myftpupload.com (example.myftpupload.com)
- *.cloudwaysapps.com (example.cloudwaysapps.com)
- *.ngrok.io (example.ngrok.io)
- *-dev.ksysweb.com (example-dev.ksysweb.com)
- *-stg.ksysweb.com (example-stg.ksysweb.com)
- *-stg.sg-host.com (example-stg.sg-host.com)
Note: The Regular license doesn’t allow subfolders to be used as staging sites that are not counted as activations.
If the domain name you’re using for staging/development does not meet the above requirements, you will need to purchase an additional license (or upgrade to a higher tier plan) in order to activate our plugin on it.
You can also remove the license from your main site, activate it on your staging/development site, and then return it back to the main site once you’re done with the changes.
What’s a difference between Regular license and Extended license?
Regular license would be limited to single domain activation only that means at a time, it can be activated on single domain but if you have extended license, there is no limit. You can activate the plugin on unlimited domains with using Extended license.
However, none of the above license give you rights to resell the plugin.
