WPWeb Social Network Integration Documentation
To create a Windows Live App, visit the Microsoft Azure Portal.
You must be logged in to your Microsoft Azure account to access the application registration page. First, log in to your Microsoft Azure account, then follow the link above to access the App registrations page. The page should look similar to the image shown below.
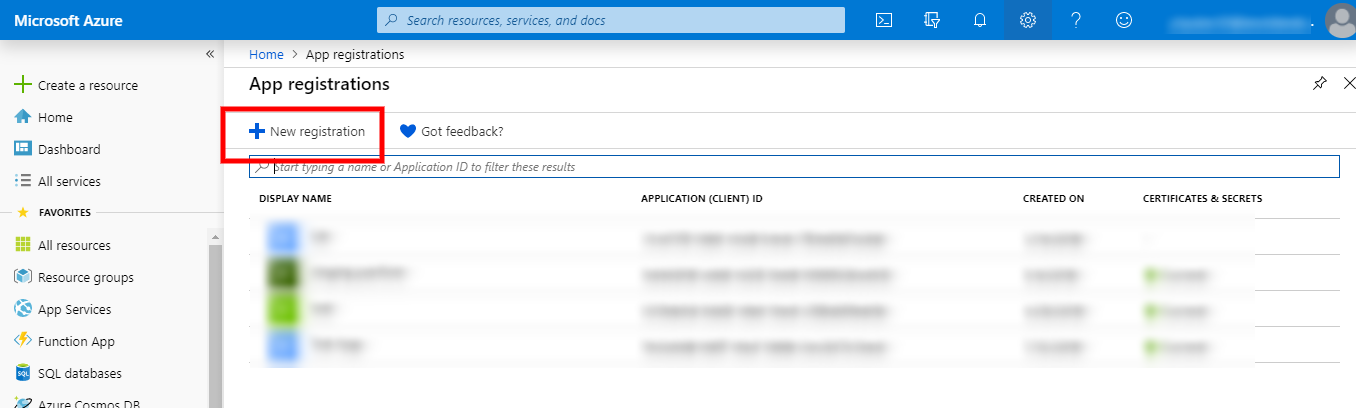
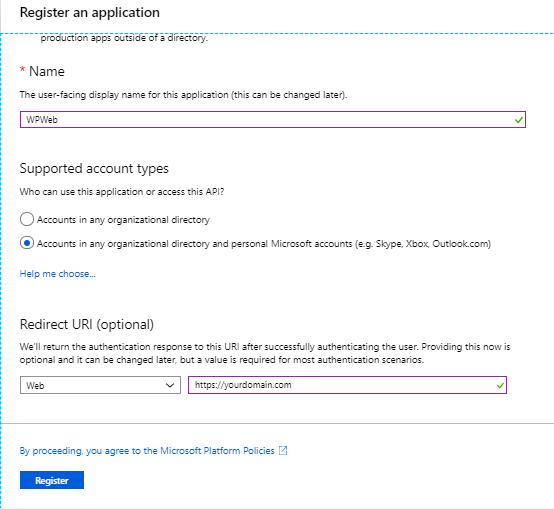
To create a new application, click New Registration. Enter your application name and configure the required Redirect URI with your website URL. Then click Register to create the application, as shown in the image below.
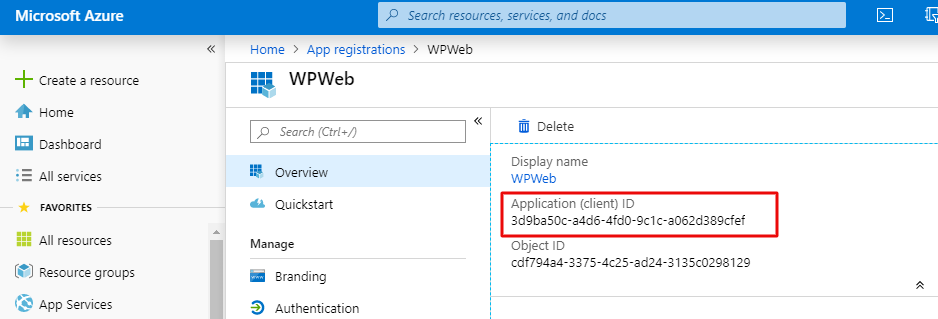
After creating the application, you will be redirected to the Application Overview page. From this page, you can find your Client ID (Application ID).
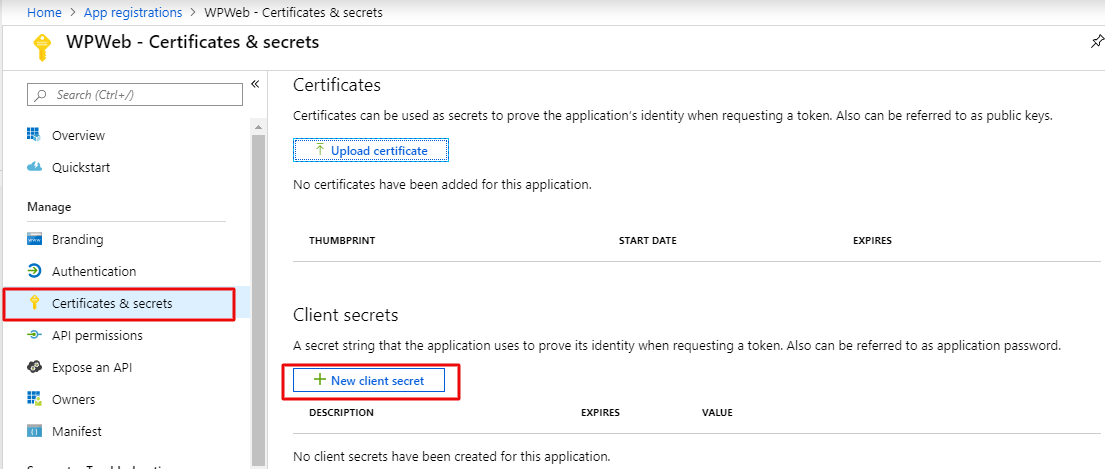
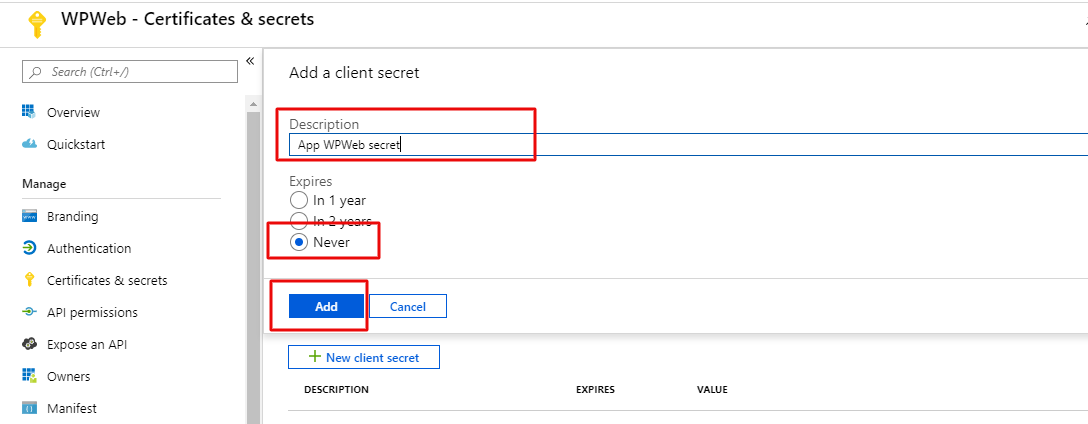
After obtaining the Client ID, go to Certificates & secrets and click New client secret to generate a client secret.
Enter a Description for the client secret and click Add, as shown in the image below.
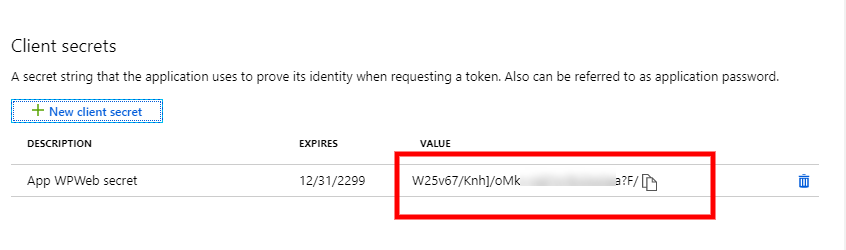
Your Client Secret has now been generated, as shown in the image below.
Next, copy the Windows Live Client ID and Client Secret into the Windows Live App Settings section within the plugin settings page, as shown in the image below.

After entering the Windows Live Client ID and Client Secret, click Save Changes on the plugin’s settings page.