Creating a VK.com Application

“Social Network Integrations” Documentation by “WPWeb”

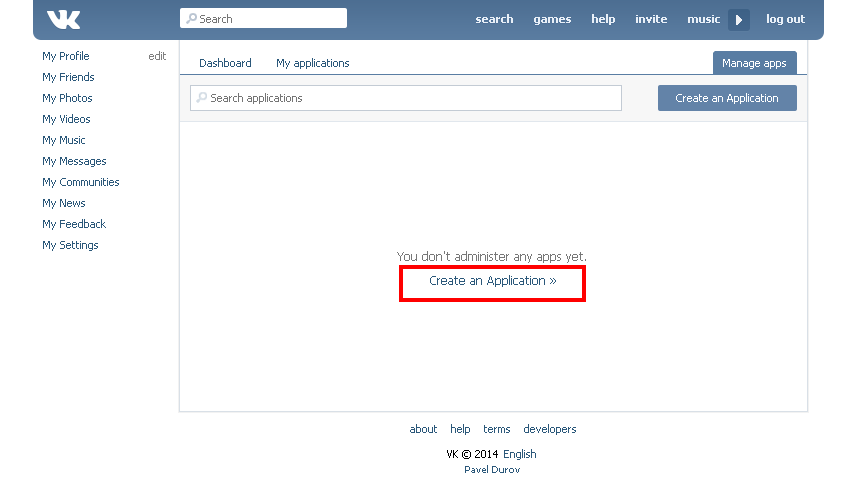
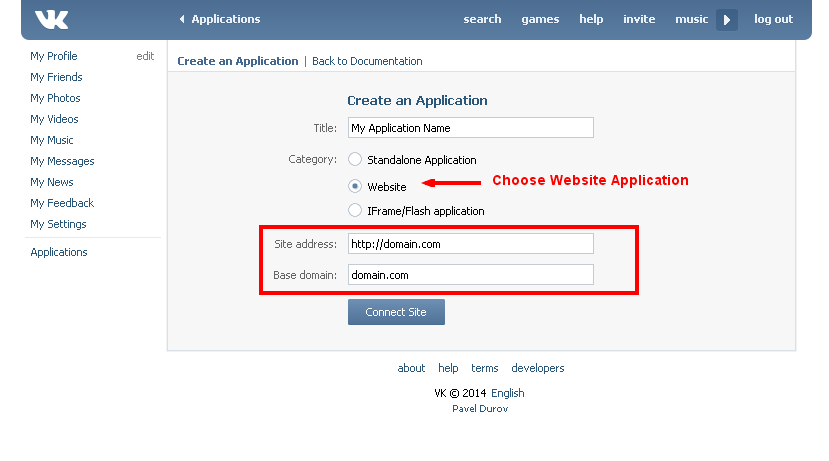
To create a VK.com App, go and visit: https://vk.com/apps?act=manage

VK developer page

Note: Your account needs to be a verified VK.com account. If your account isn’t verified yet, you’ll receive a text message from VK.com to verify your account. So make sure, that you have a mobile number set within your account, otherwise you won’t be able to create an App. On VK.com apps page, click on “Create An Application” button on the top right hand side. A new page will be open (see image below). Enter a Title for your new app, choose an App Category as “Website”, Enter Site address and Base domain and click on Connect site.

VK create app

Note: When you enter the URL of your website in to the Site address field, make sure that it does match the URL of your website 100%. This means, if you go to your website and then check the URL in the browser and the URL does look like http://www.domain.com then you need to enter the exact same URL. If your website URL is http://domain.com then you need to enter it that way, without using the www at the front of the name.

After you added the application you will get redirected on Edit application page. please click on “Settings” tab and you will see the page as mentioned in the image below:

VK app success

Note: When you enter the URL of your website in to the “Authorized Redirect URI” field, make sure that it does match the URL of your website 100%. This means, if you go to your website and then check the URL in the browser and the URL does look like http://www.domain.com then you need to enter the exact same URL. If your website URL is http://domain.com then you need to enter it that way, without using the www at the front of the name.

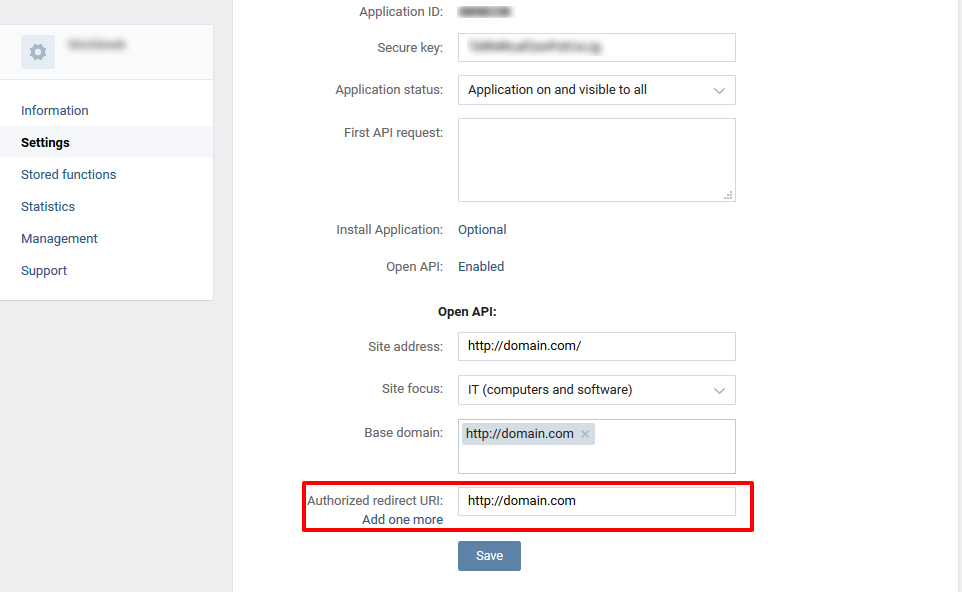
Copy the Application ID and Secure key in to the VK.com App settings within the Plugin settings page. See image below:

VK app plugin setttings

Important: When you copy and paste all the needed IDs and Keys, make sure, that you don’t have any empty spaces, either at the beginning nor at the end of these entries. If you have any empty spaces, then the Application won’t work and will show an error message when you try to connect to the App.

After you entered the Application ID and Secure key, click on the “Save Changes” button within the plugin’s settings page.