“Social Network Integrations” Documentation by “WPWeb”
Further after this process, once your twitter developer account is registered you will be redirected to Twitter Developer Dashboard, Here please carry forward and click on the Default APP setting where you can update your twitter developer app settinggs.
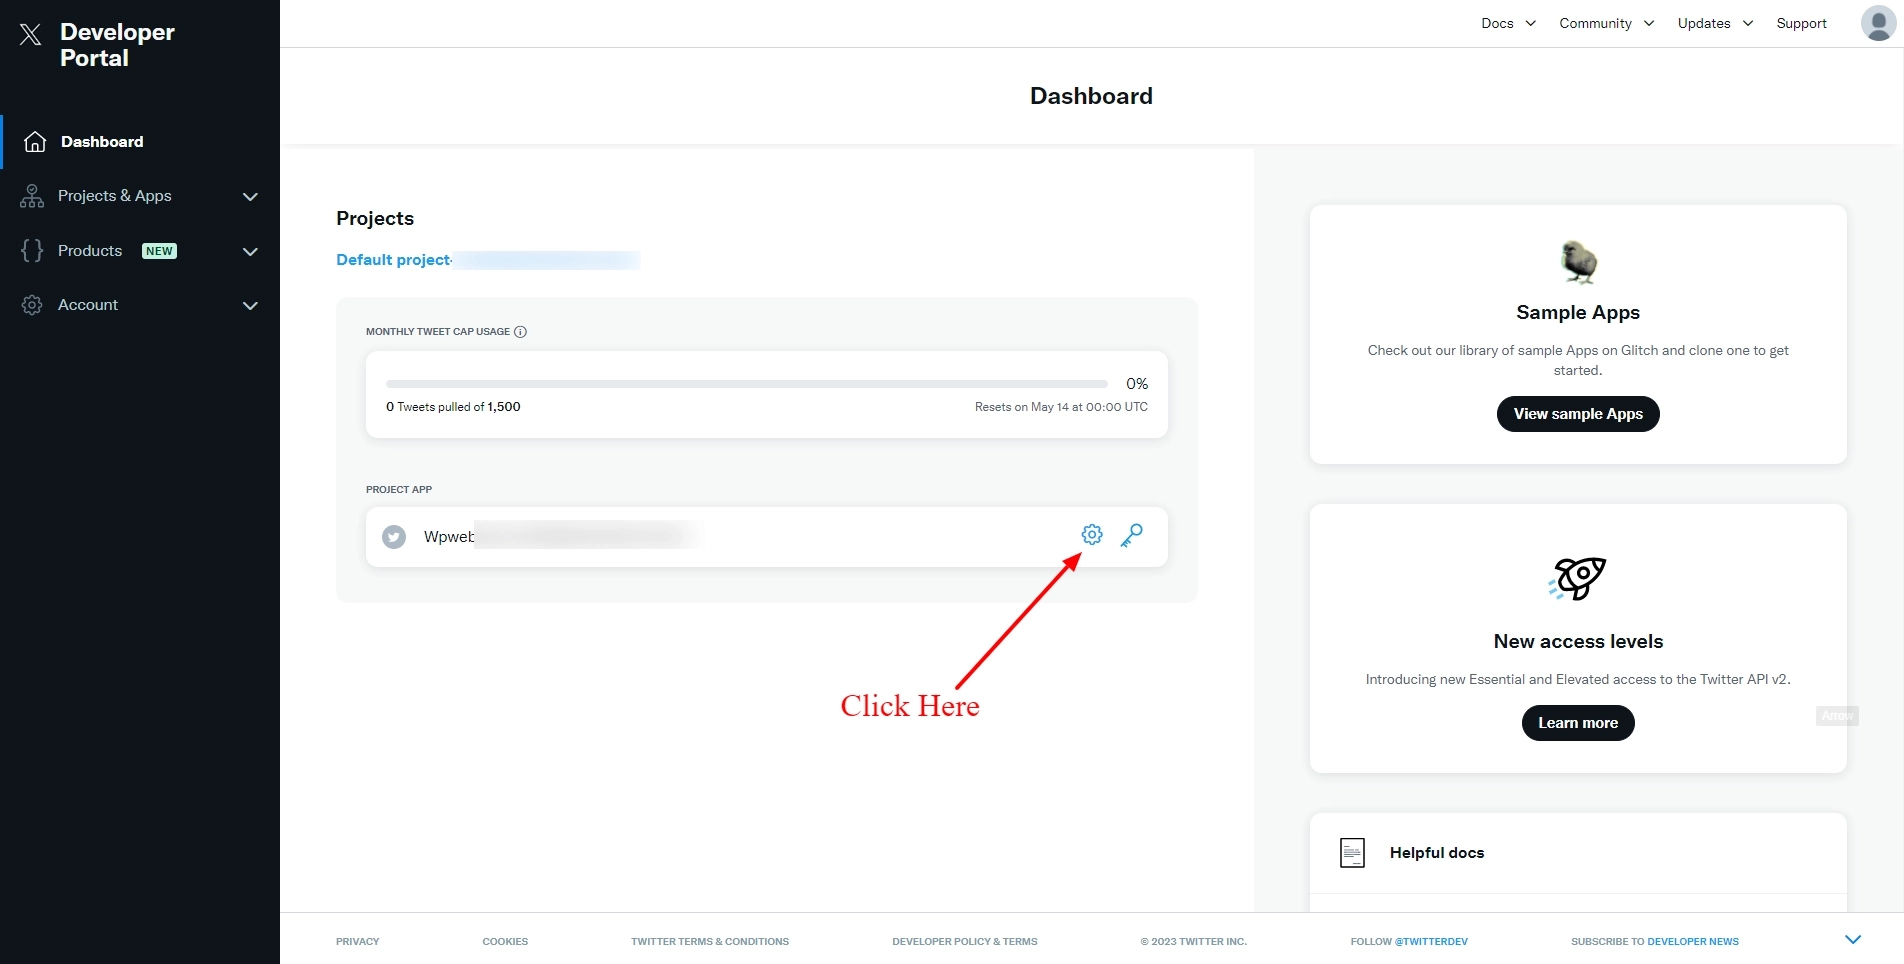
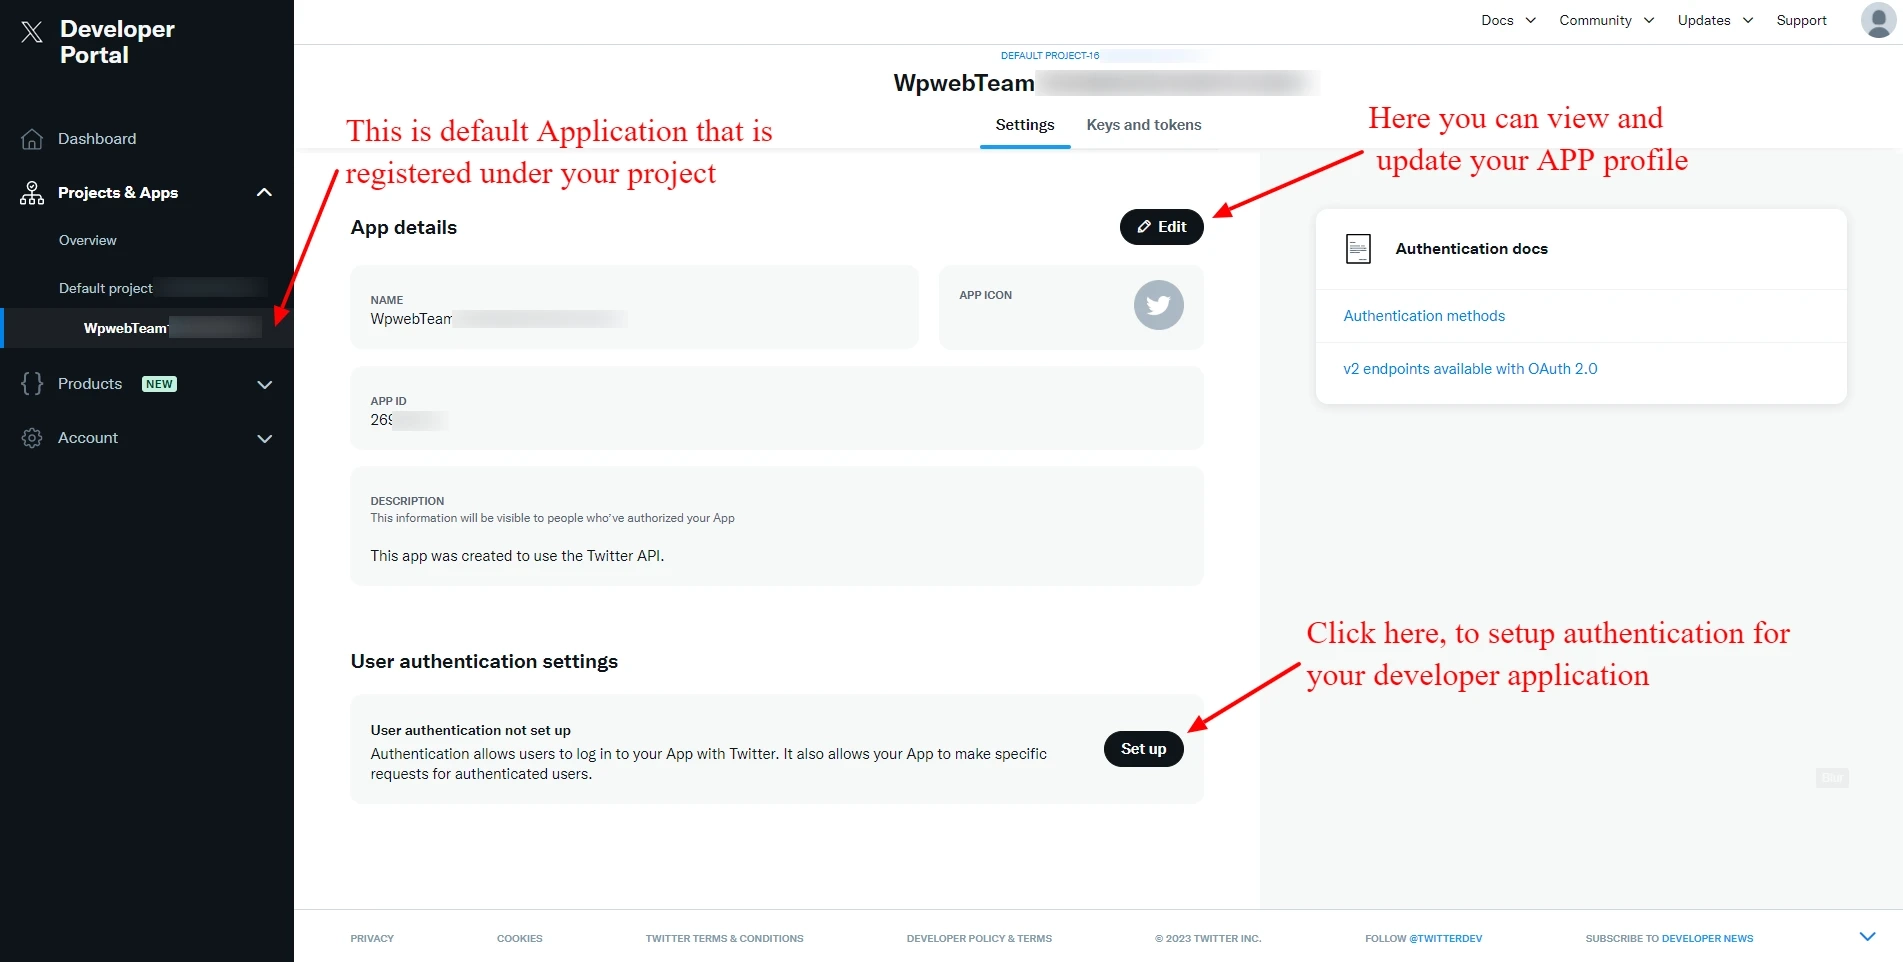
Following this setting will allow you to configure your Twitter developer applications Authentications settings, Click on Set up button as shown in below screenshot to proceed further with this configuration.
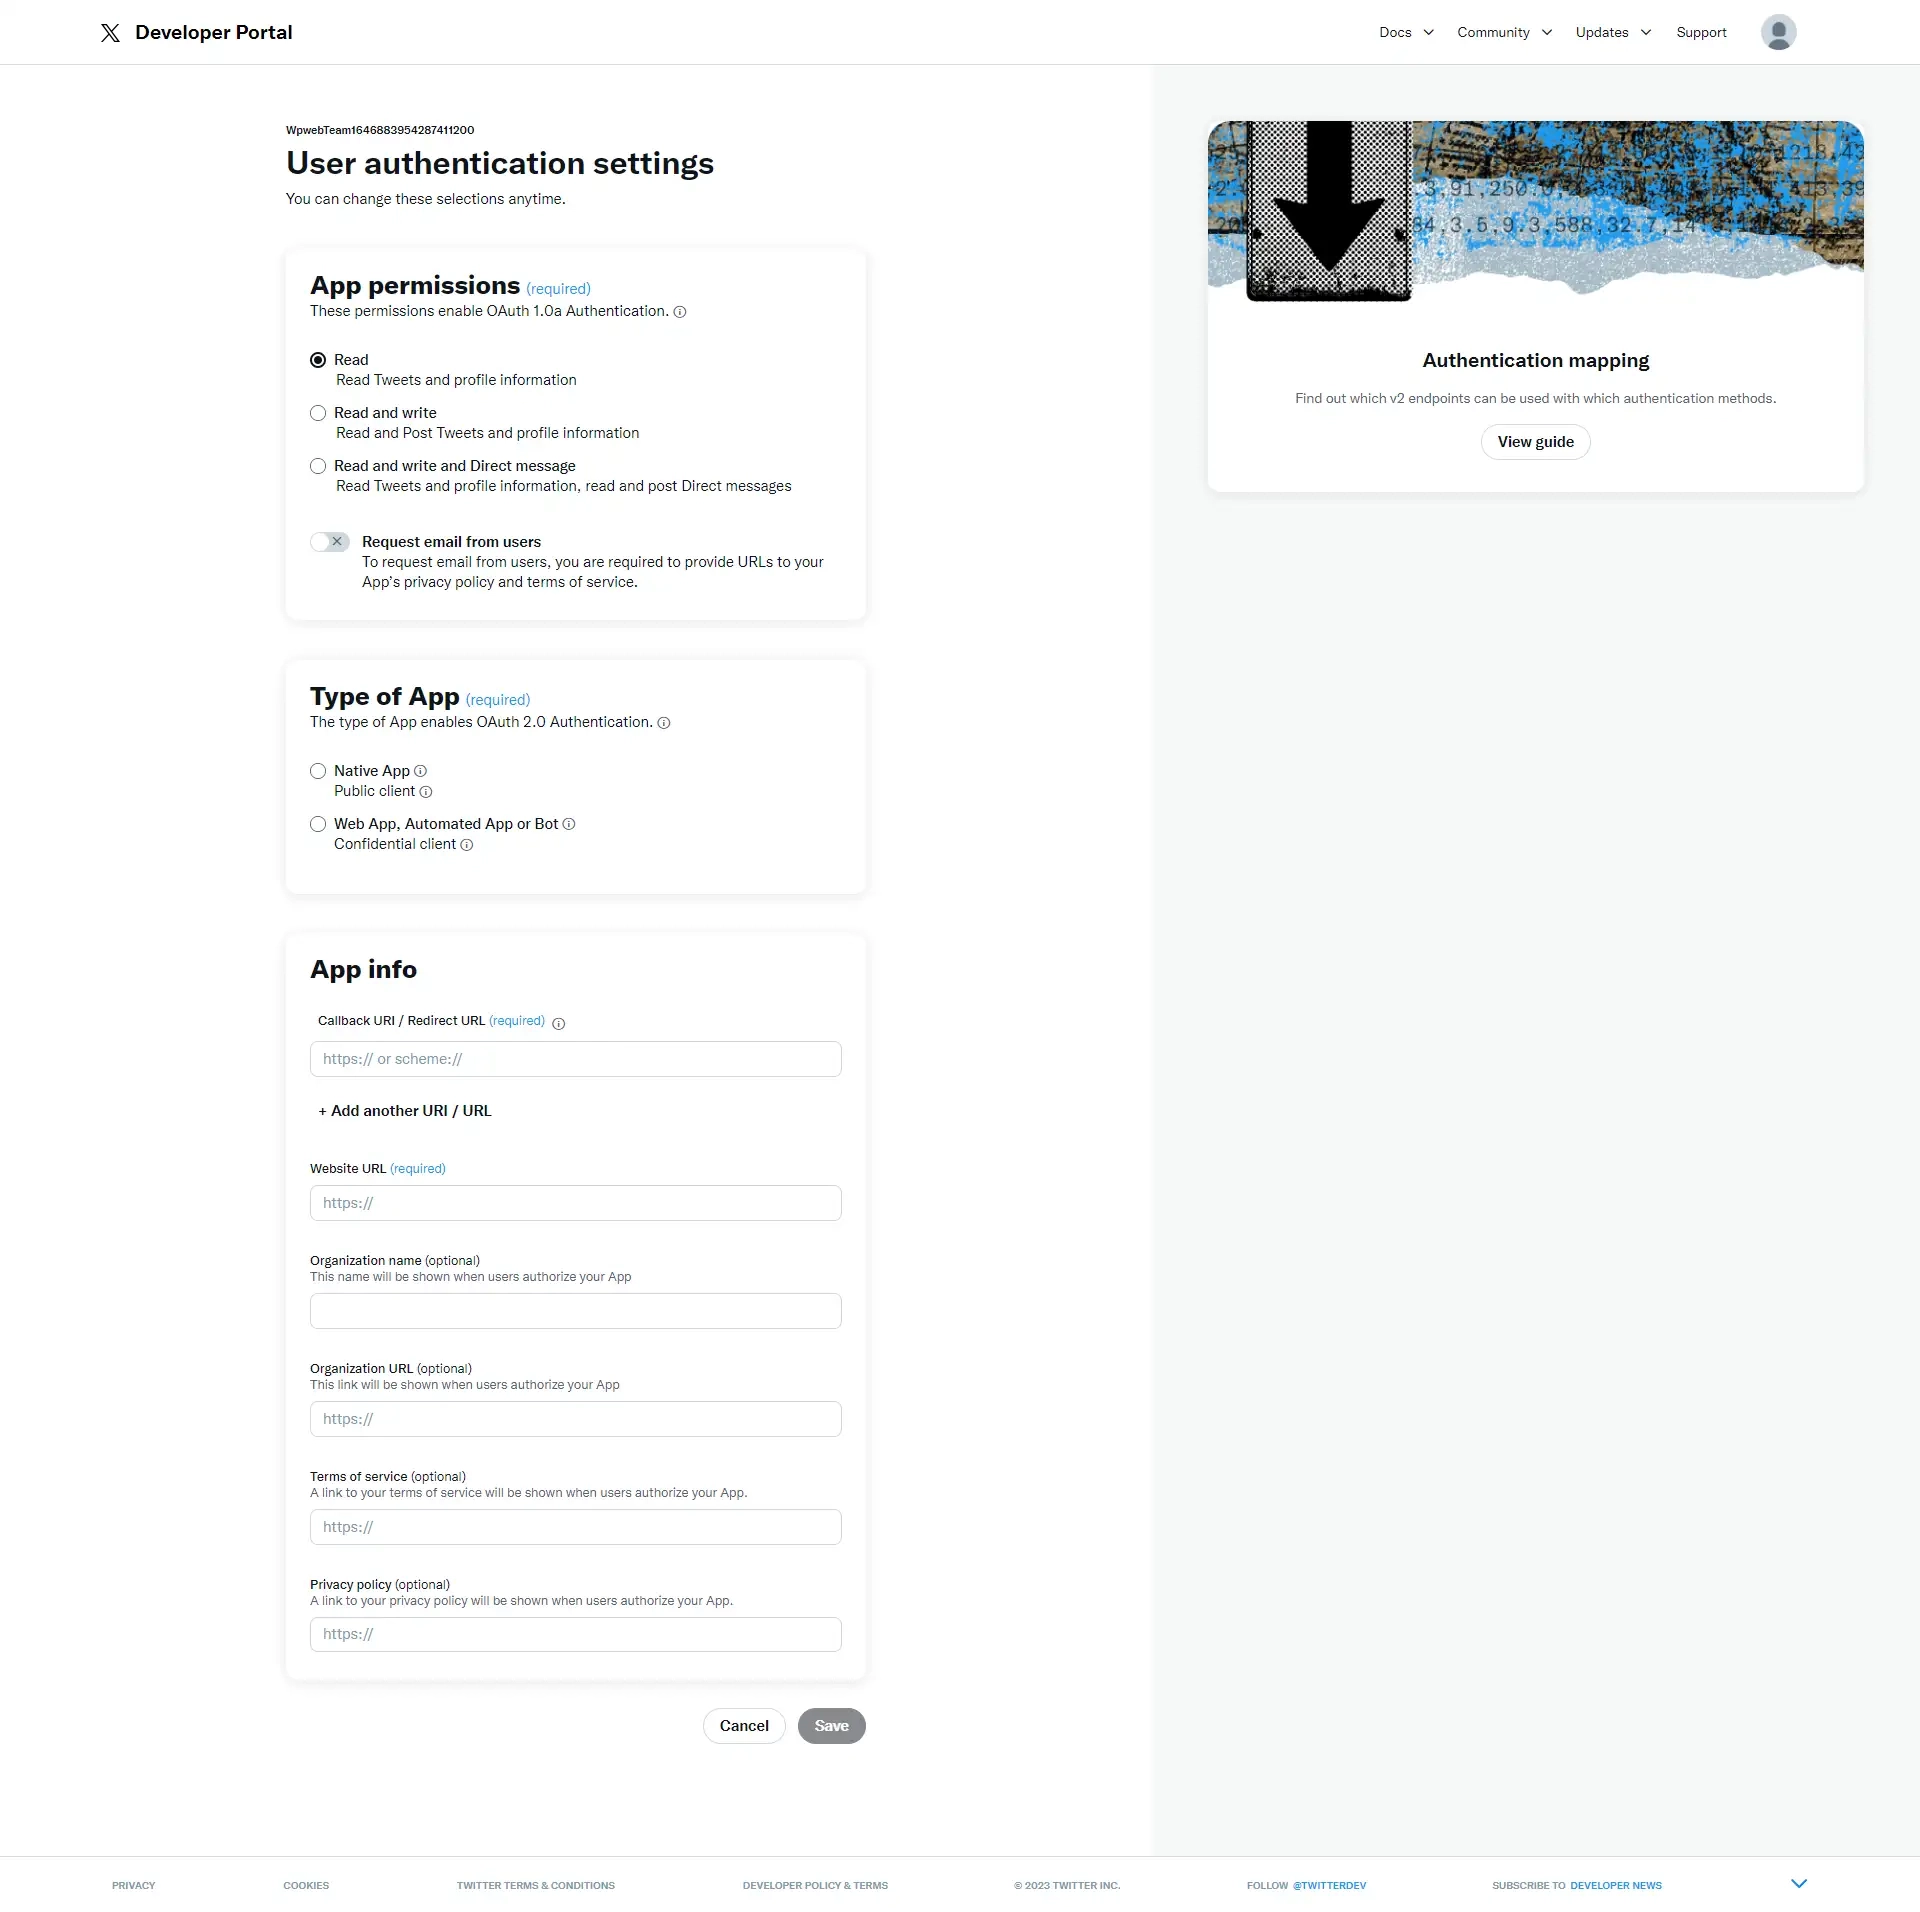
For the APP permissions from below screenshot, that setting is for permissions that you want to apply for this APP over your twitter accounts, for that while using This developer app for
-
Social Auto Poster :
You will need to select Read & Write permission as that will be required for posting with Twitter API to your profile.
- Social Login : For Social Login you can select the simple Read Permission with that you are required to Enable the Option for Request Email From User.
For Next section with Type of app you can select the Application type to Native in need to use your application with Social Auto Poster.
Going further with APP Info you are required to input callback URL and Website URL, here for Social Auto Poster, you can put your Website URL in both fields.
For Social Login You will need to insert the redirect URL on Callback URL Field.
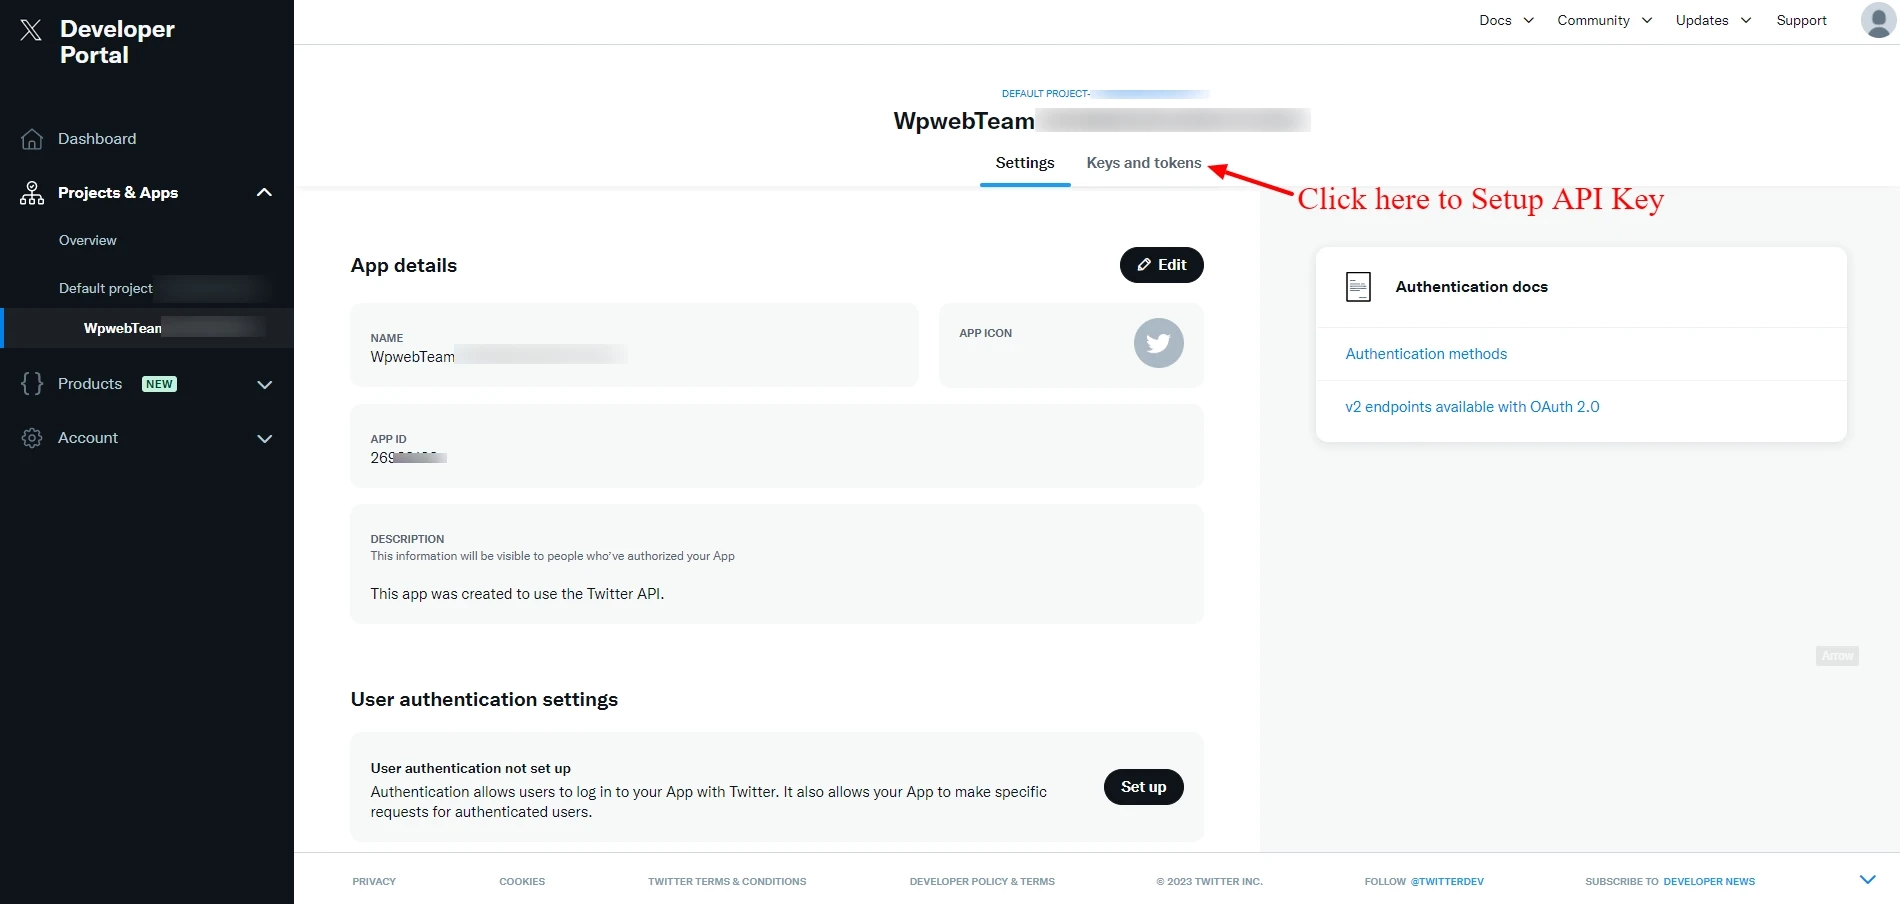
Now, to generate API Key for your APP, go back to APP Dashboard. You can click on Key and Tokens for setting up API Key and Secrets for your developer app.
This will take you to Key and Tokens section where you can create API Key, Bearer Token and Access Tokens. On this screen you will require
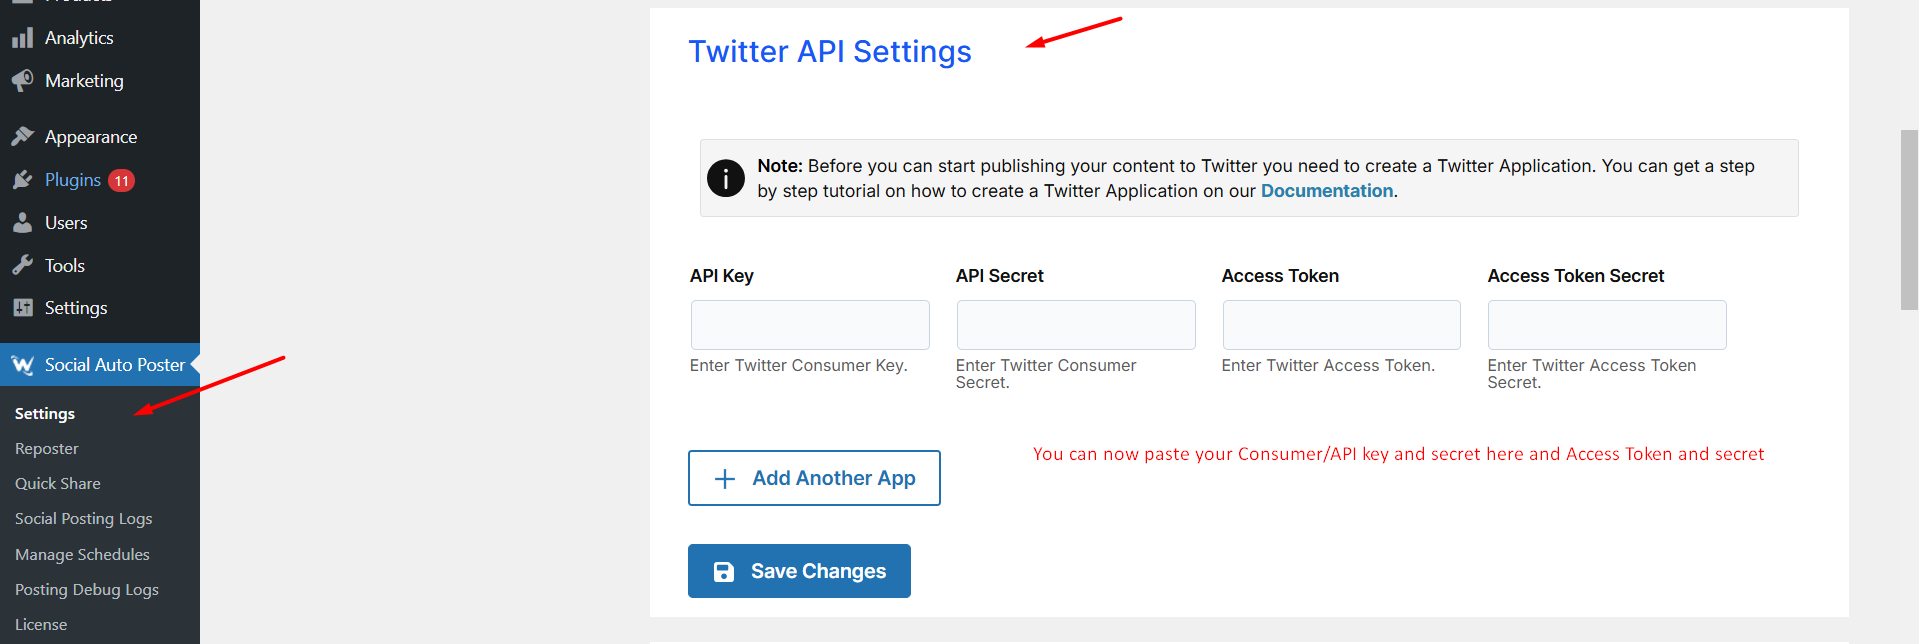
- Social Auto Poster : API Key and Secret + Access Tokens and Secret
- Social Login : API Key and Secret
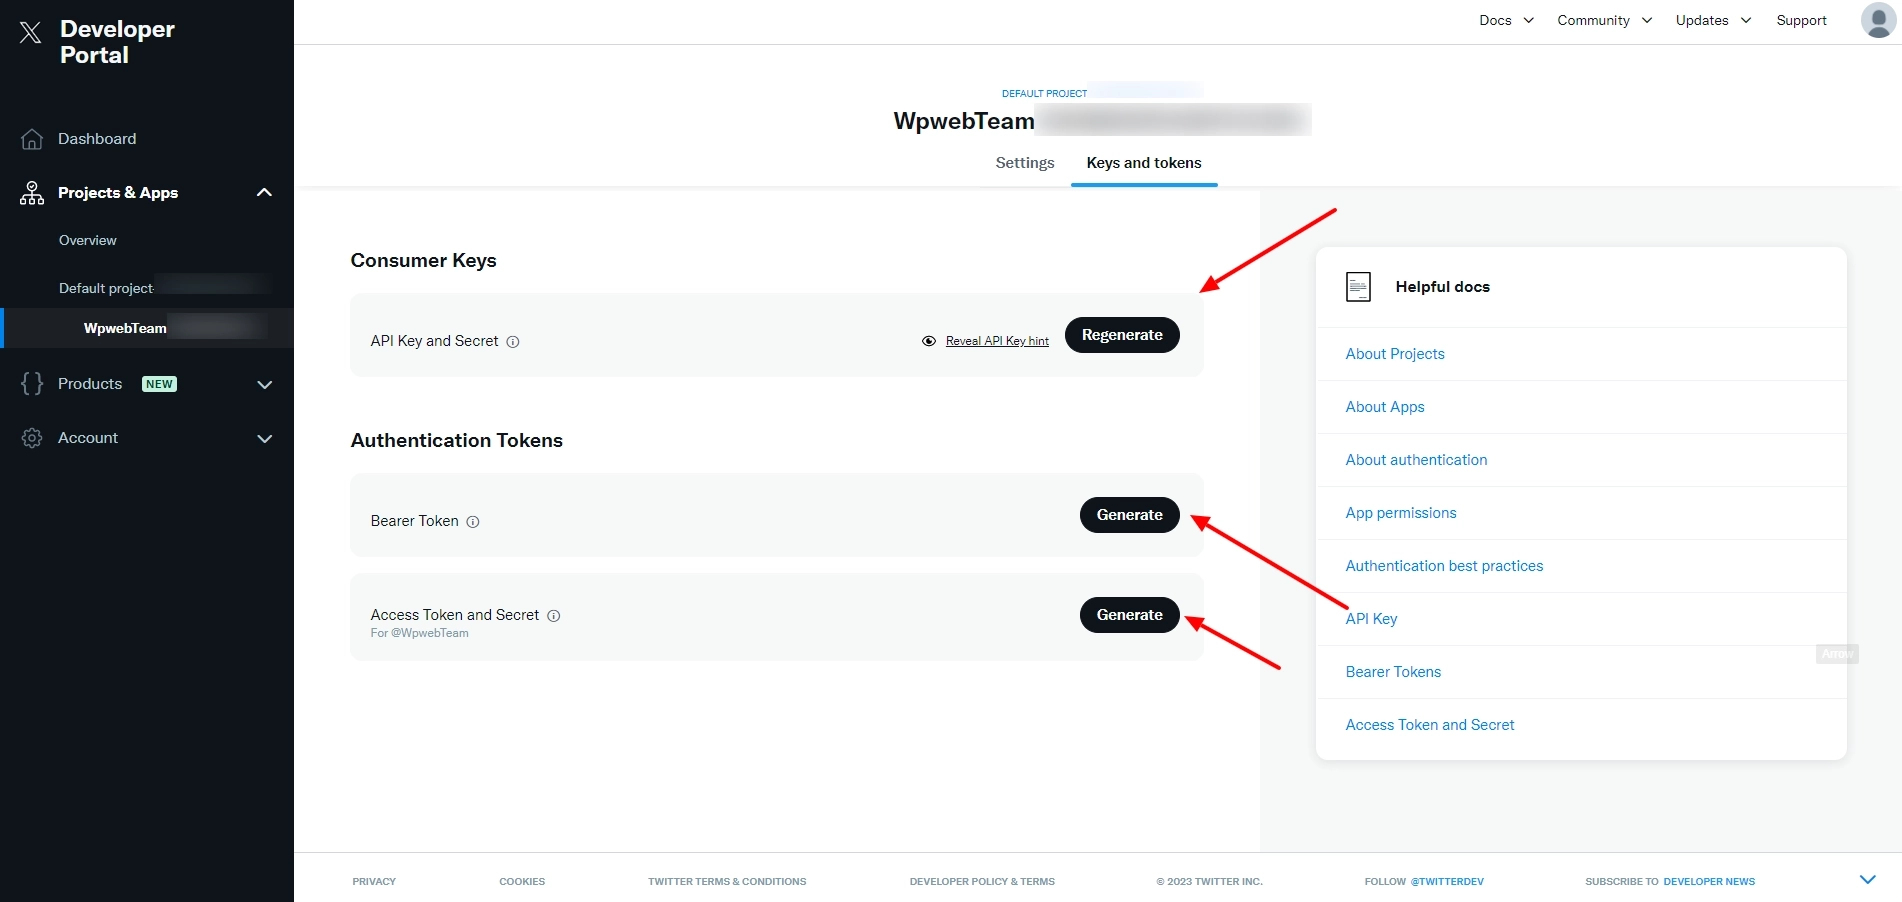
Once, you have generated and saved the Key and Secrets do insert them on Social Auto Poster / Social Login in appropriate fields.