“Social Network Integrations” Documentation by “WPWeb”
To get a YouTube Application detail, go and visit: https://console.developers.google.com/project.
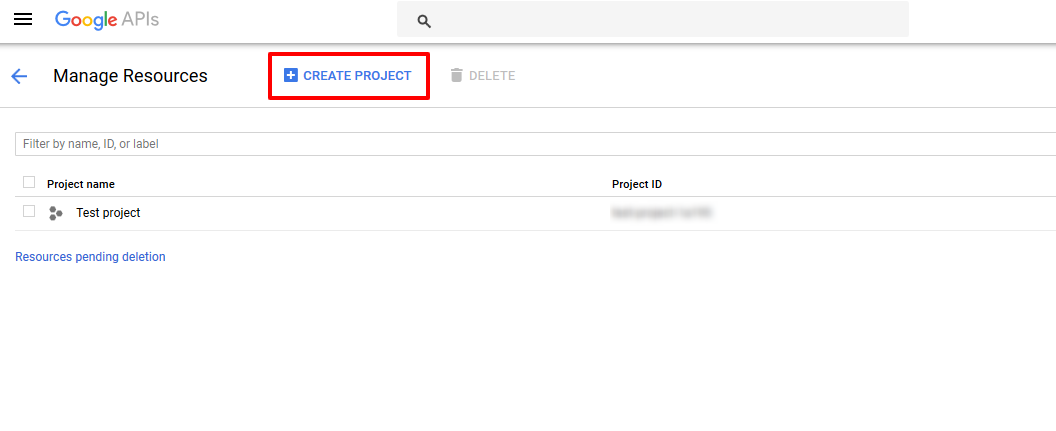
You need to be logged in to your YouTube account to be able to get YouTube Application Id and channel secret. So first, login to your YouTube account and then follow the link above to get to their developer page. This should look similar to the one shown in the image below. Click on ” Create Project” button.
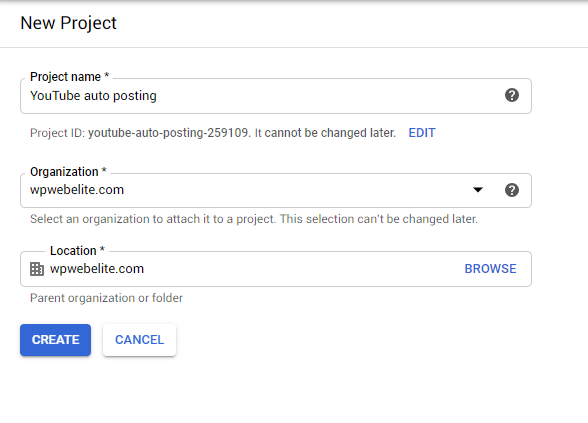
After you click ” Create Project” the project screen opens, Enter Project Name and Project ID will be auto generated. After that Click on the “Create” button to create Project. The page will look similar to image shown below.
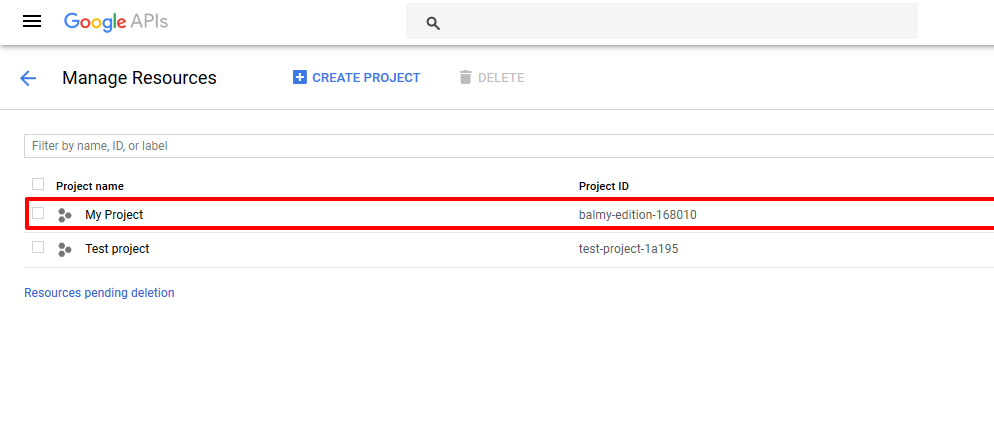
After creating the project you will be redirect to the project listing page as shown in the image below: Click on the Project name.
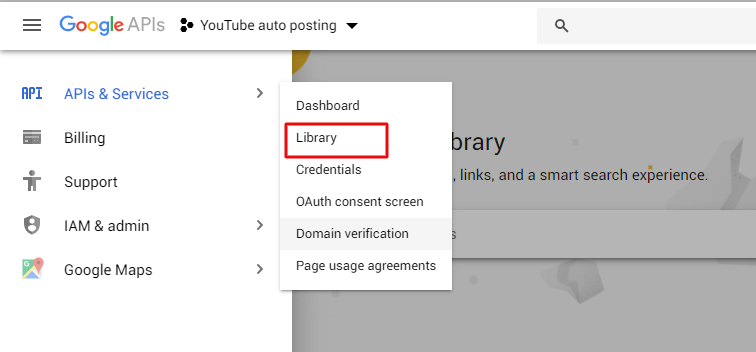
Now, you have to enable YouTube data API V3. Click on APIs & Services and there you will find Library. Click on Library.
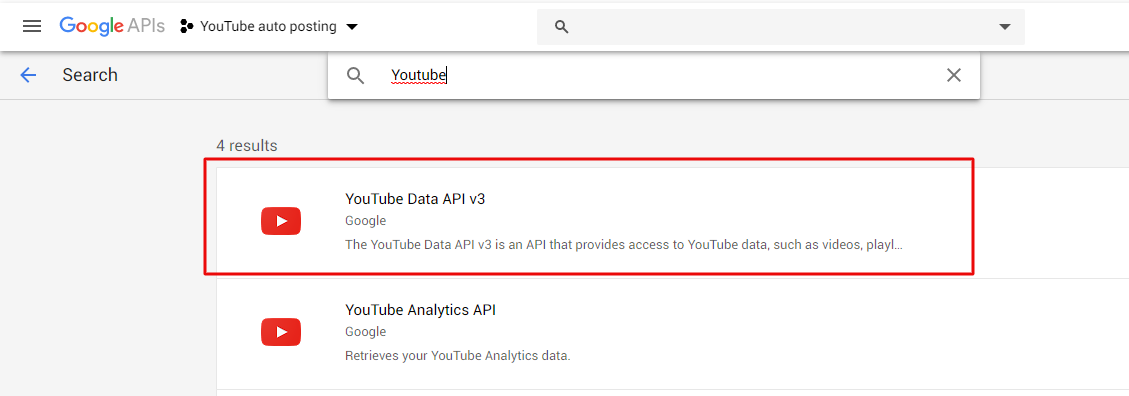
After you click on library the page similar to image will open in the search bar enter YouTube and in suggestion box you will find YouTube Data API v3. Click on it.
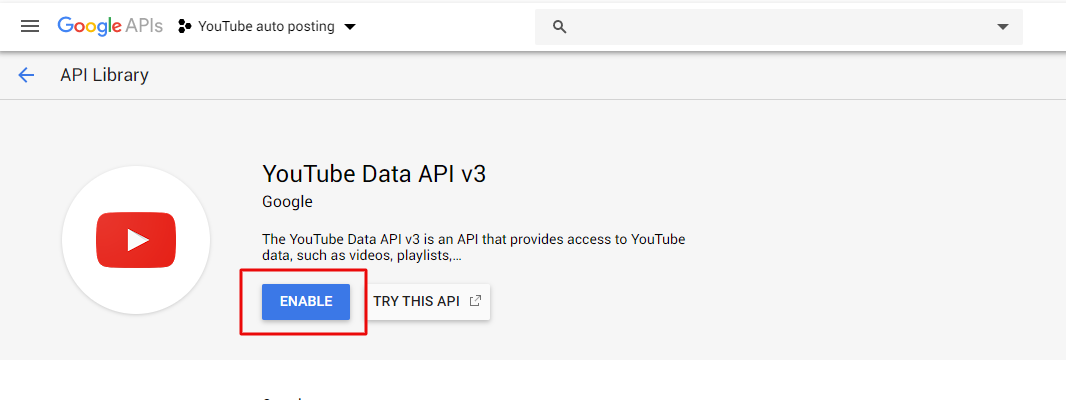
As you click on YouTube Data API v3 the screen similar to the image shown below is shown. There click on “Enable” button.
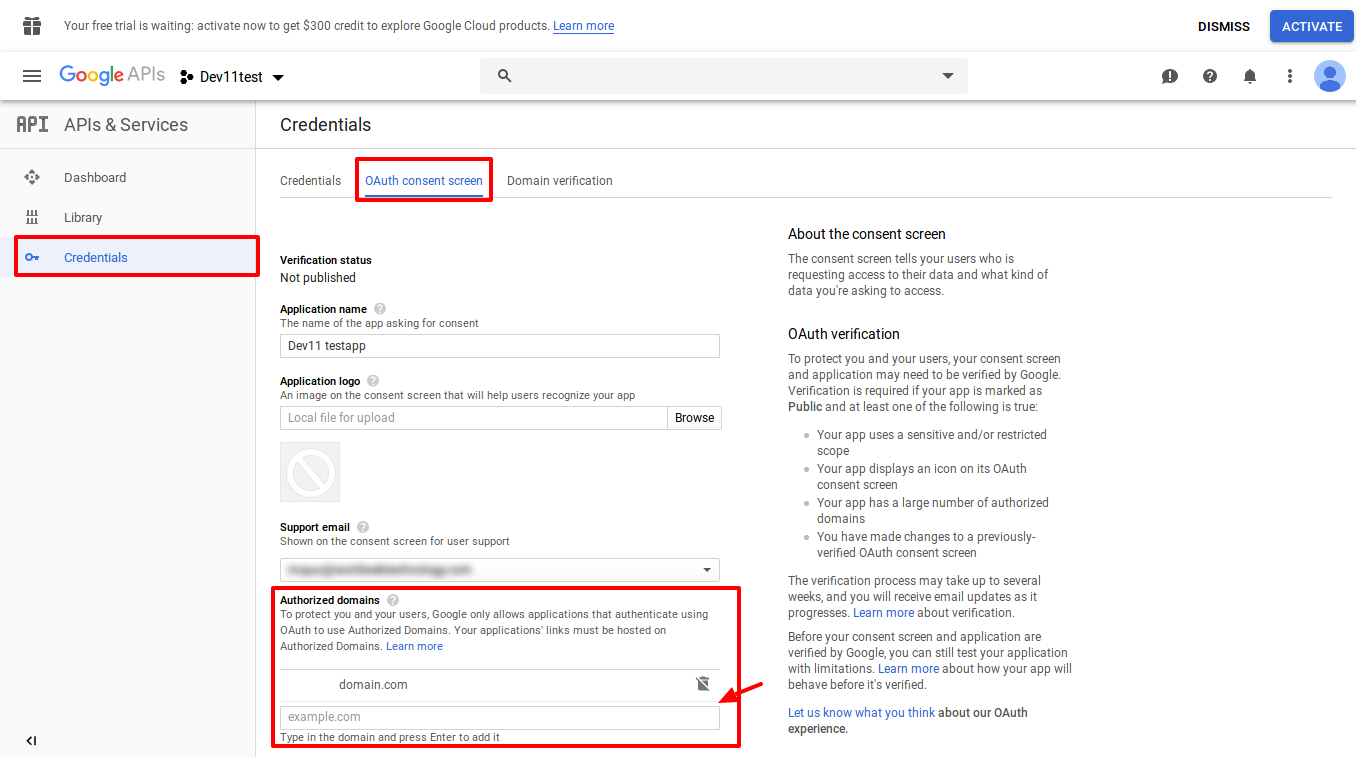
Now, click on menu “Credentials” and select the “OAuth consent screen” tab. After you click on ” OAuth consent screen” you will be asked to Choose the user type select the user type and click on “Create” button. Then the screen open which will be similar to image shown below .Fill the required data and save.
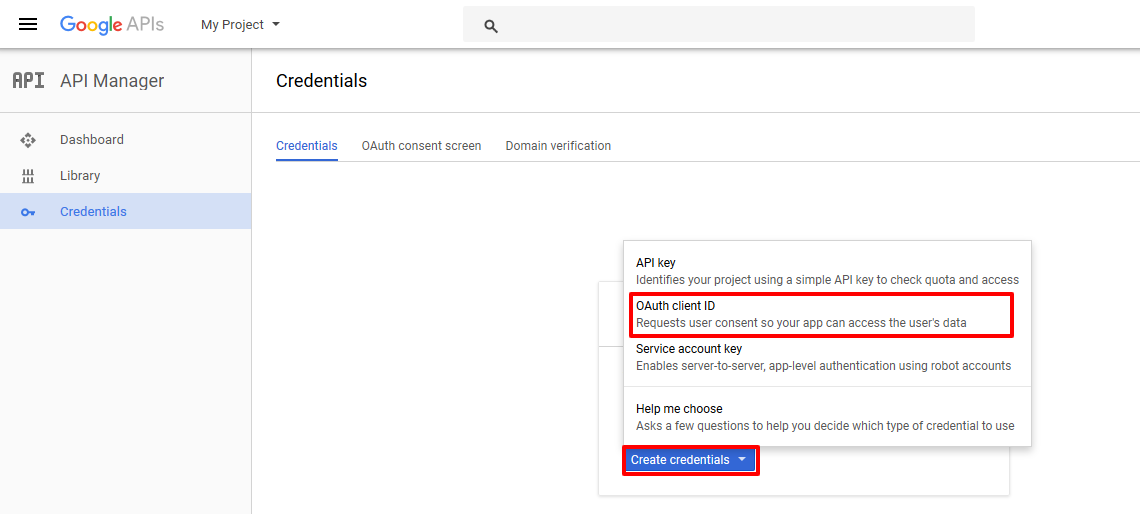
After saving the “OAuth consent screen”, you will be redirect to the scope click on Save and continue then test users screen where you can add test users. After adding test user you can click on save and continue. You will be lead to summary page on the side menu bar click on Credential tab. Now click on Create credential > OAuth client ID link as shown in the image below:
Now enter the application type. Based on the Application type you will be asked to fill the data. Enter the data and click on “Create” button. After that you will be redirected to screen where in Pop up you will find the Client Id and Secret Key. The screen will look similar to image shown below.
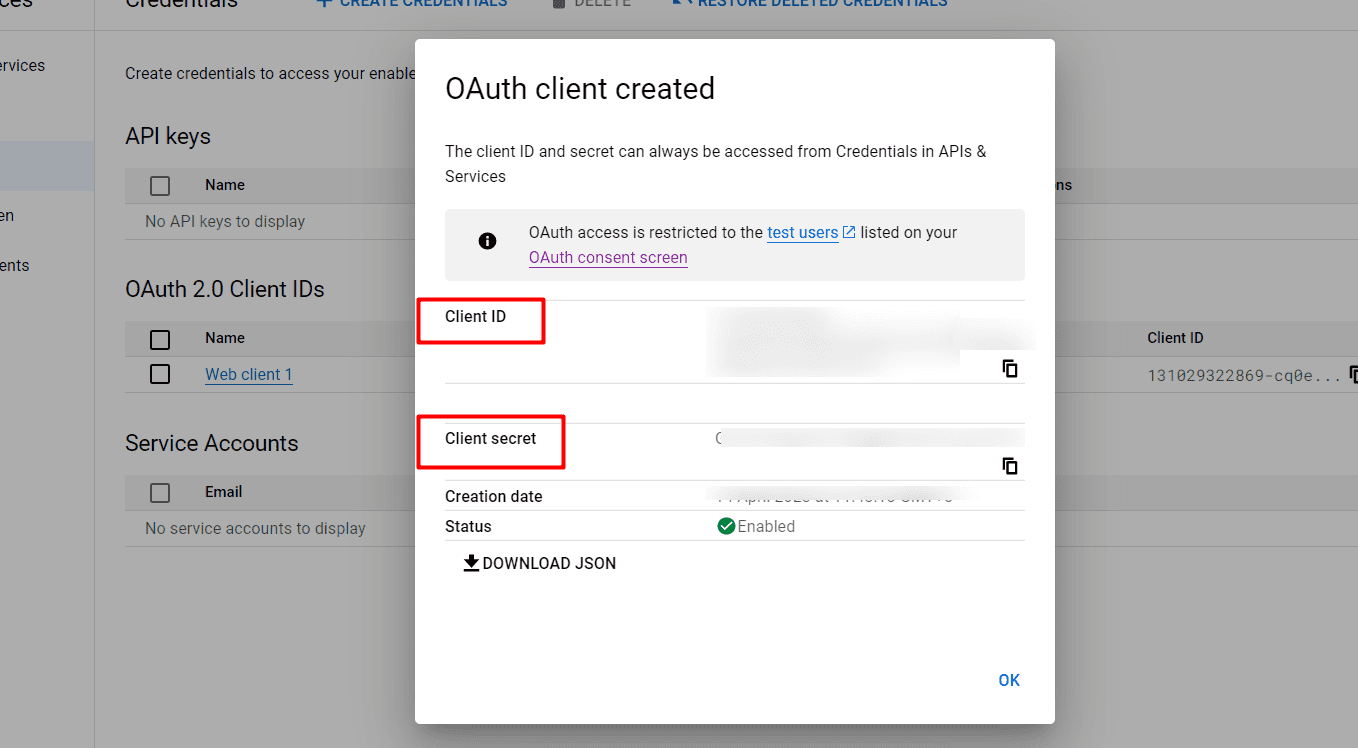
Now, Copy the Client Id and client secret to the YouTube settings within the Plugin settings page. Once you save the settings, it will display valid OAuth redirect URI copy it


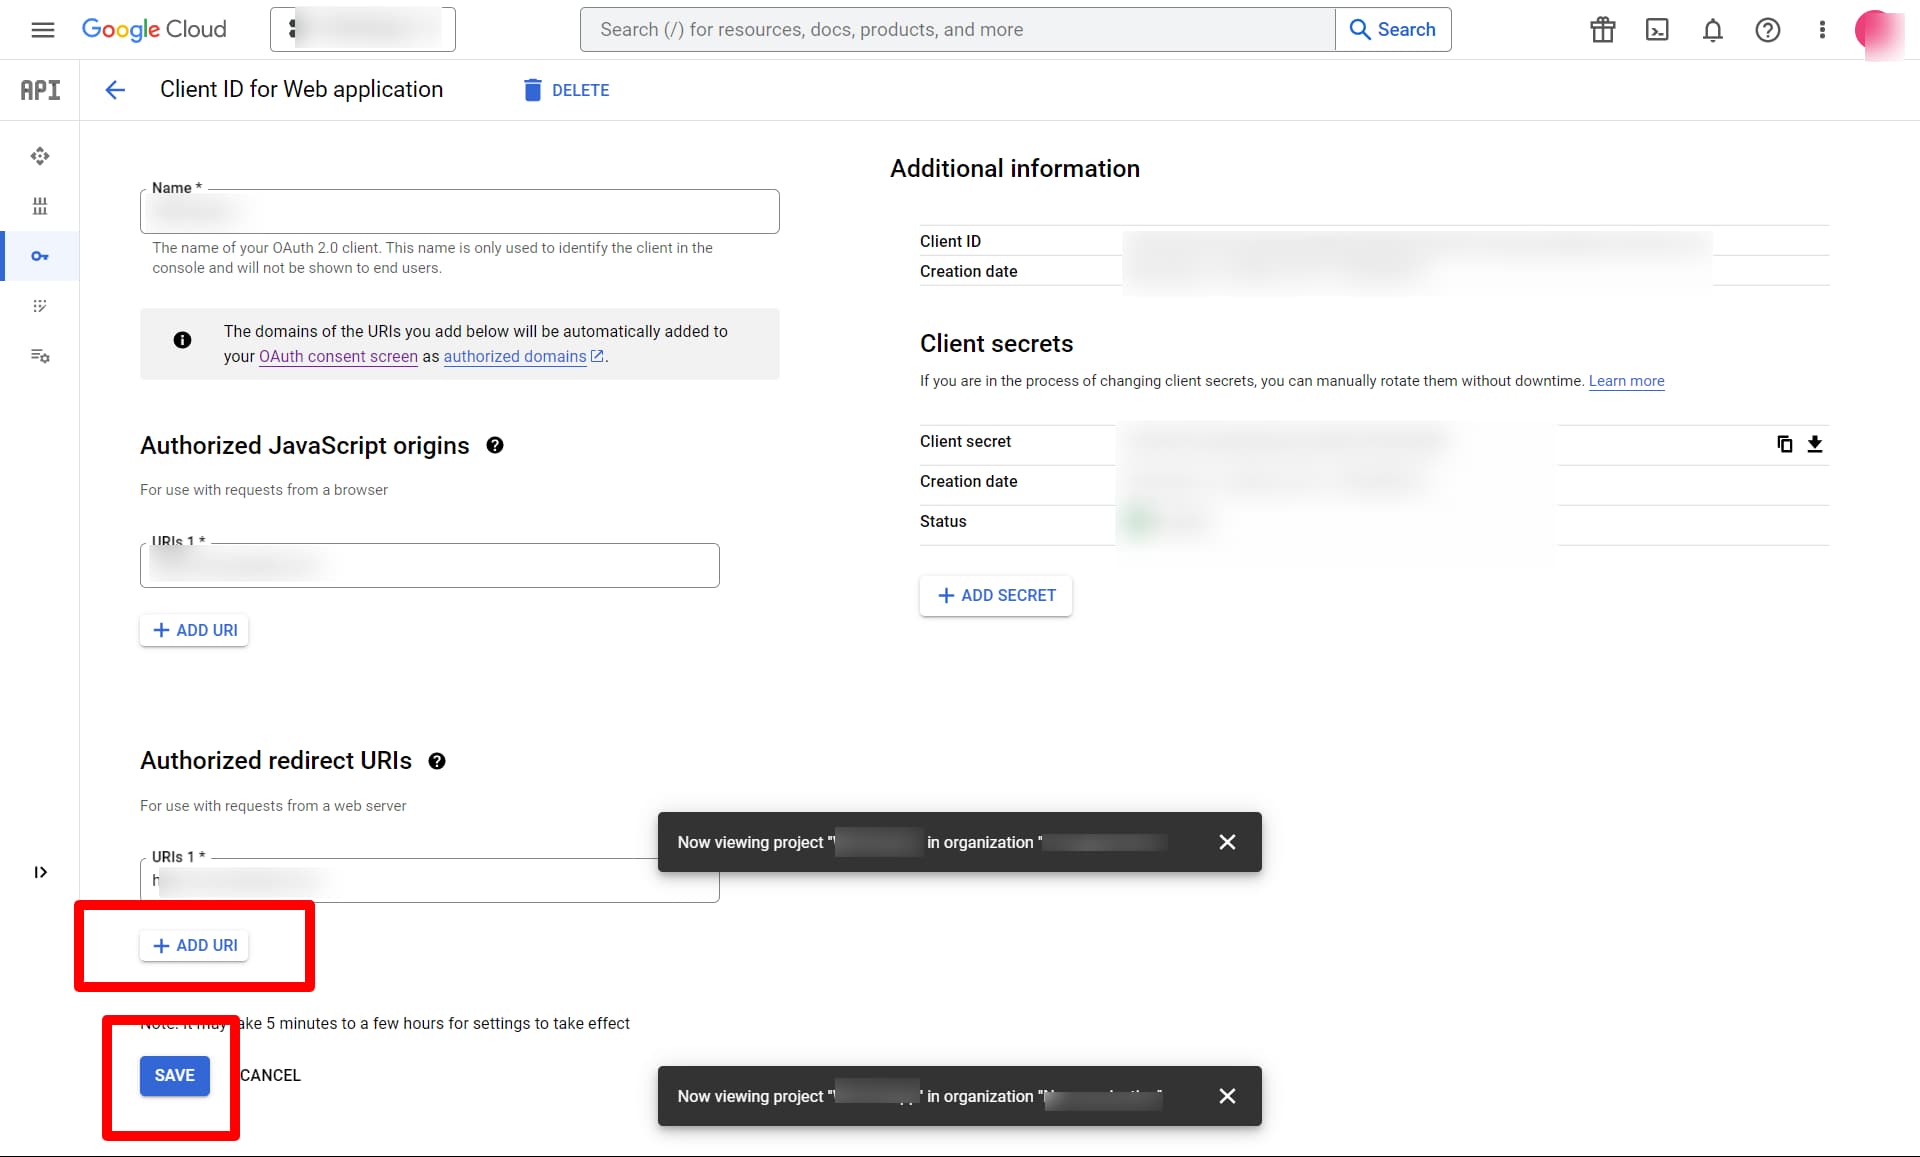
Now go to developer dashboard > credentials (its in side menu bar) > select app from dropdown next to google cloud logo. Click on project name. A screen similar to image shown below will be displayed. Enter the redirect URL and saver then go to plugin and click on extended permission.
After entering redirect URI, click on the “Grant Extended Permission” button within the plugin’s settings page and Save.
