“Social Network Integrations” Documentation by “WPWeb”
To create a BufferApp App, go and visit: http://bufferapp.com/developers/apps/create.
You need to be logged in to your BufferApp account to be able to access their developer page. So first, login to your BufferApp account and then follow the link above to get to their developer page. This should look similar to the one shown in the image below:
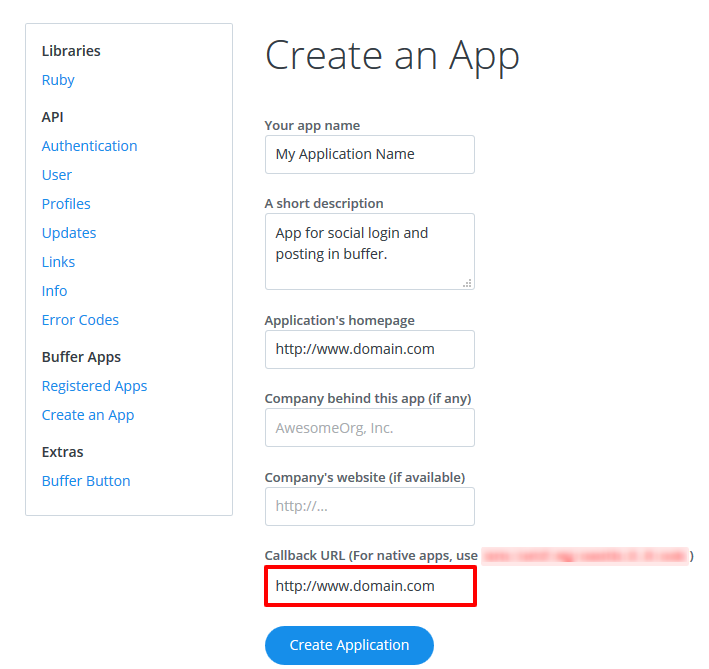
When you enter the URL of your website in to the “Website” field, make sure that it does match the URL of your website 100%. If these entries do not completely match the URL of your website, the application won’t work and it will show an error message whe you try to connect to the App.
After Creation of BufferApp App, You will redirect to registered application list. See Image Below:
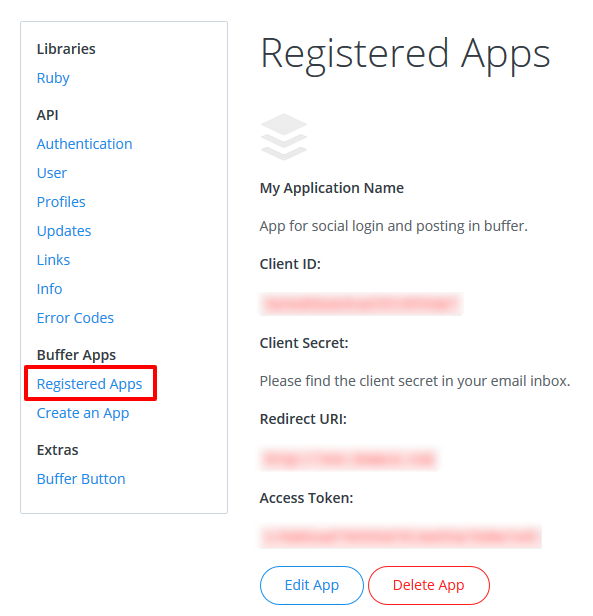
Here you can get Client Id and Client Secret.
Now, Copy the Client Id and Client Secret in to the BufferApp App settings within the Plugin settings page. See image below:

After you entered the BufferApp Client Id and Client Secret, click on the “Save Changes” button within the plugin’s settings page.