WPWeb Social Network Integration Documentation
To get your LINE Channel details, visit the LINE Developers Console.
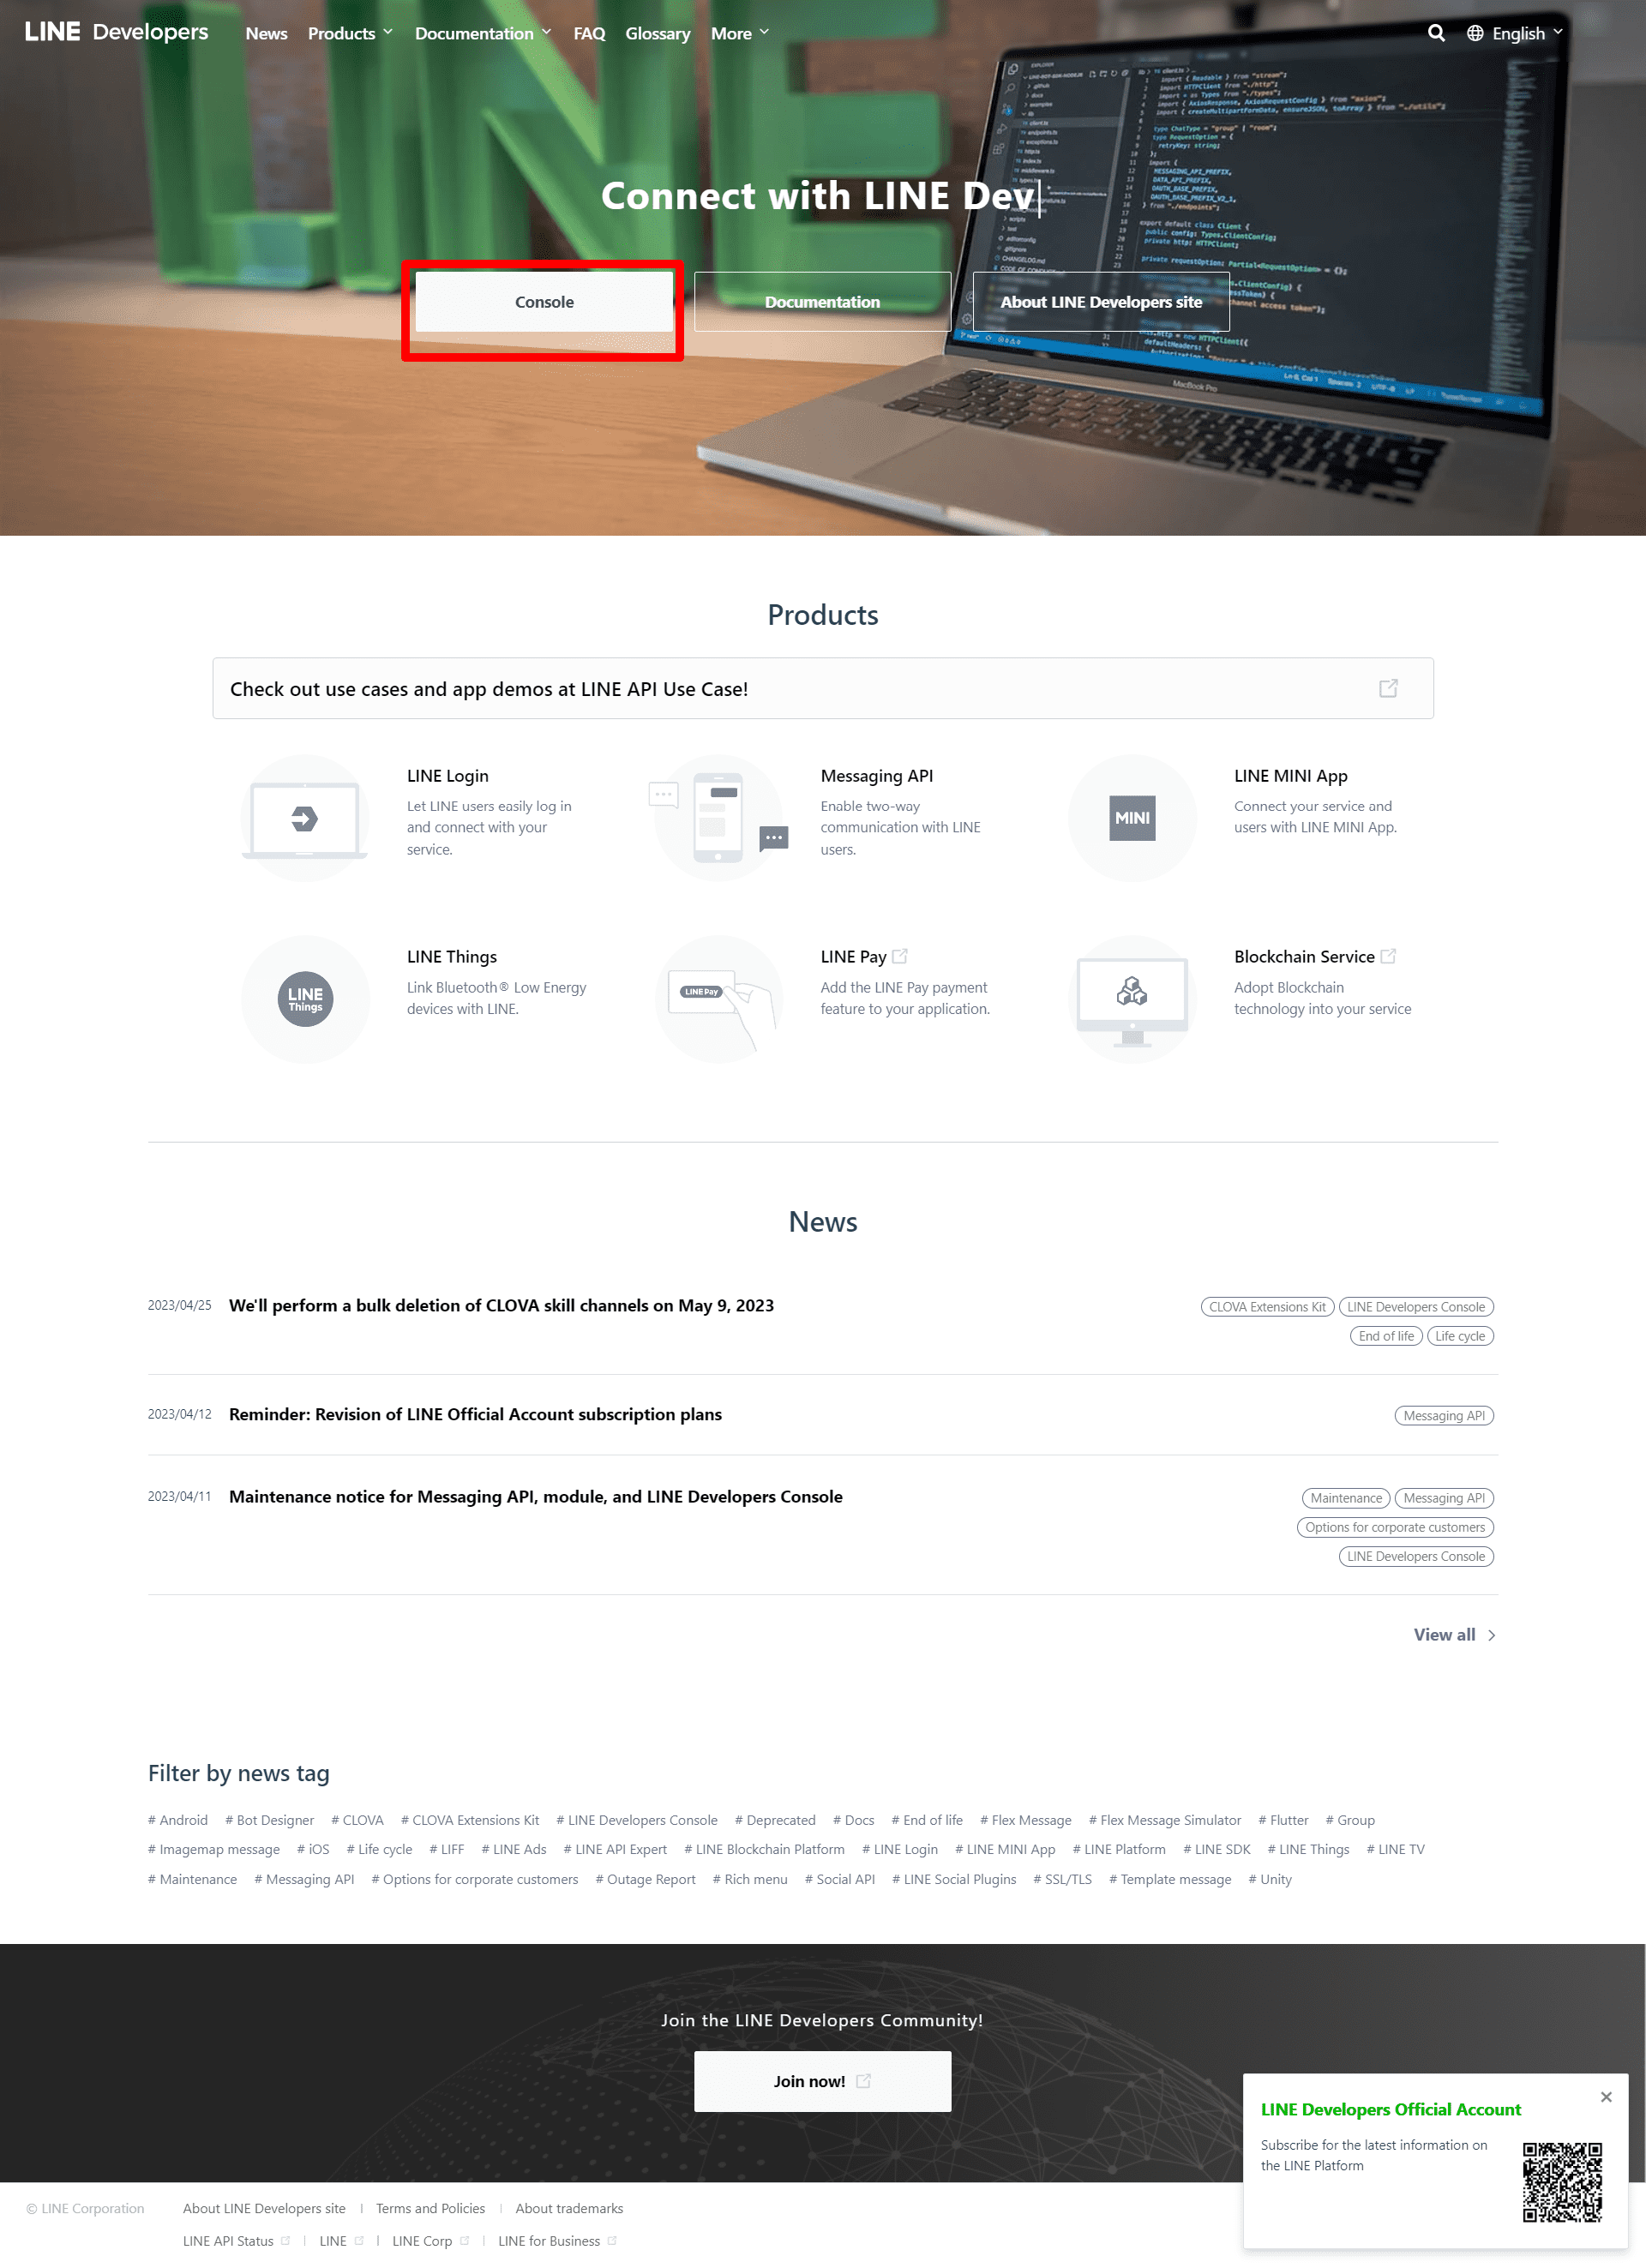
You must be logged in to your LINE account to access your Channel ID and Channel Secret. First, log in to your LINE account and open the link above to access the developer console. Then, click Console.
Once logged in, you will see a screen similar to the one shown below.
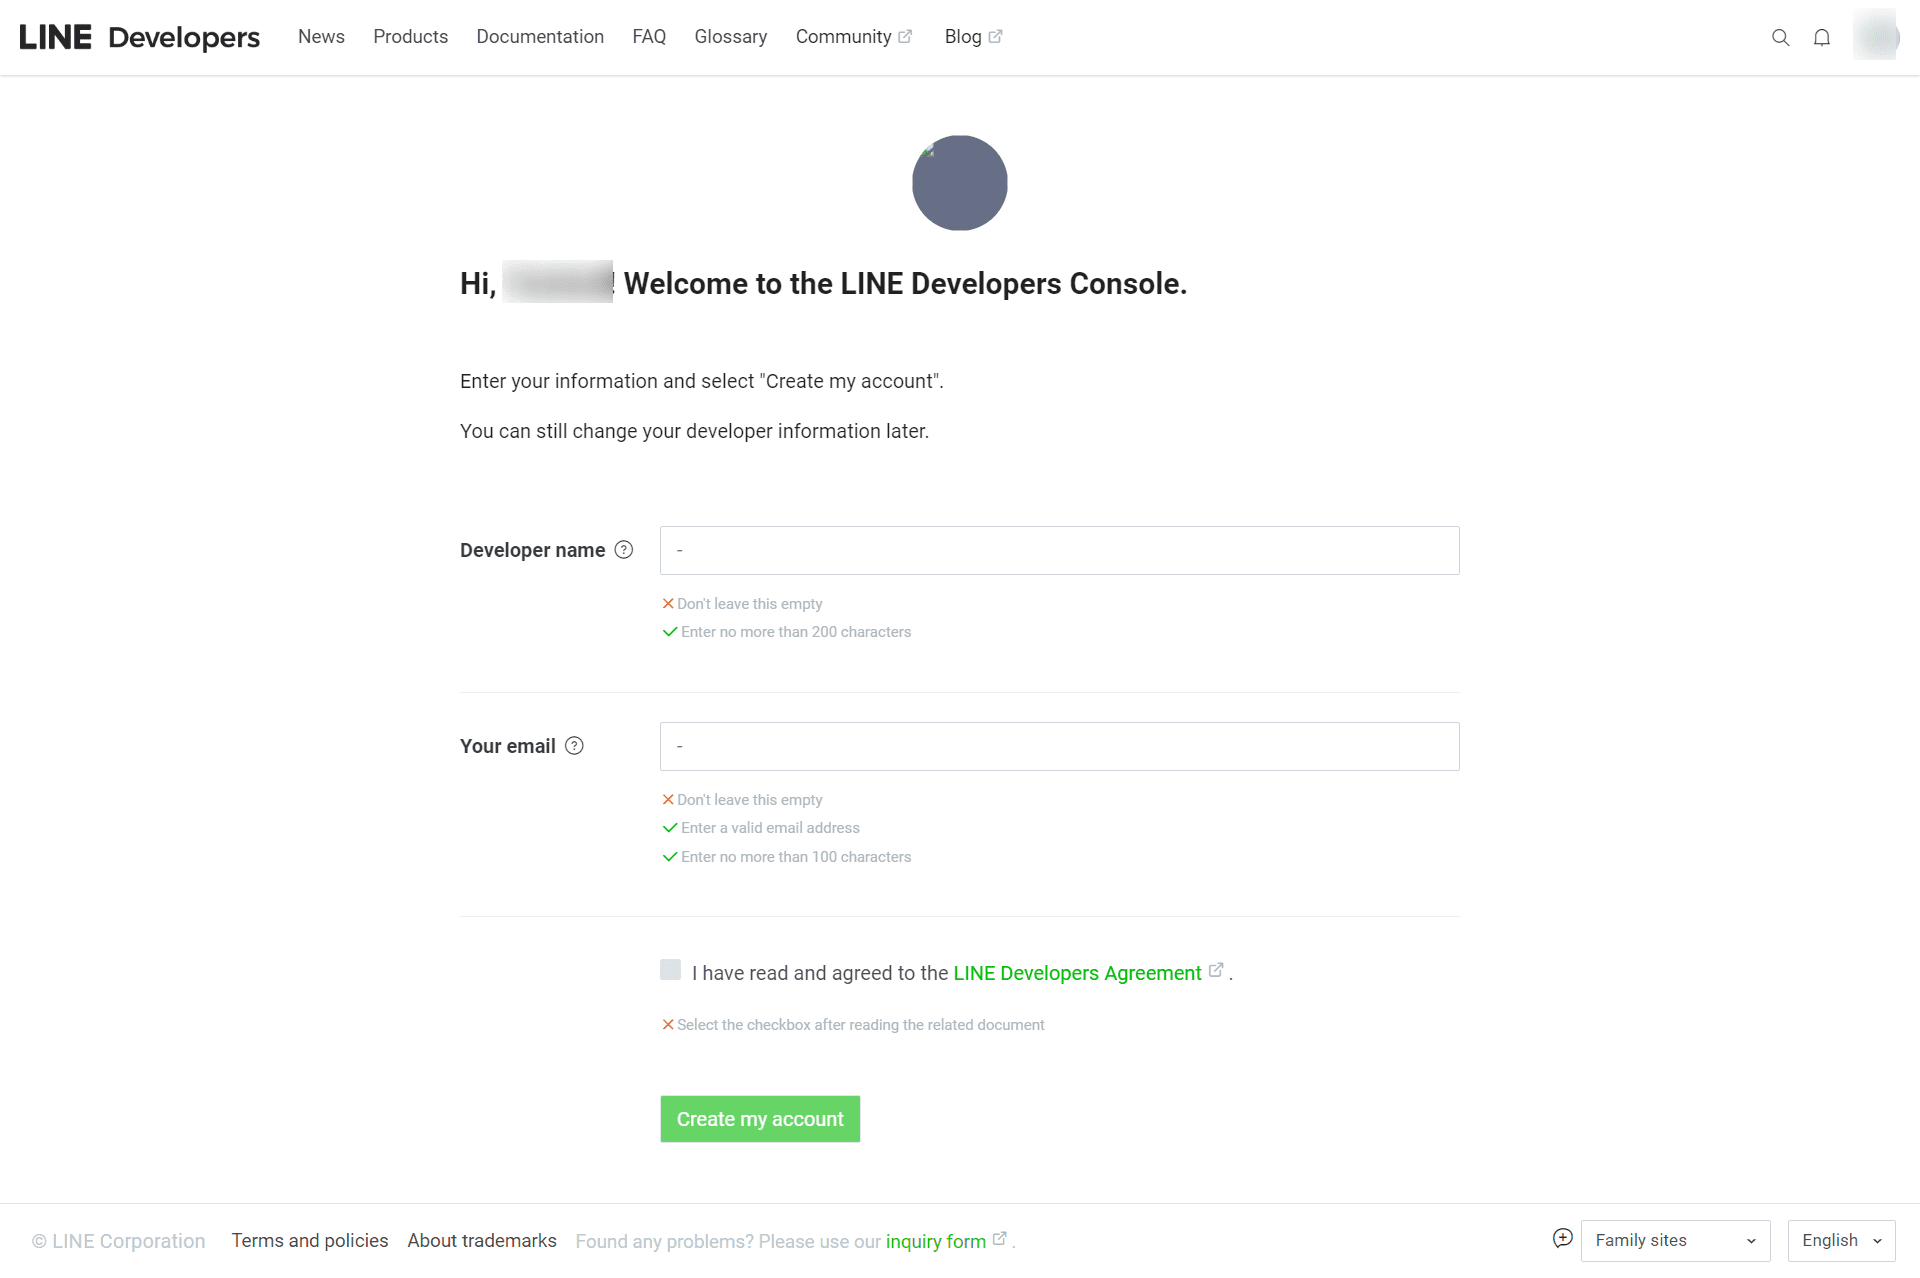
After clicking Console, fill in the required information and click Create My Account. The screen will look similar to the image shown below:
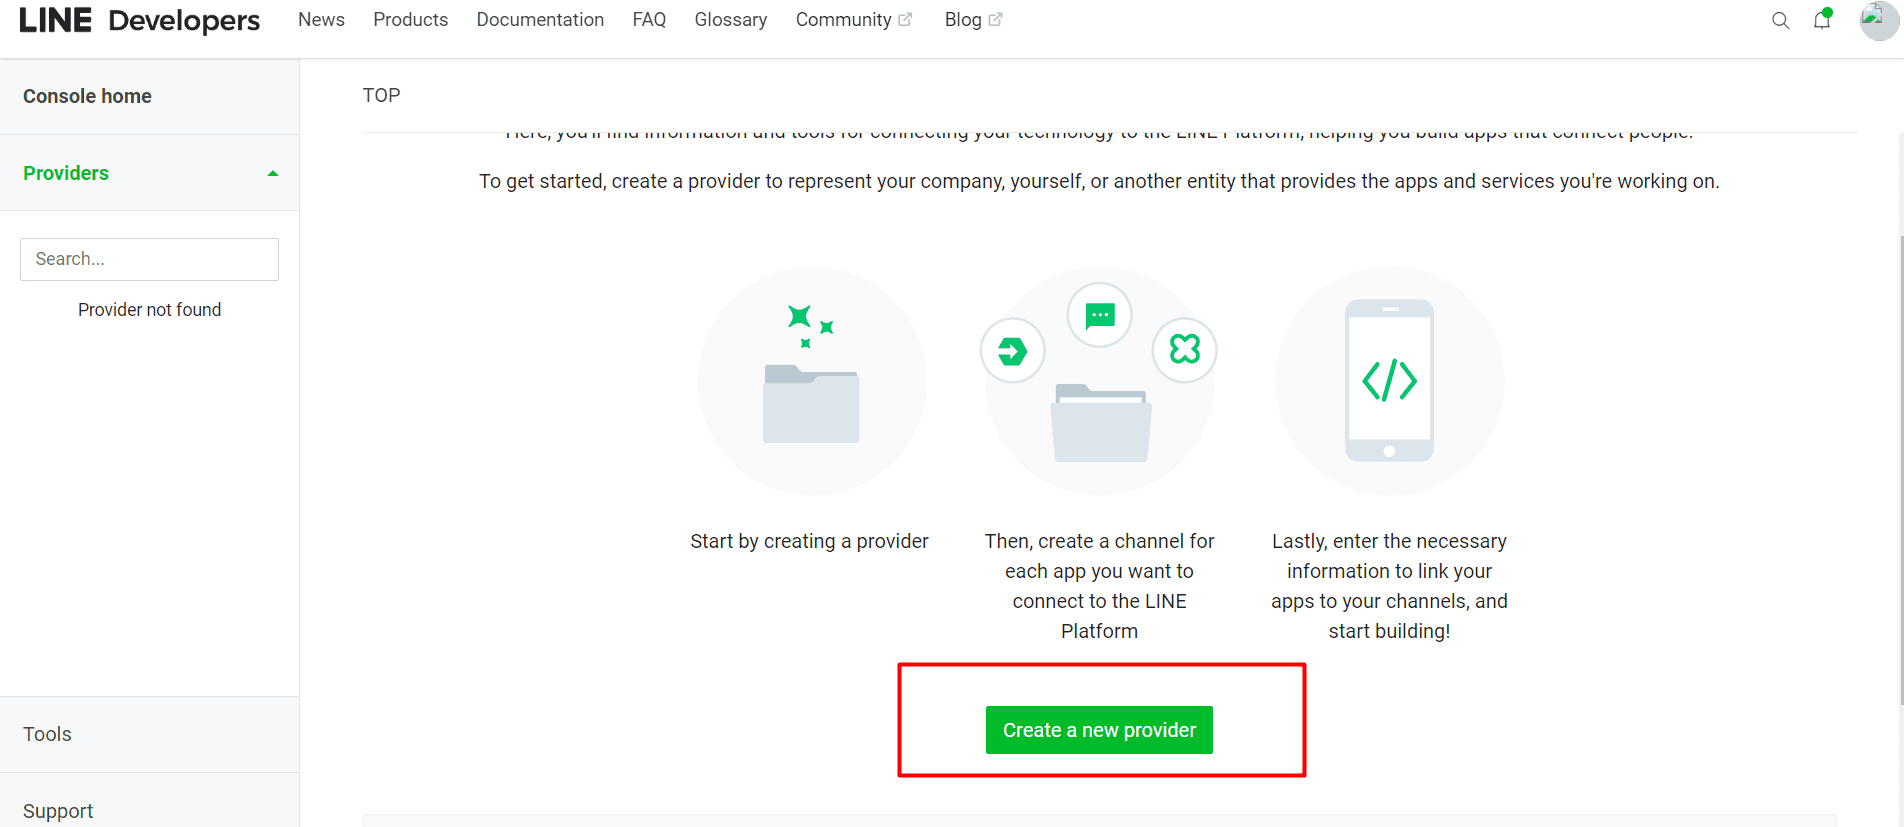
After clicking Create My Account, you will be redirected to a page similar to the one shown in the image below. To start creating your app, click Create New Provider.
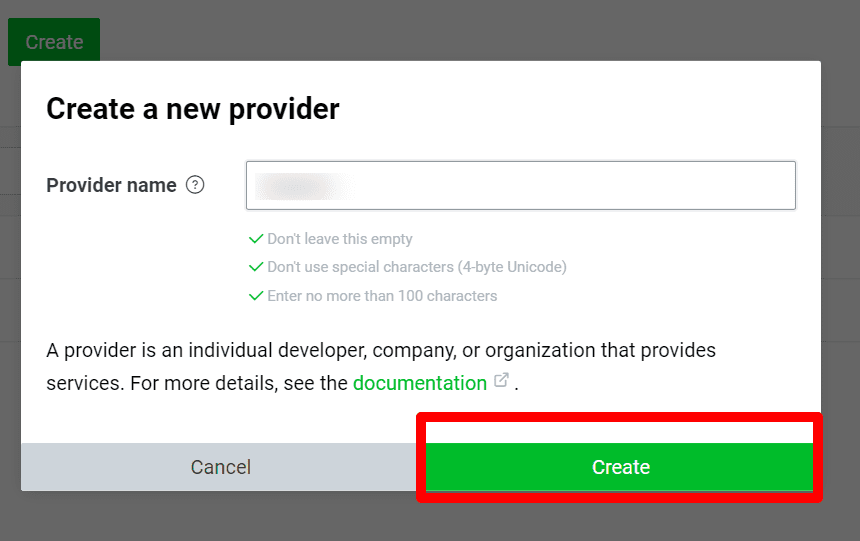
After clicking Create New Provider, a pop-up screen will appear, as shown in the image below. Enter the name of your app and click Create.
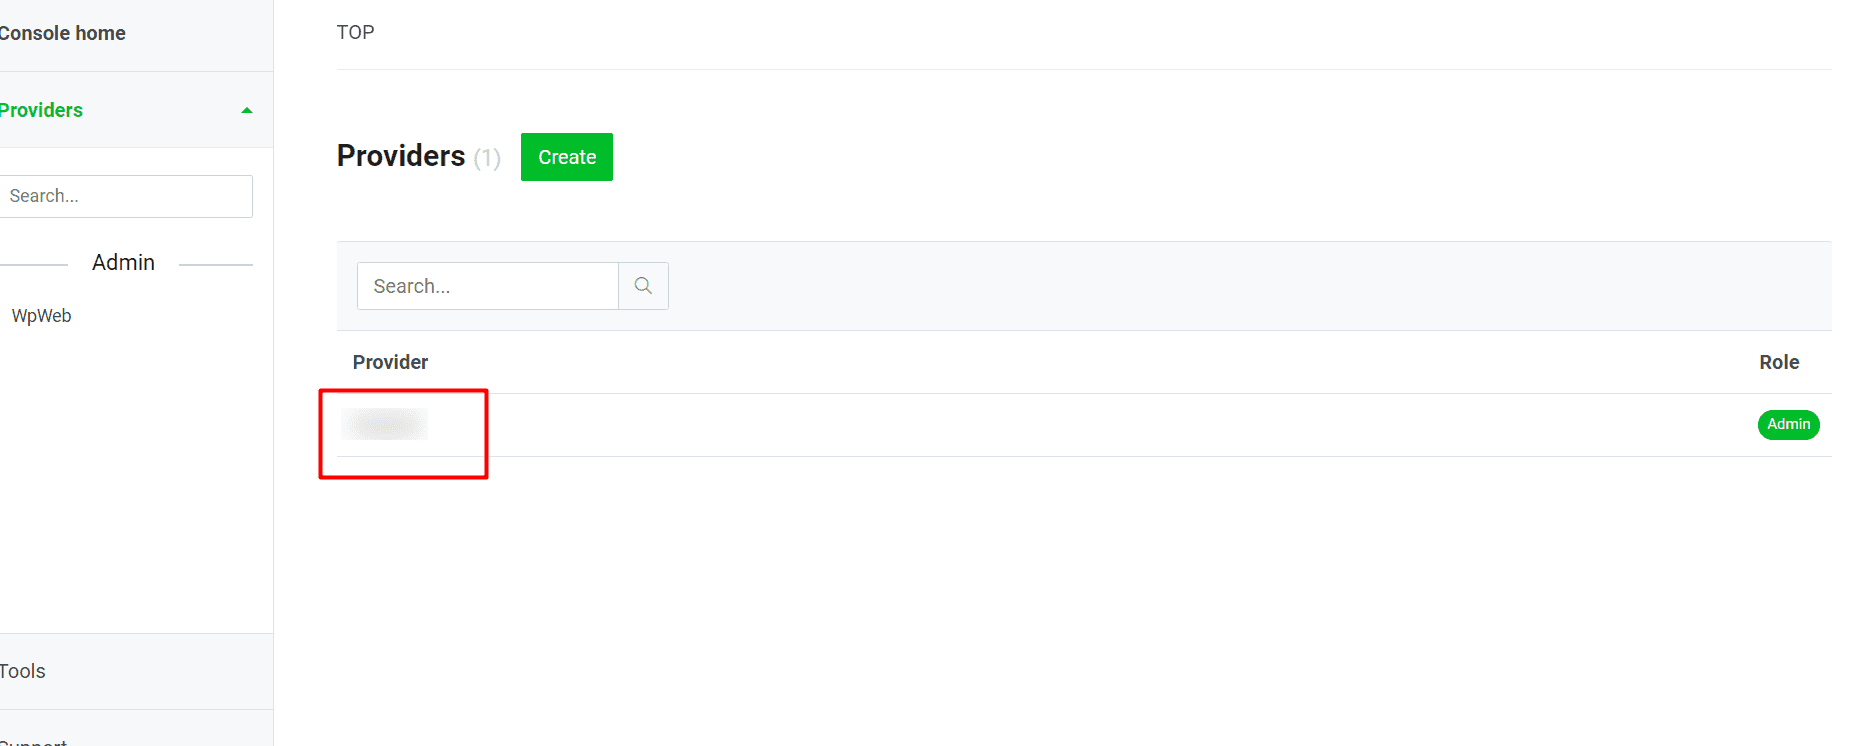
After creating the App, a screen similar to the image shown below will appear. Click on your App Name to open the App settings. A new screen will appear, as shown in the next step.
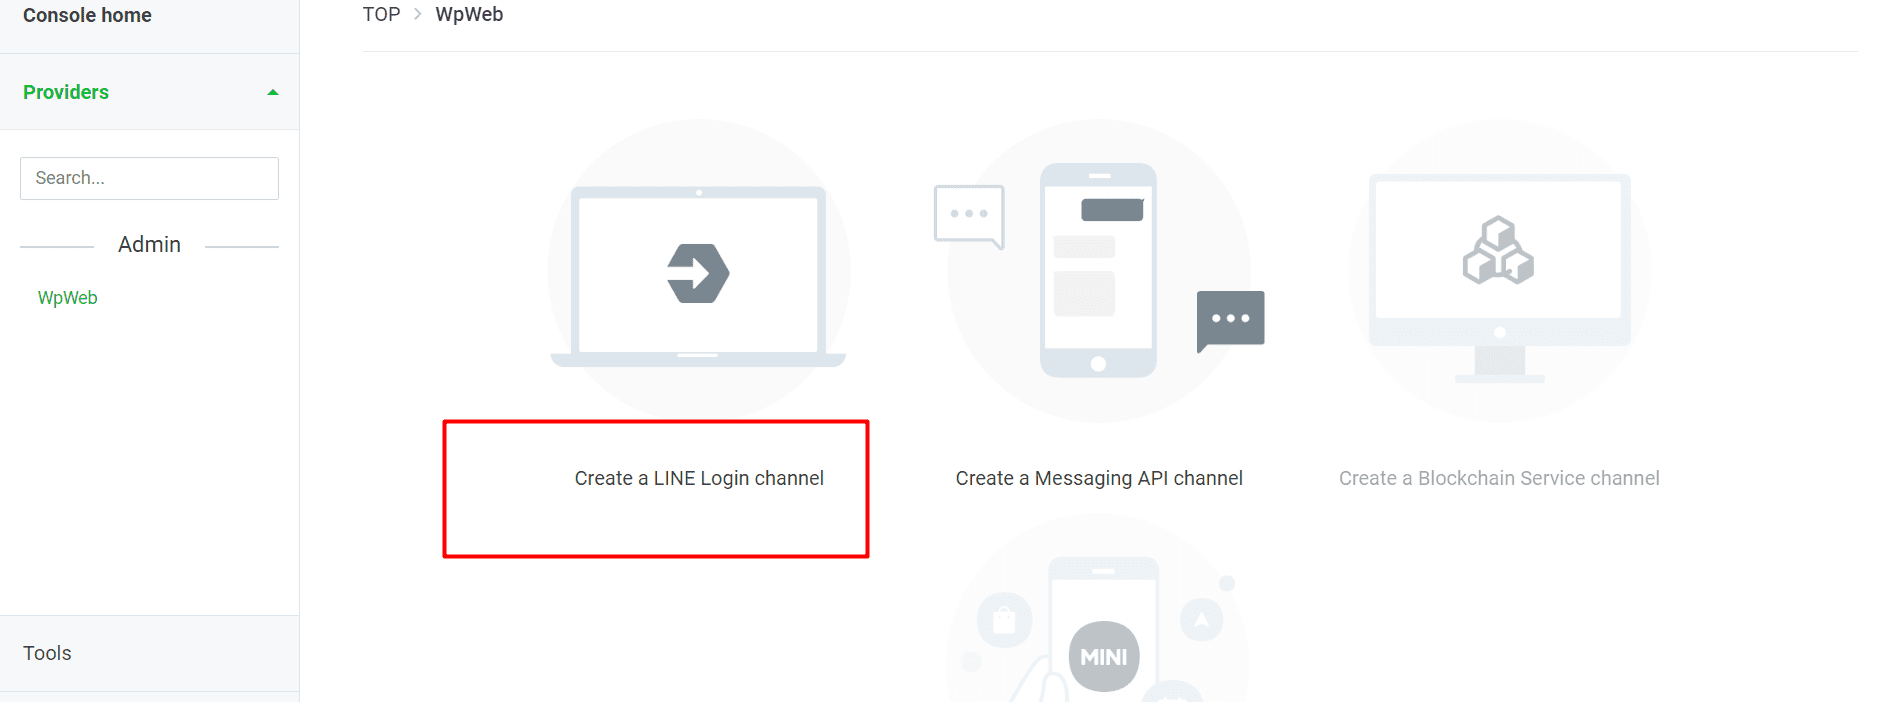
Click Create a LINE Login Channel, as shown in the image below.
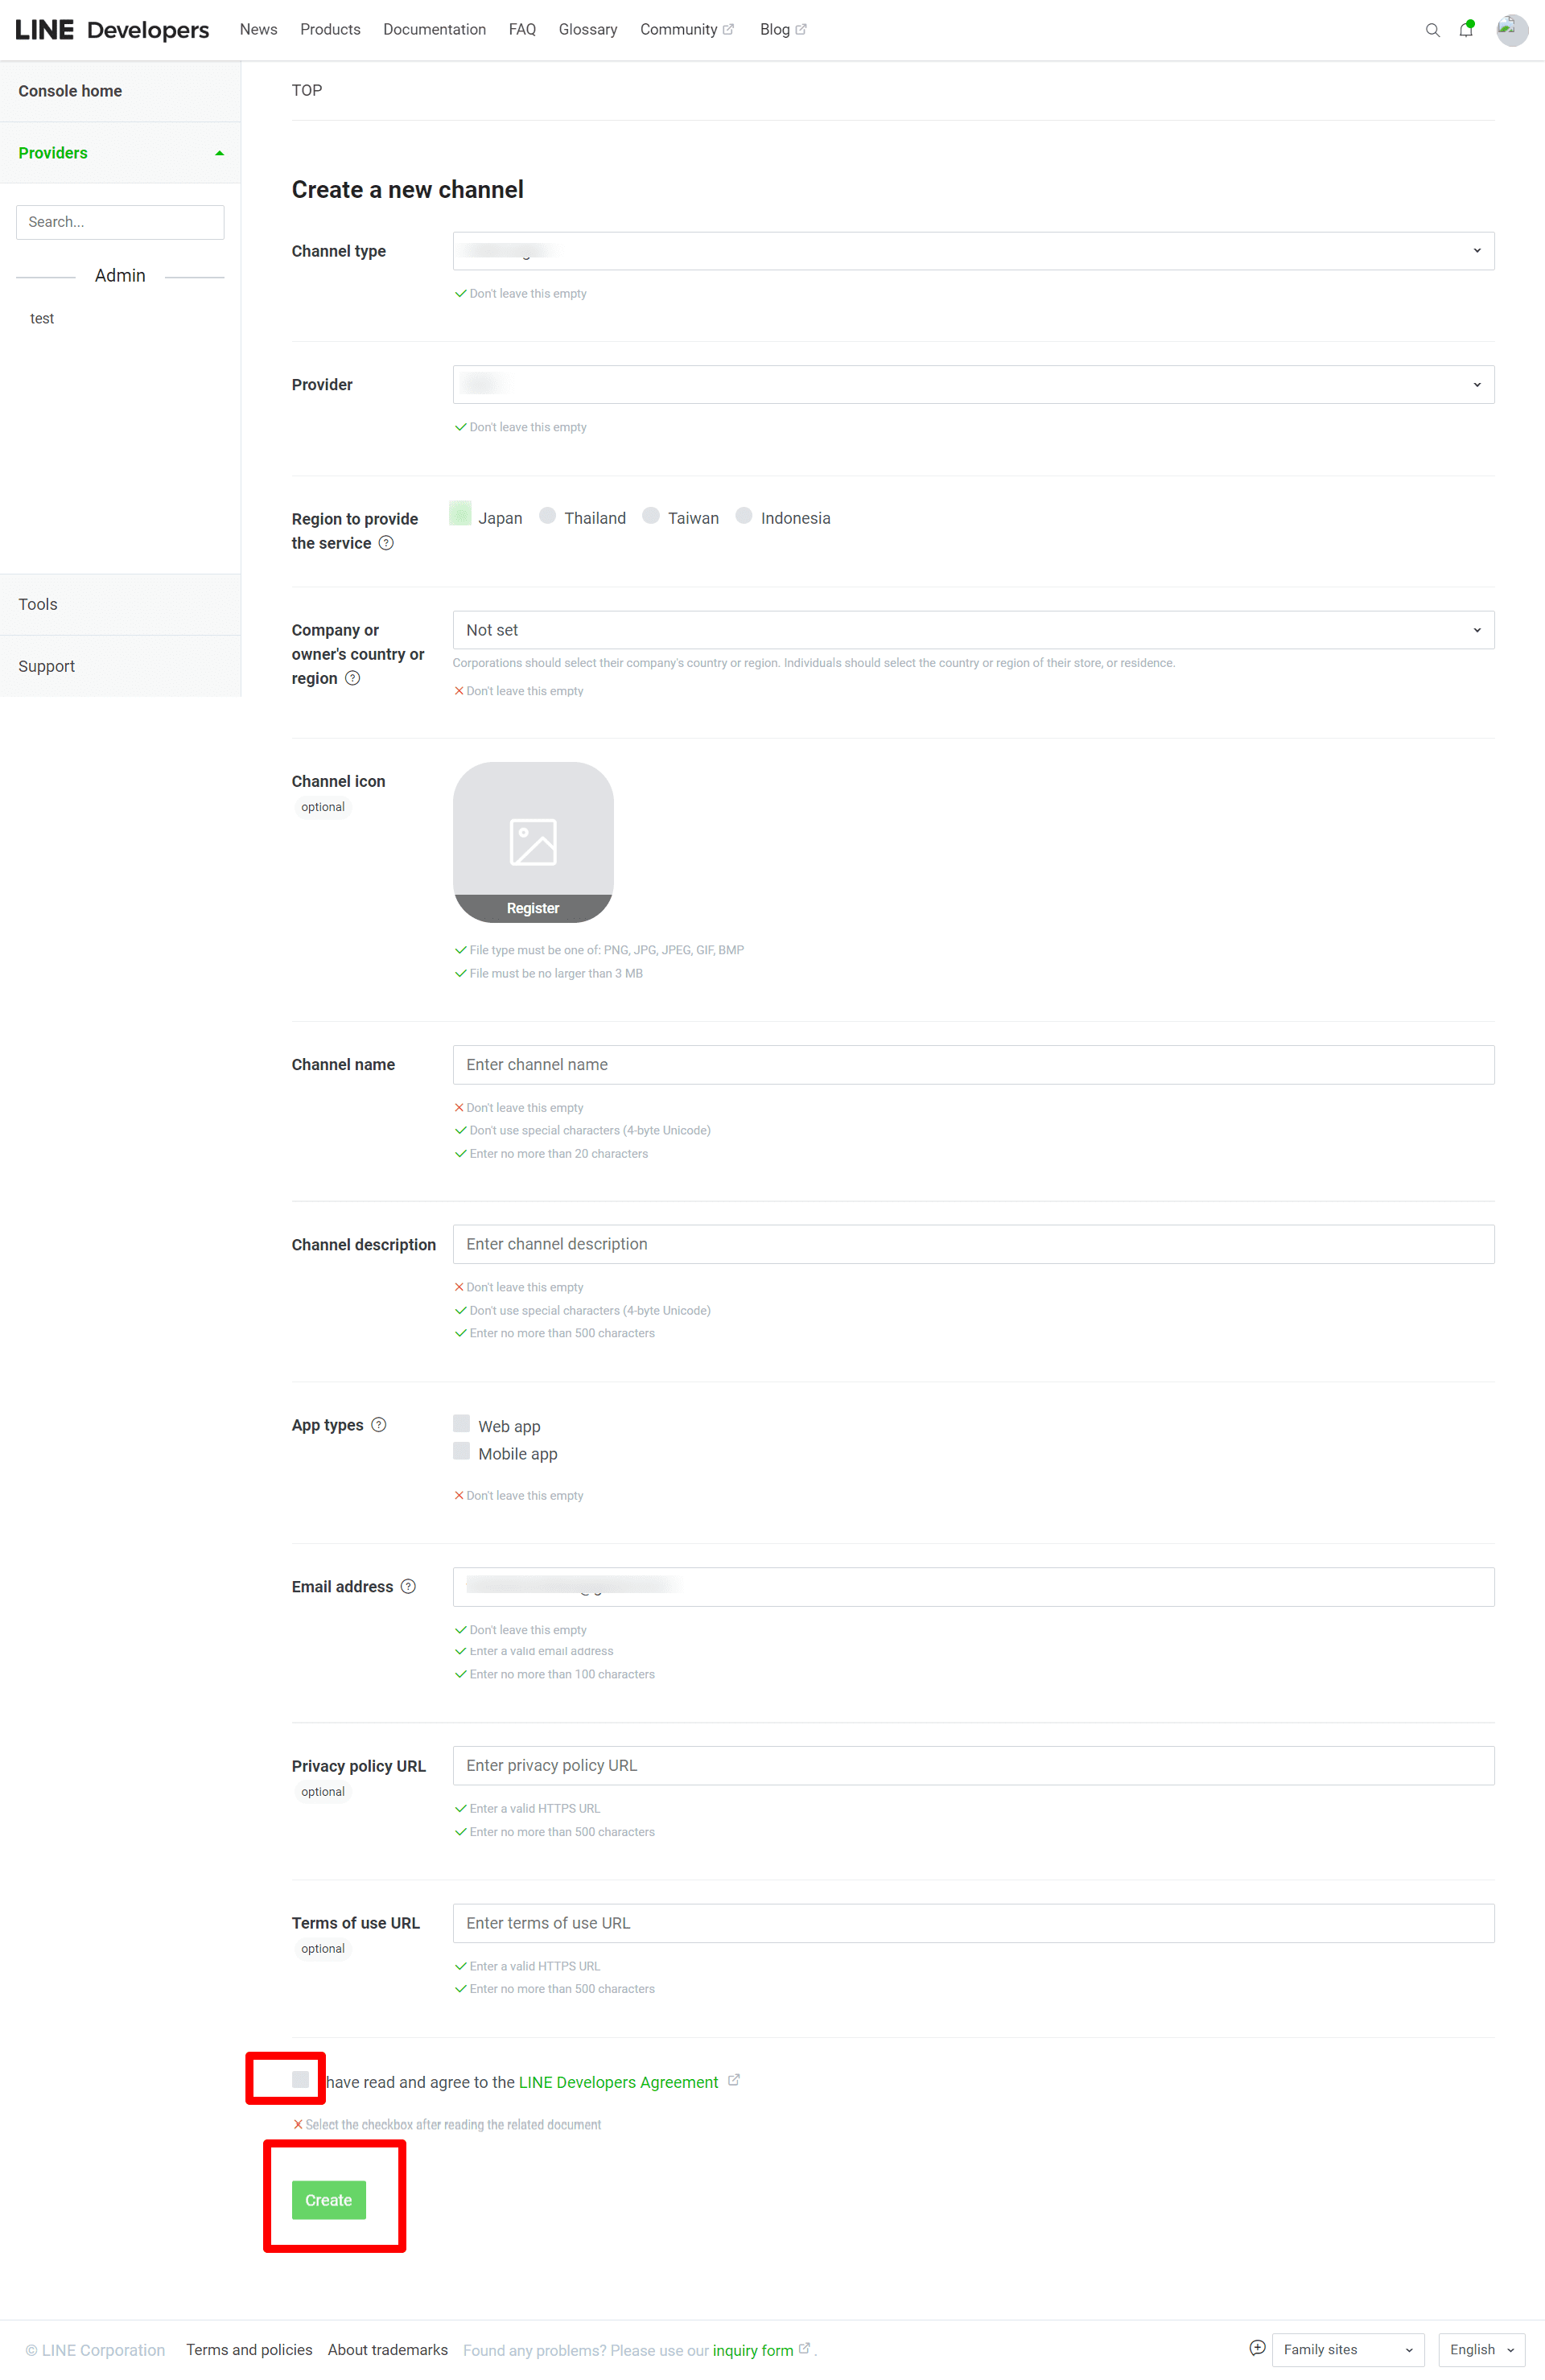
After clicking Create a LINE Login Channel, you will be redirected to the page shown below. Fill in all the required information and click the Create button. See the image below.
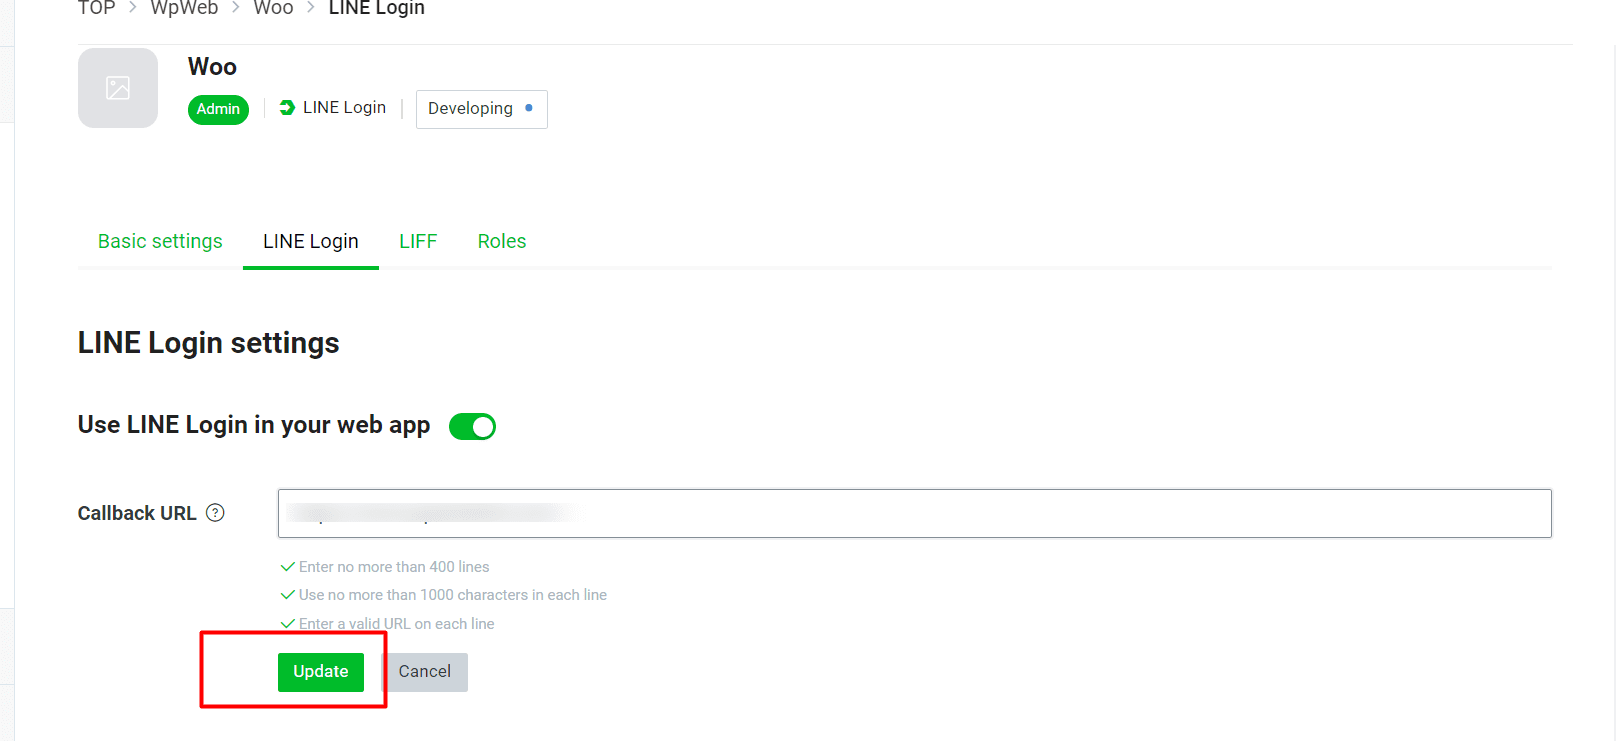
Go to LINE Login settings and click Edit. You will be redirected to the screen shown below.
Enter the Callback URL in the required field and click Update to save the changes.
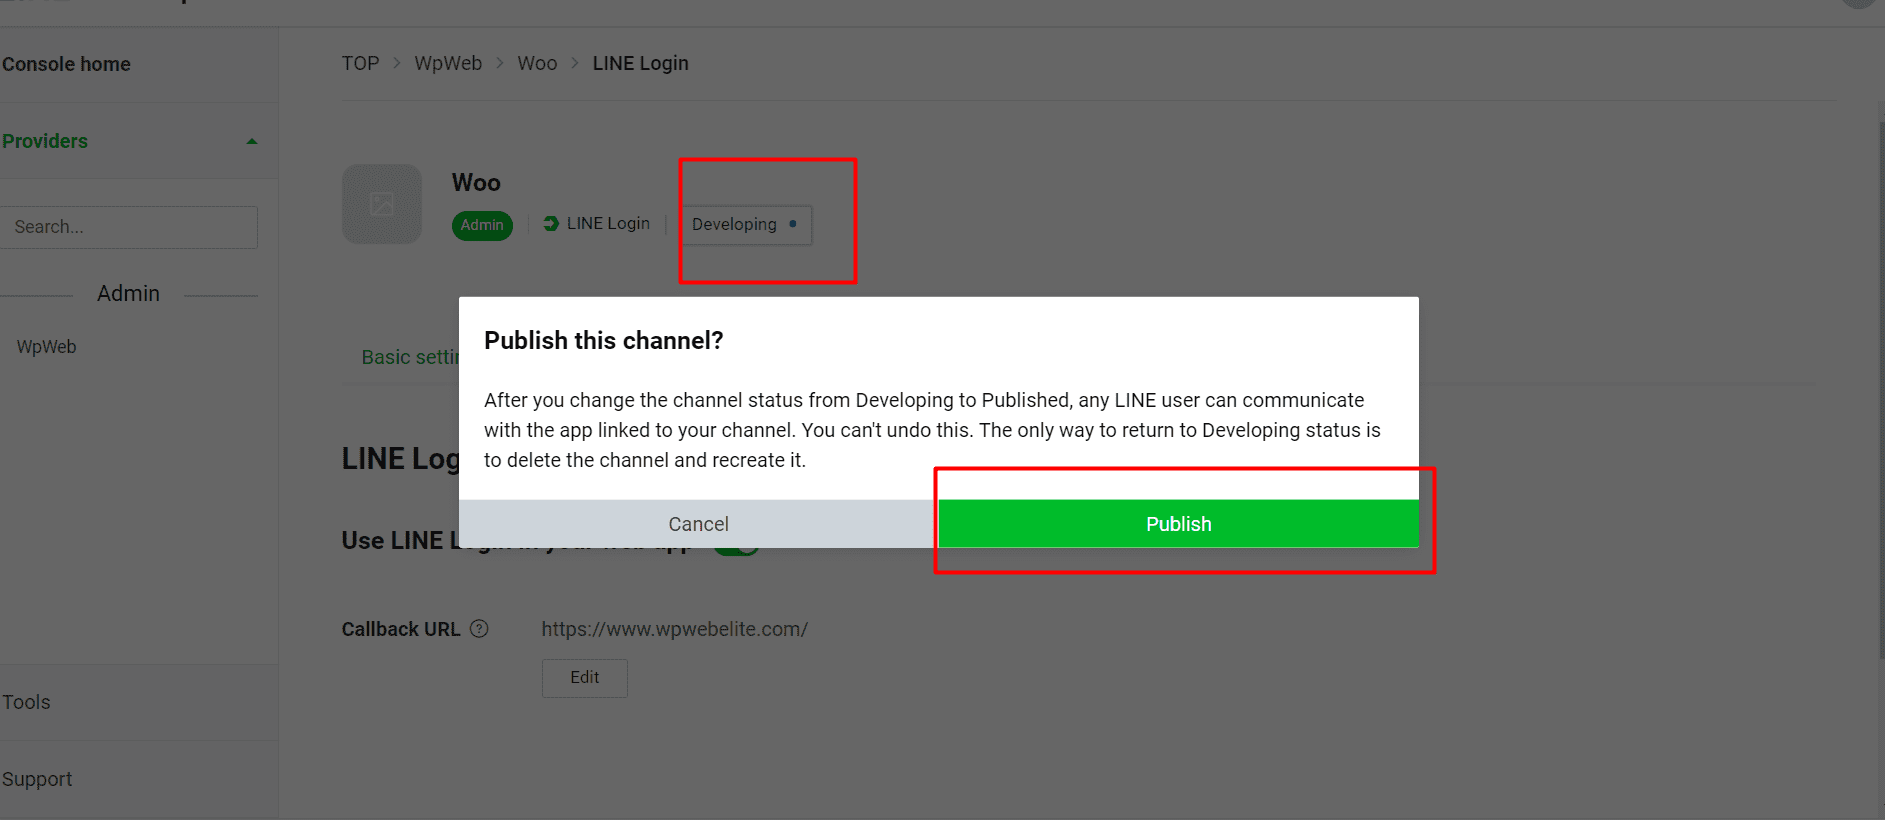
Now, you need to publish the App. Click Developing next to LINE Login. A pop-up will appear. Click the Publish button to publish the App.
The screen will look similar to the image shown below:
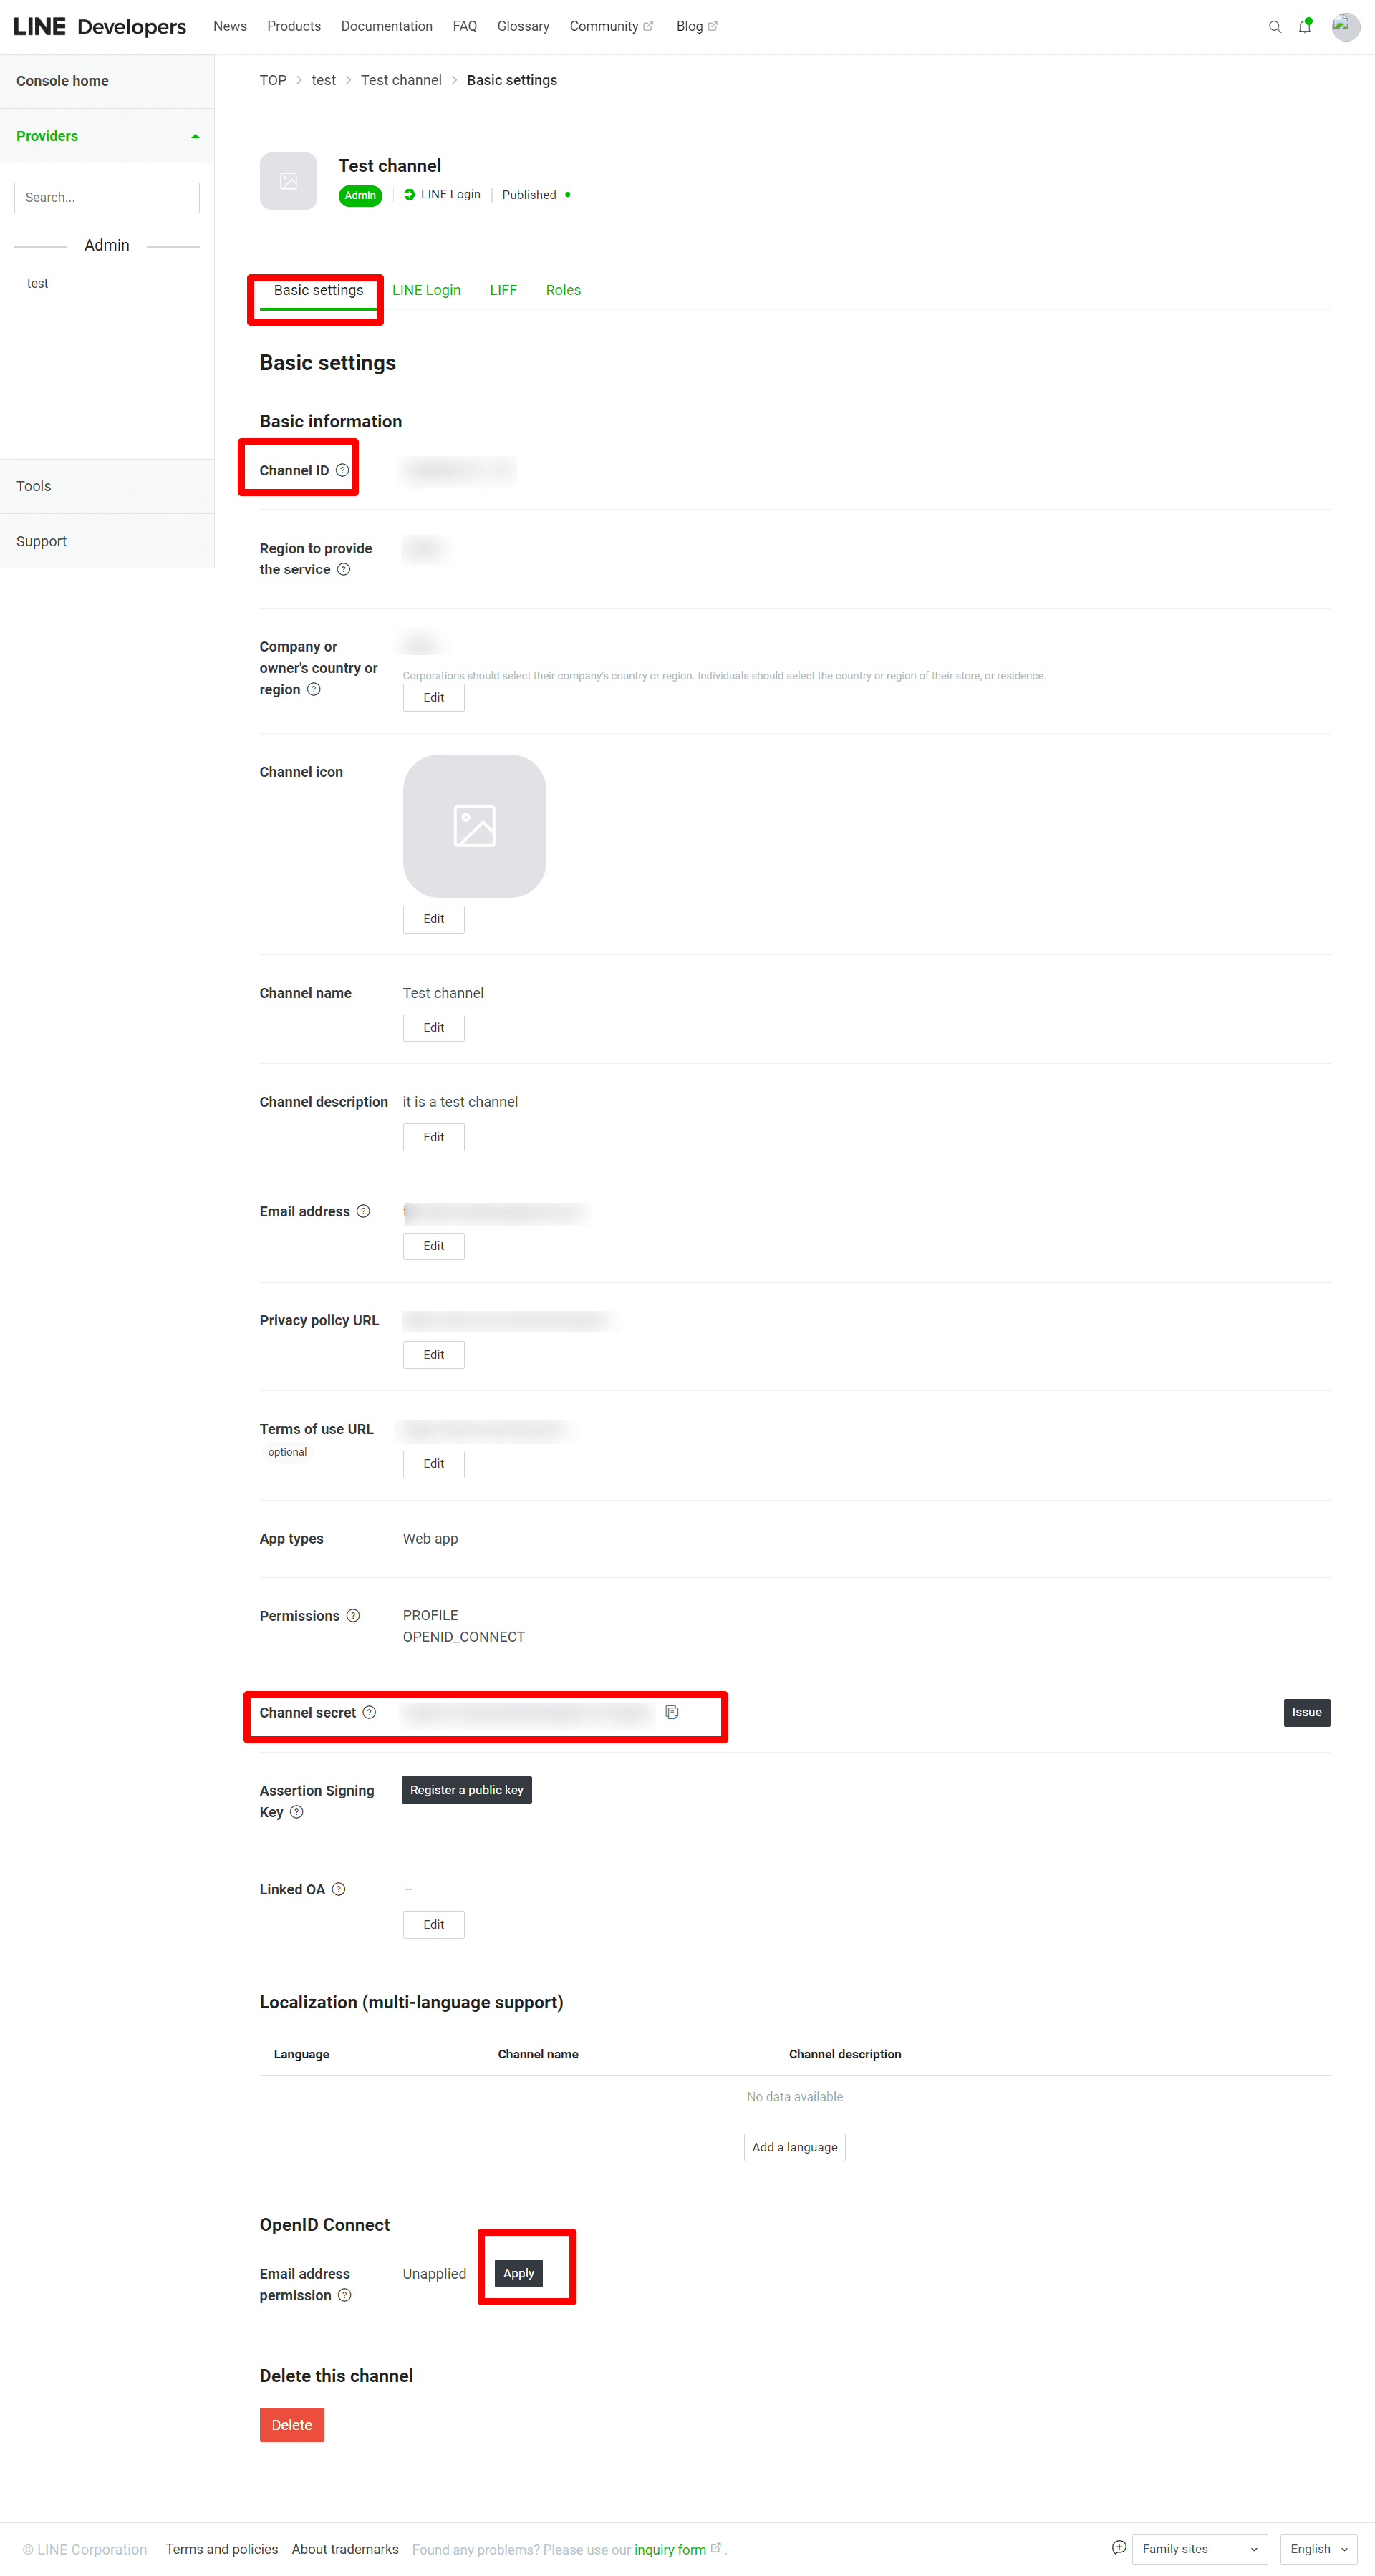
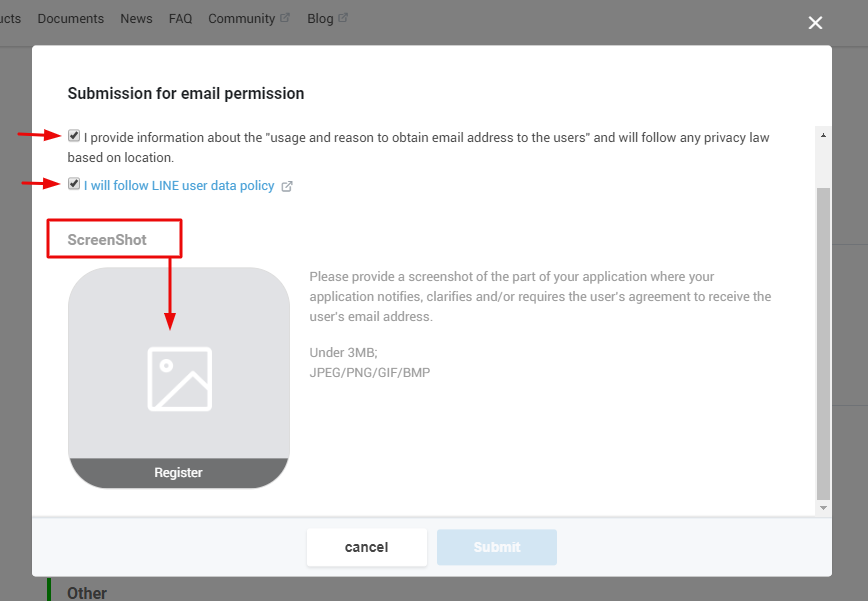
Go to Basic Settings. At the bottom of the page, you will find OpenID Connect. Click the Apply button next to it. A new page will open, as shown in the image below.
Accept both terms and provide a screenshot of the section of your application where users are notified, informed, and/or asked to agree to provide their email address.
Take a screenshot of your website’s login page and make sure the GDPR notice is clearly visible on the login form, as shown in the image below.
Go to Basic Settings and copy the LINE Channel ID and Channel Secret.
Then, open the plugin settings page and enter the Channel ID and Channel Secret in the corresponding fields, as shown in the image below.
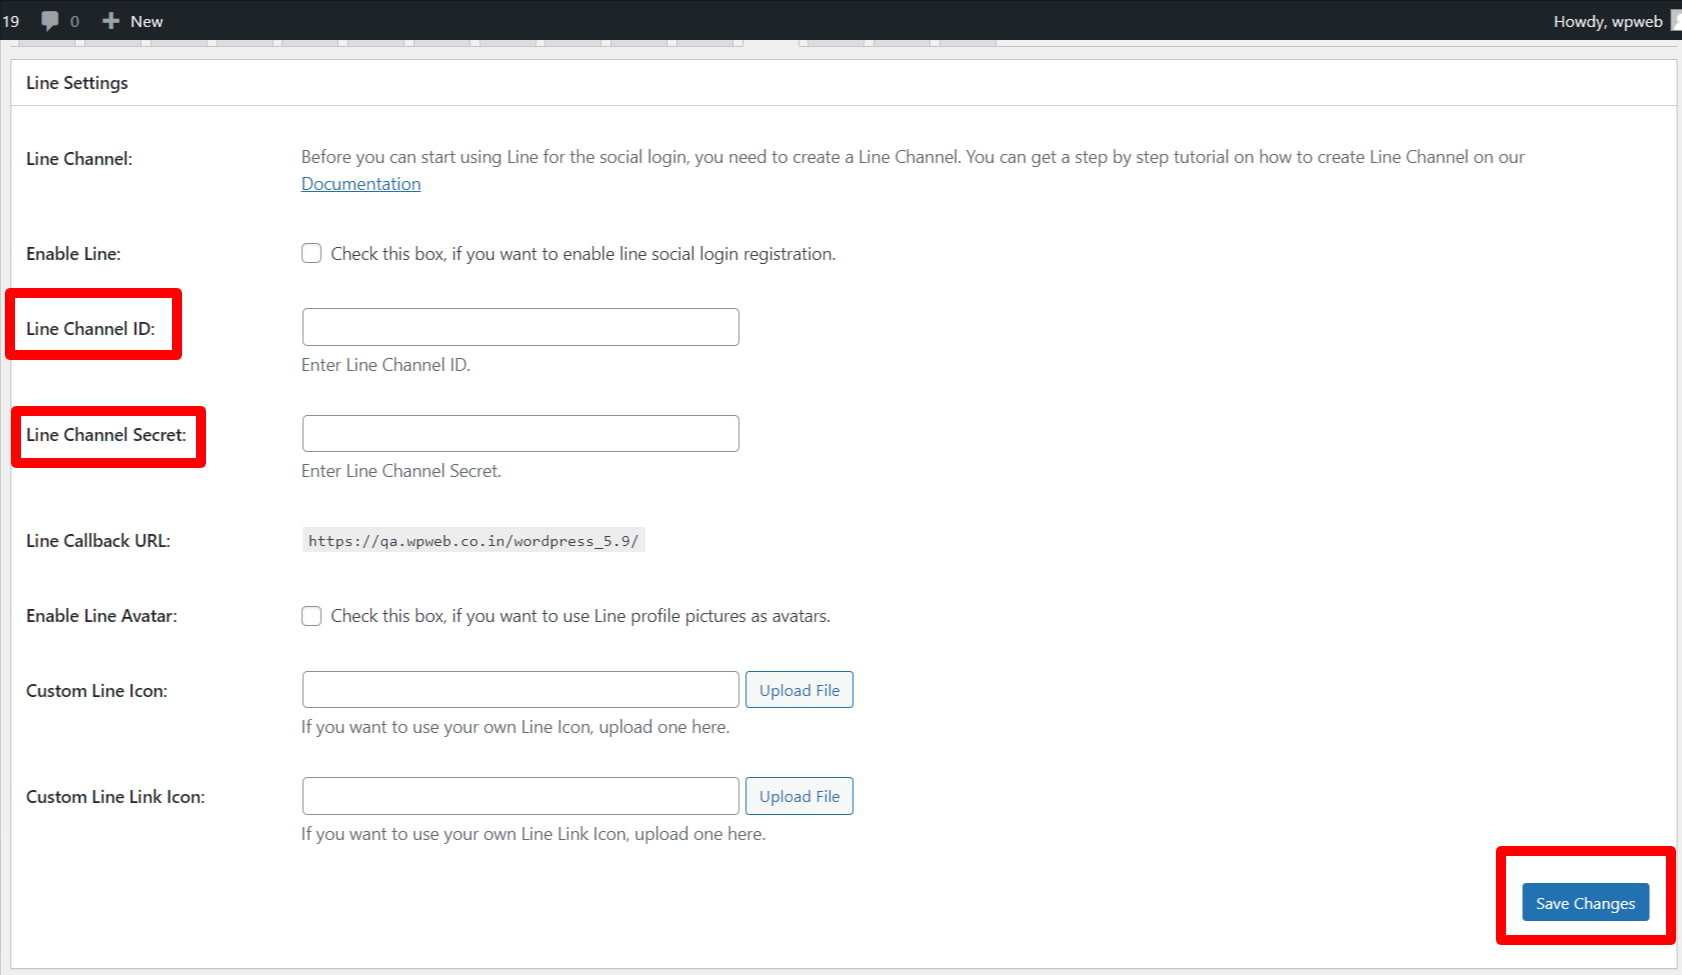
After entering the LINE Channel ID and Channel Secret, click the Save Changes button on the plugin’s settings page.