“Social Network Integrations” Documentation by “WPWeb”
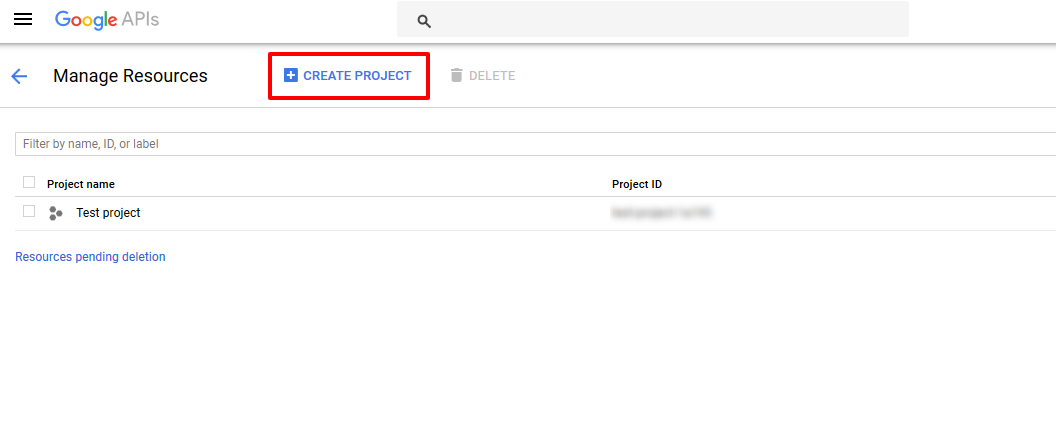
To get Google App Detail, go and visit the https://console.developers.google.com/project page. You need to login in with your Google account if you aren’t already. Then the Google API Console page will load and click on the “Create Project” button as shown in the image below:
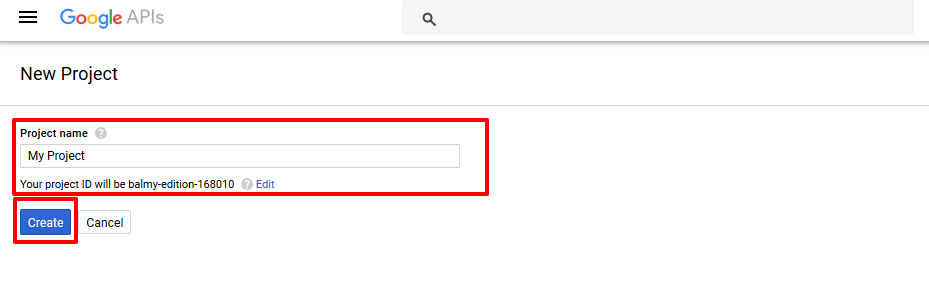
After the click o ” Create Project” button it will open the project screen, Enter Project Name and Project ID will be auto generated. After that Click on the “Create” button to create Project as shown in the image below:
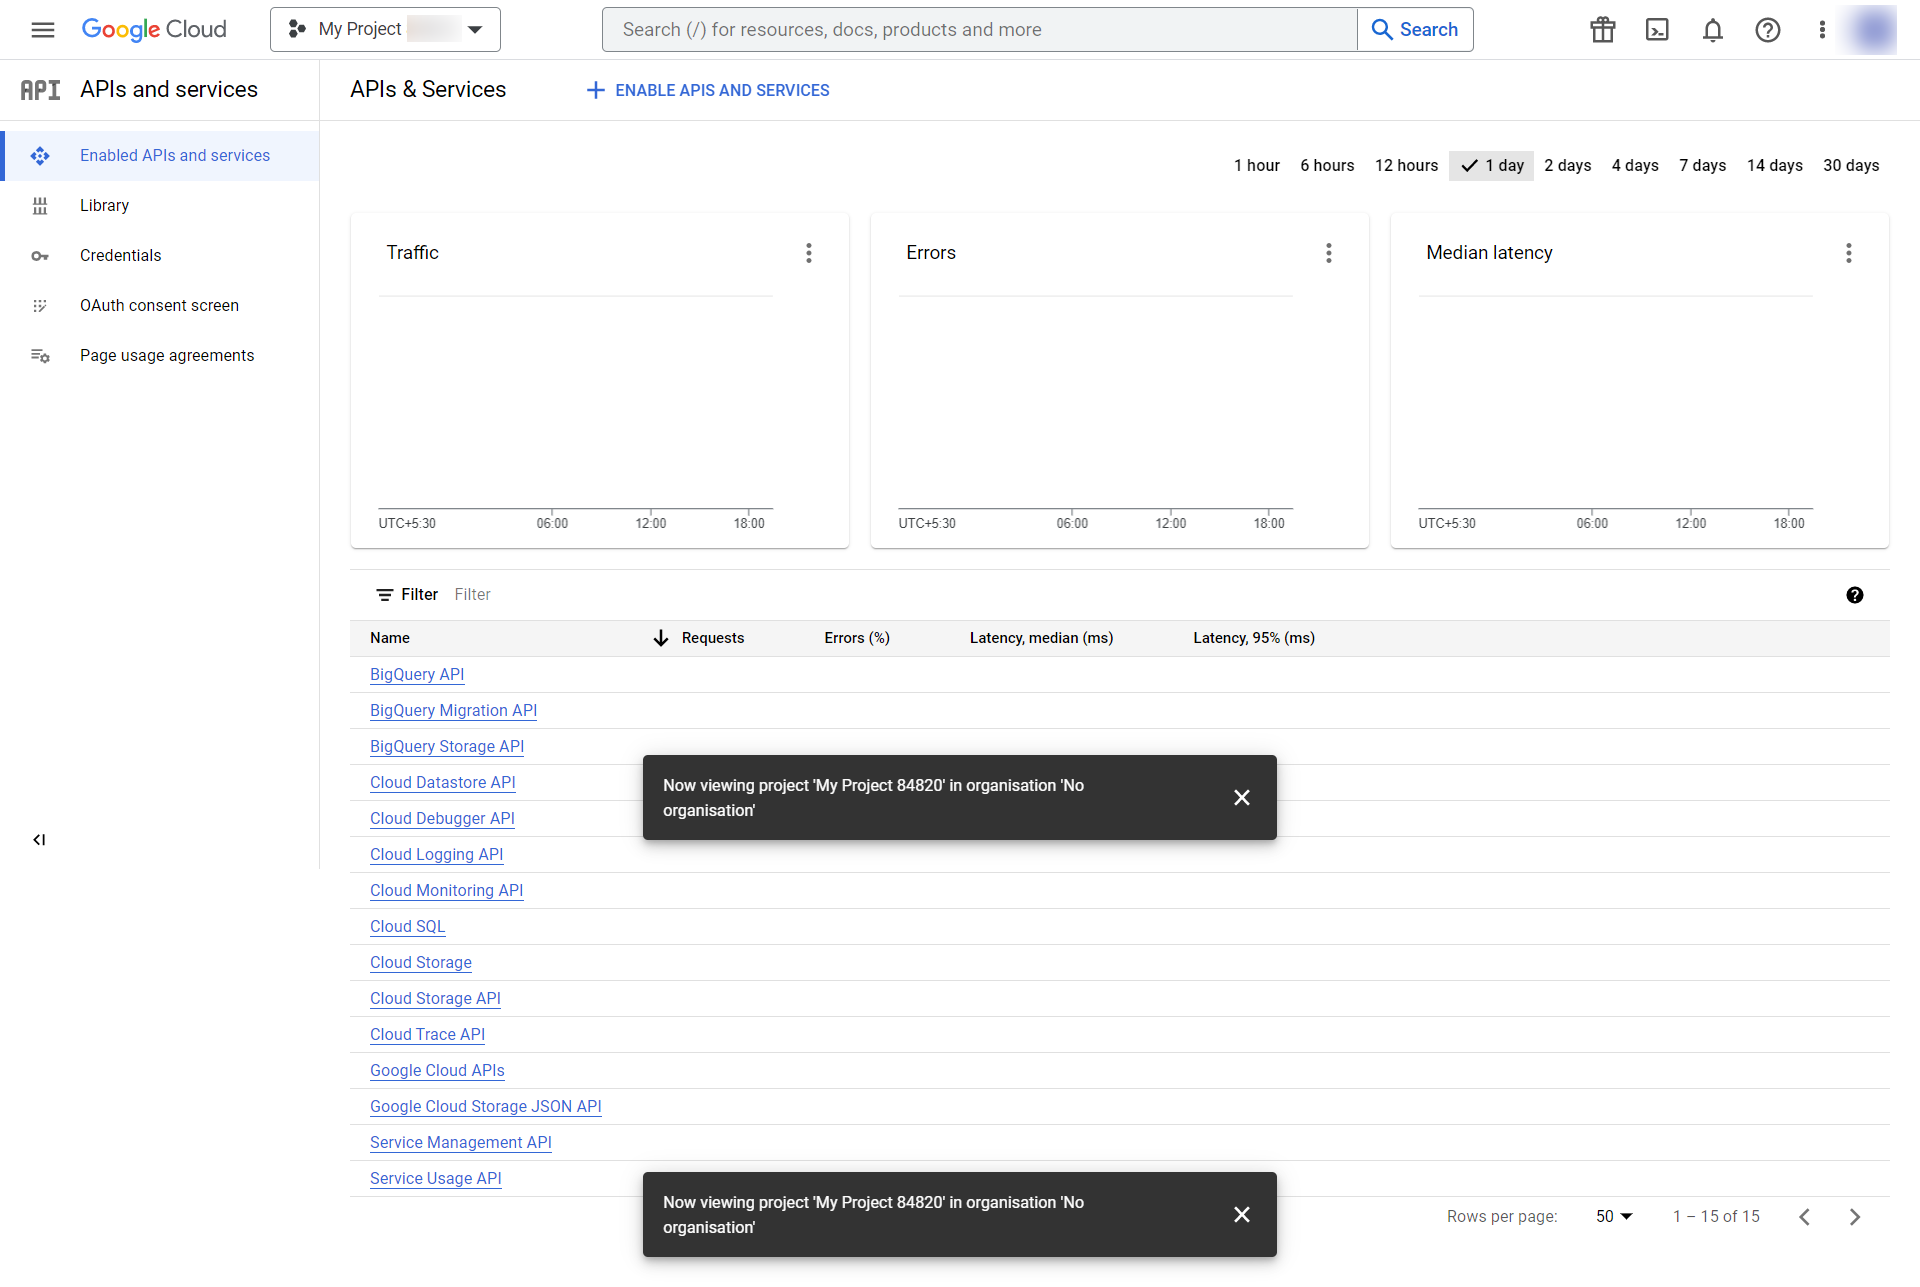
After creating the project you will be redirect to the page as shown in the image below:
Now, click on menu “Credentials” and select the “OAuth consent screen” tab as shown in the image below:
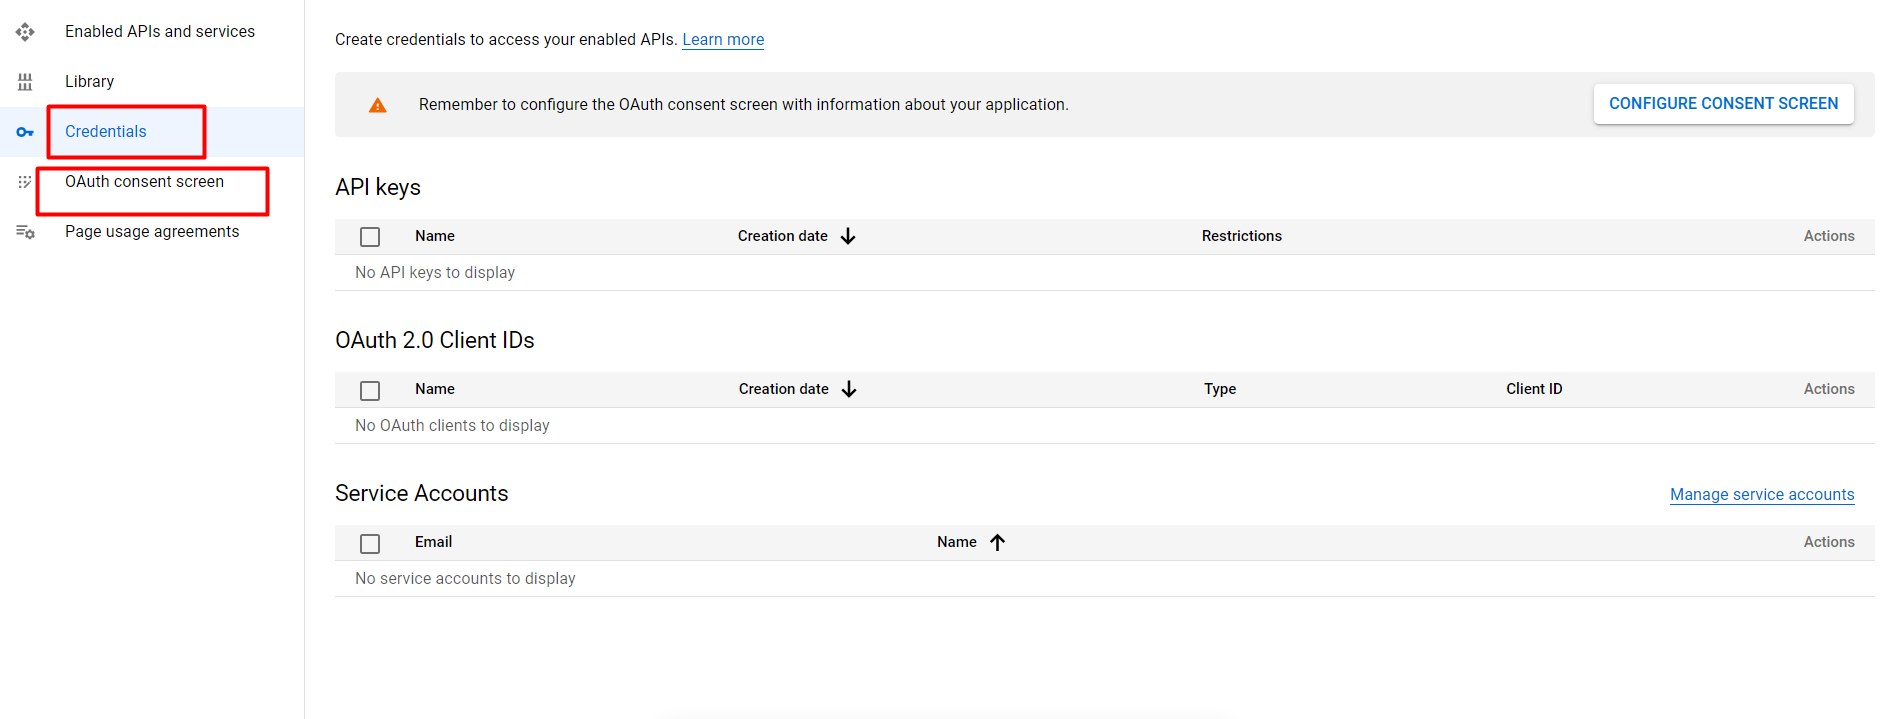
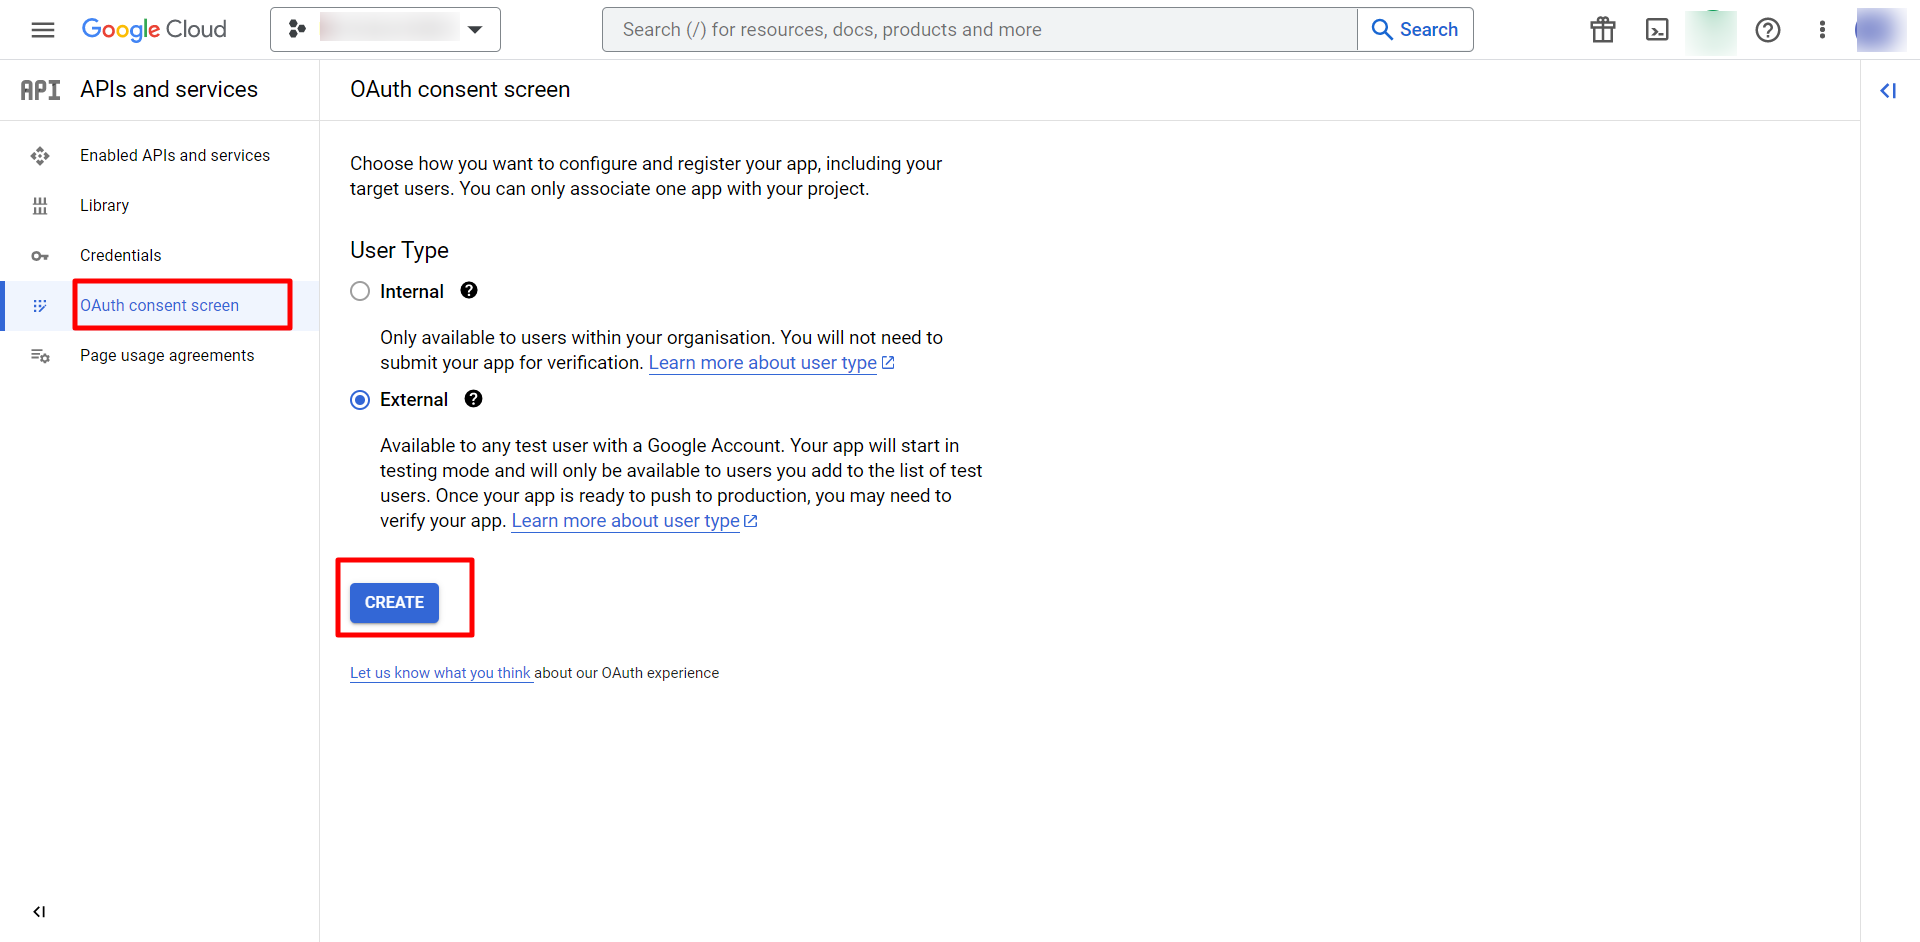
After you click on OAuth consent Screen. Select the user type and click on “Create” button.The screen similar to image shown below will be seen.
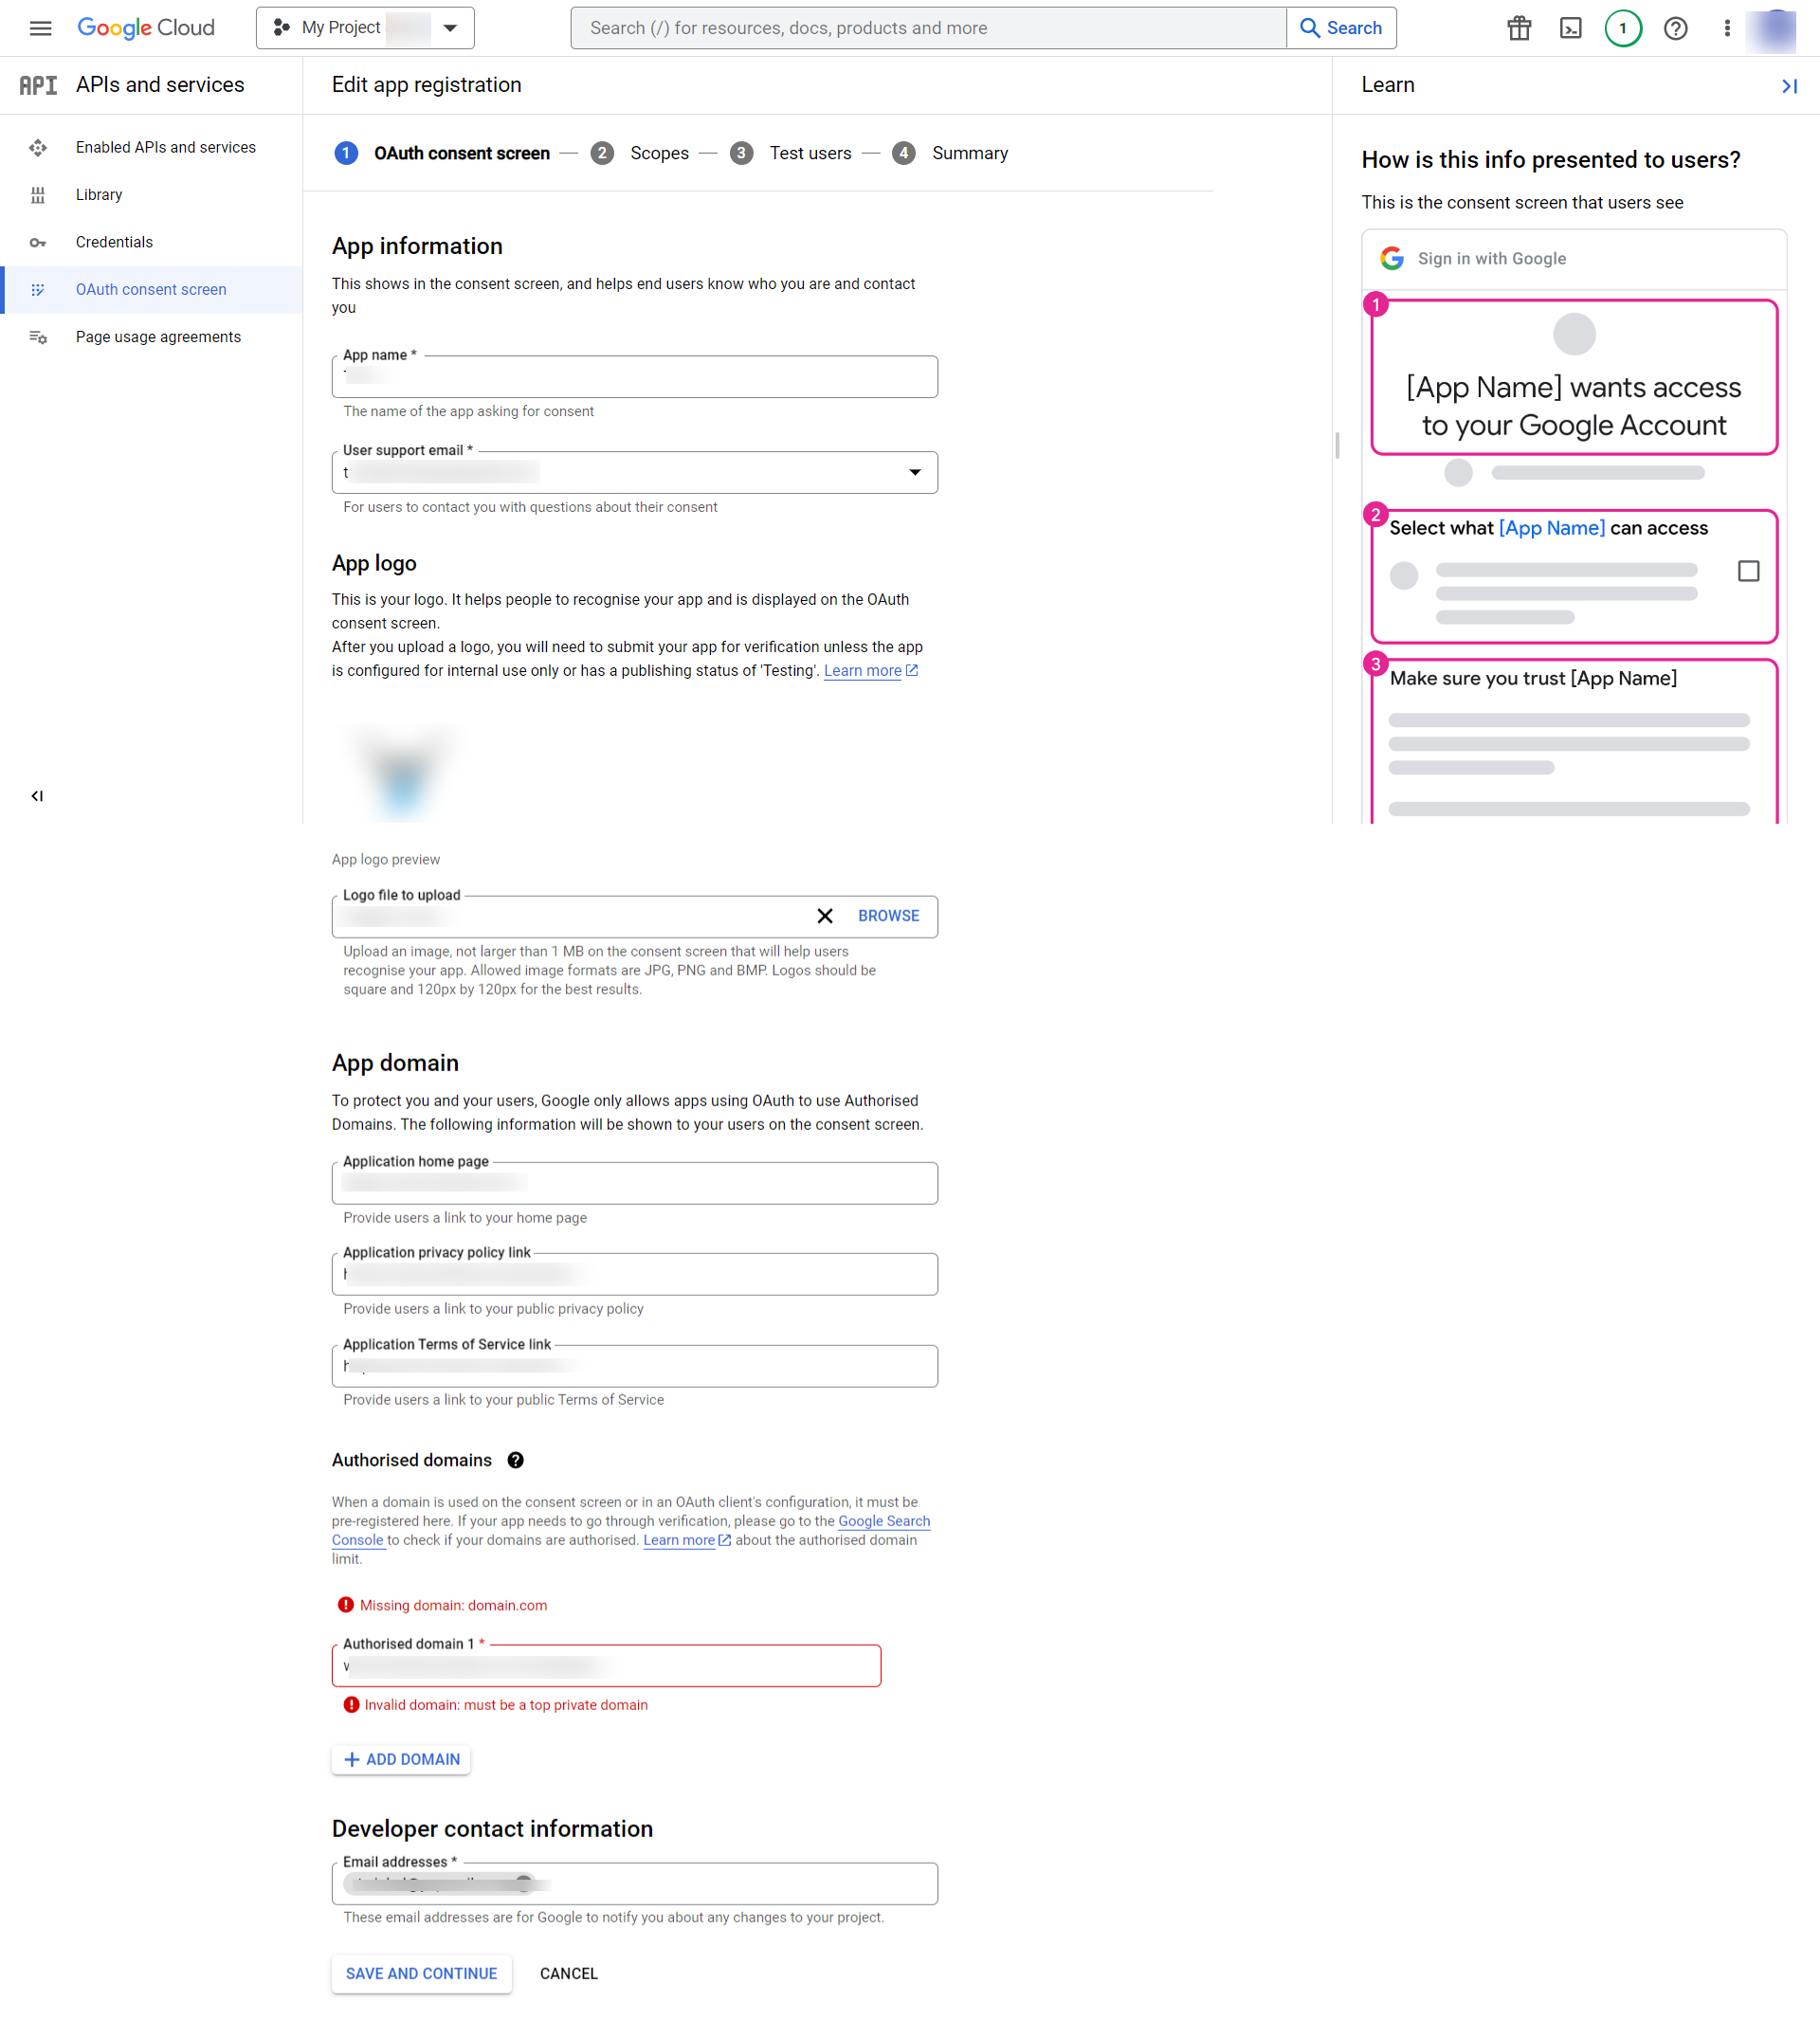
Now, you will be redirect to App information page. Fill the required data then click on ” Save and continue” button
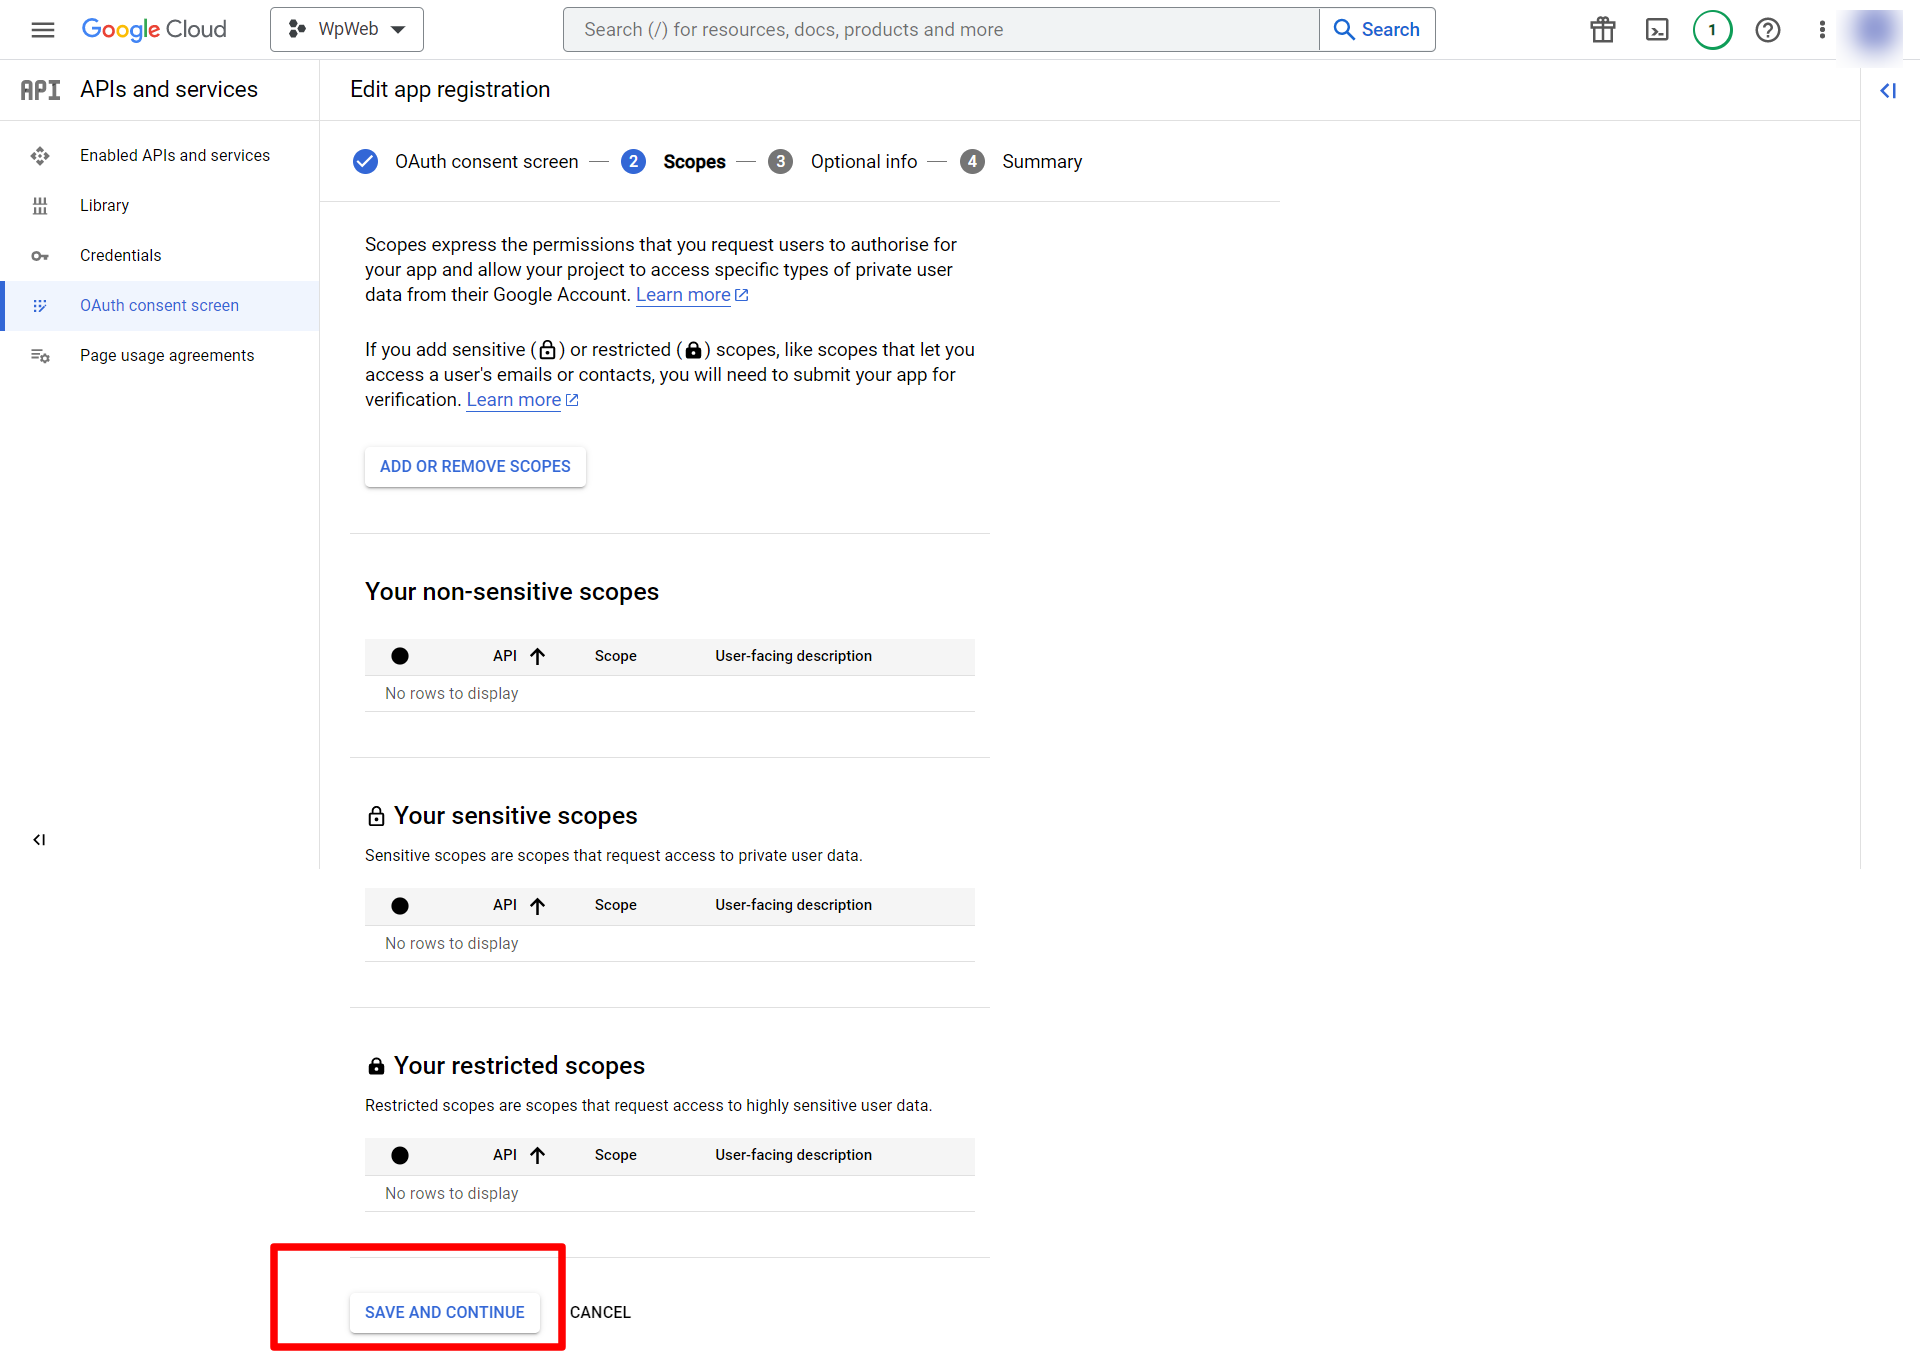
After you save and continue you will be redirect to page as shown in image. Click on Save and Continue.
After you save and continue you will be redirected to optional Info. It is not necessary to fill the data so you can click on Save and continue. It will show the summary.
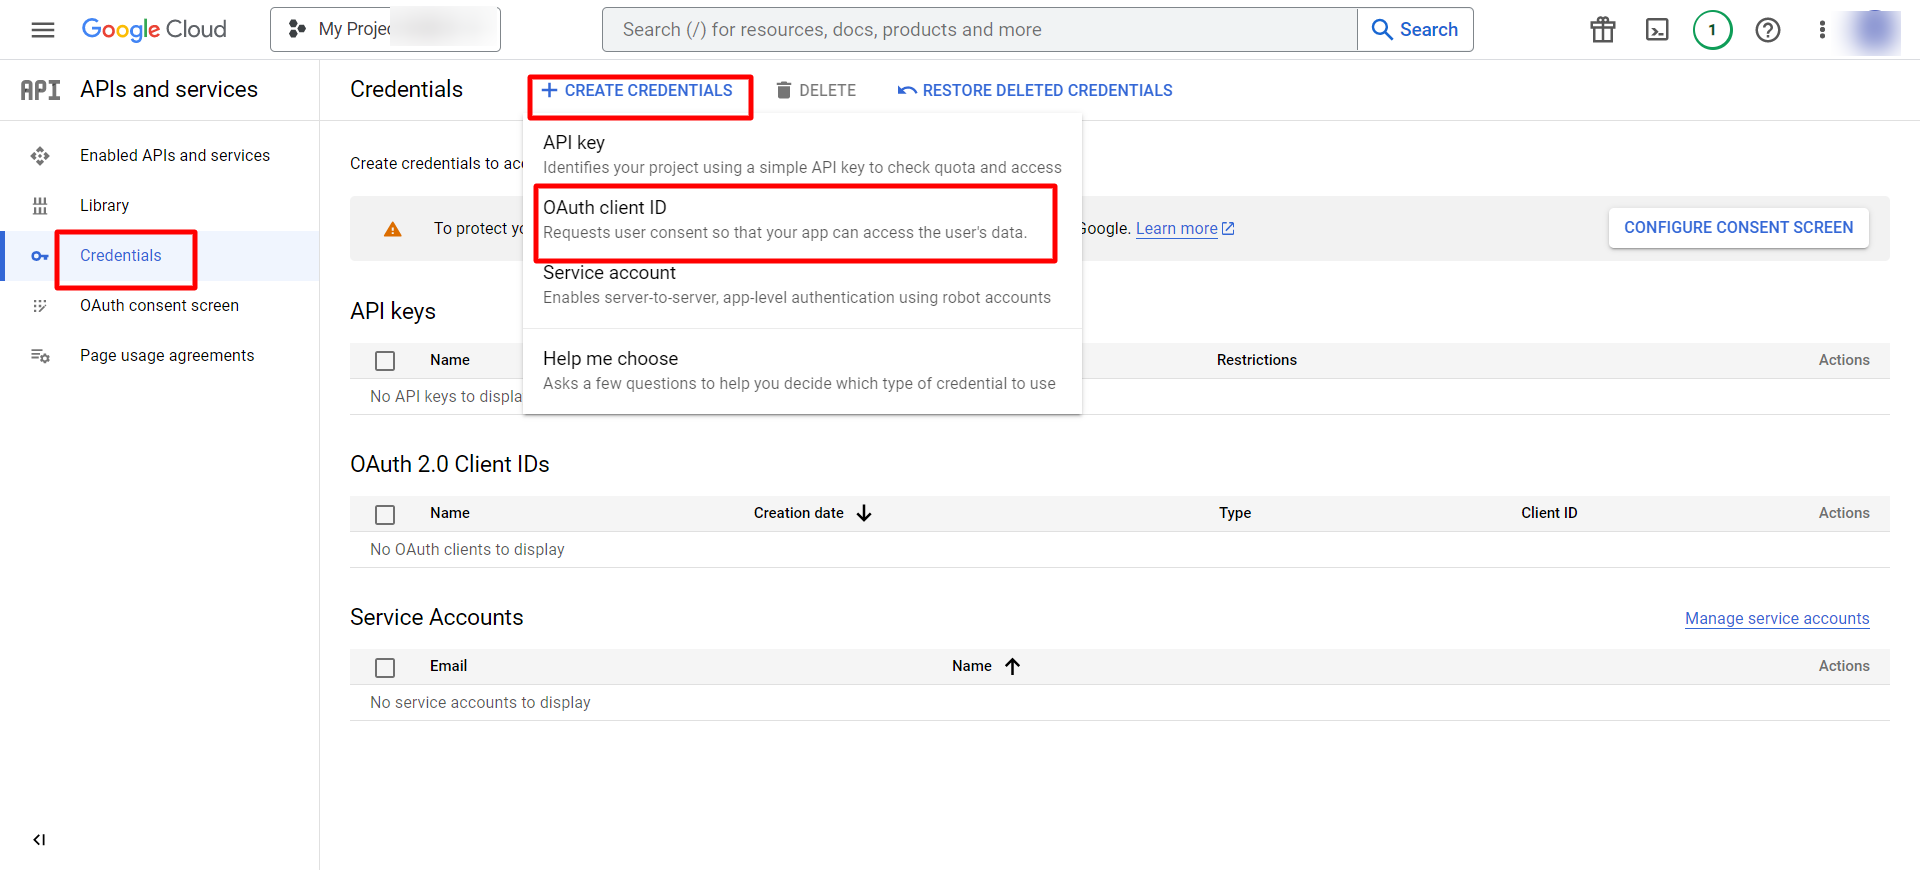
Now click on credentials. It will redirect to page shown below. Then click on “Create Credentials” in the menu and click OAuth Client Id.
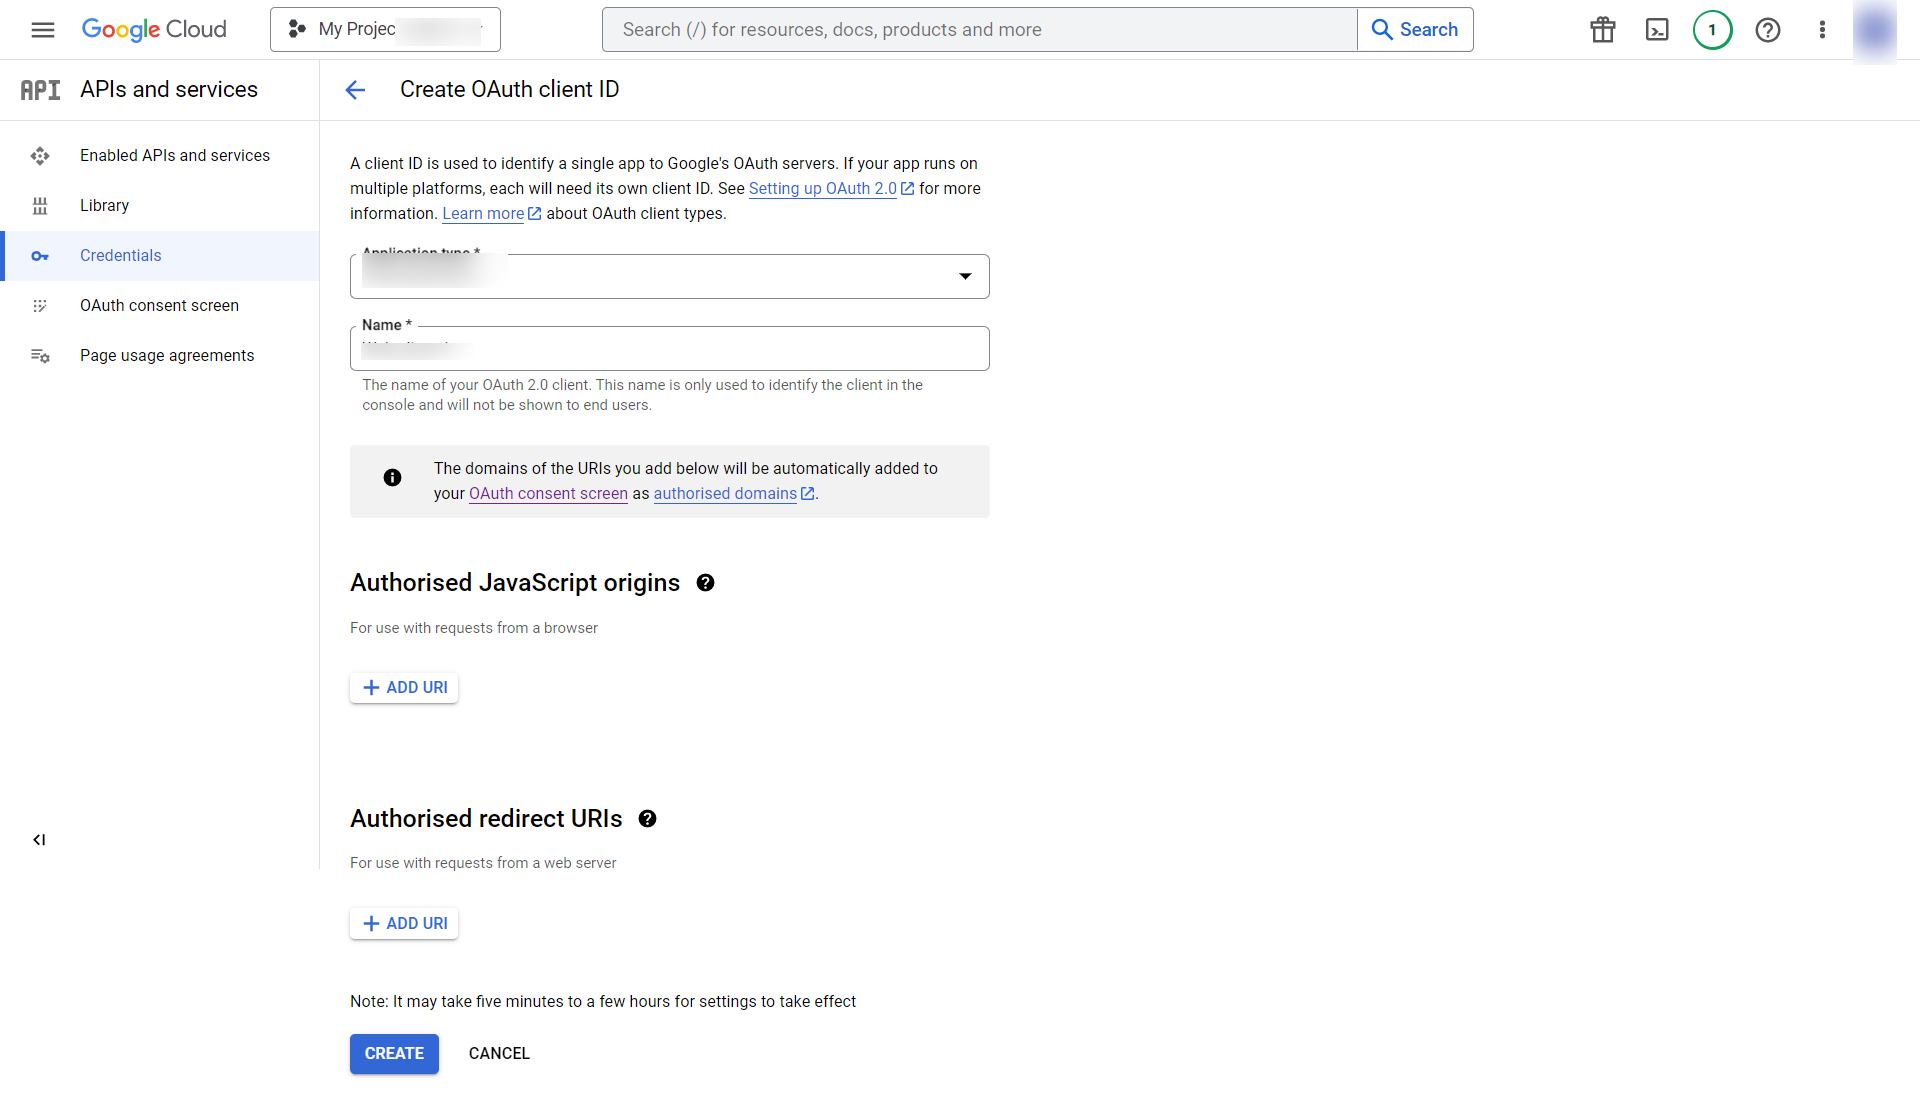
Now you have to select Application Type. After you select Application Type based on the application type the screen may change and based on it you will be asked to fill the data. The Screen shown below in image when type selected is web Application. Then click on “Create” button.
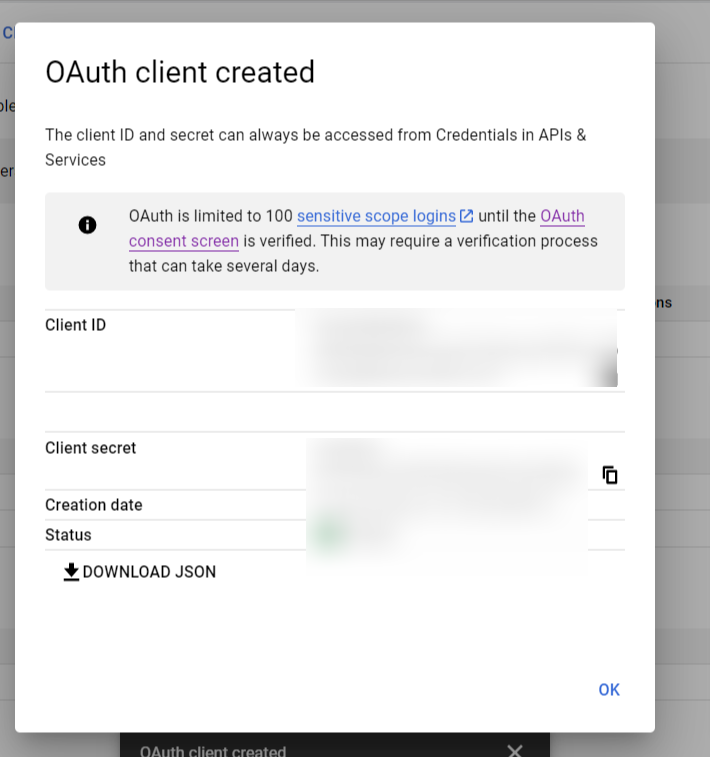
Now you will be able to get Client ID and Secret Key. The screen will look similar to image shown below. Copy the Client ID and Secret Key
Now, Copy the Google Client Id in to the Google App settings within the Plugin settings page. See image below and save the settings.
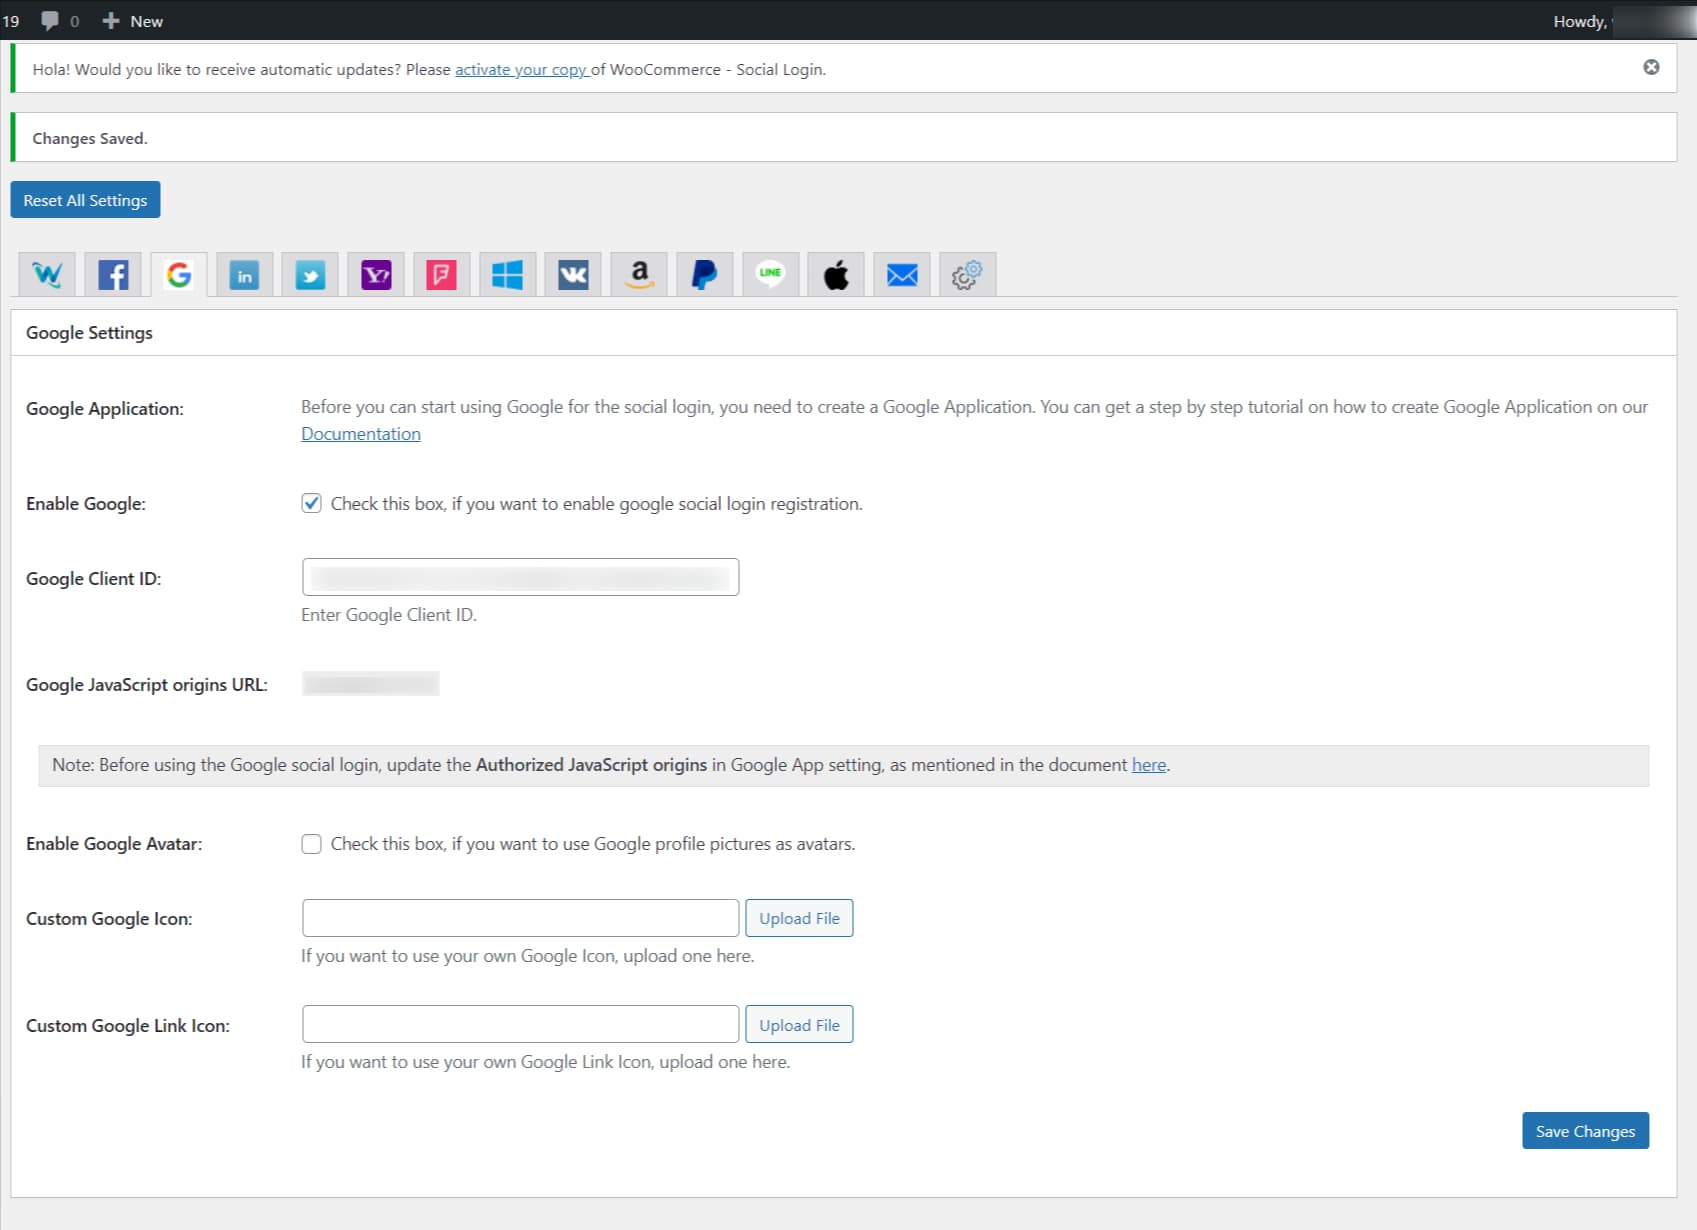
After you entered the Google Client Id, click on the “Save Changes” button within the plugin’s settings page.