WPWeb Social Network Integration Documentation
To create a WordPress.com Application, visit WordPress.com Application Creation Page.
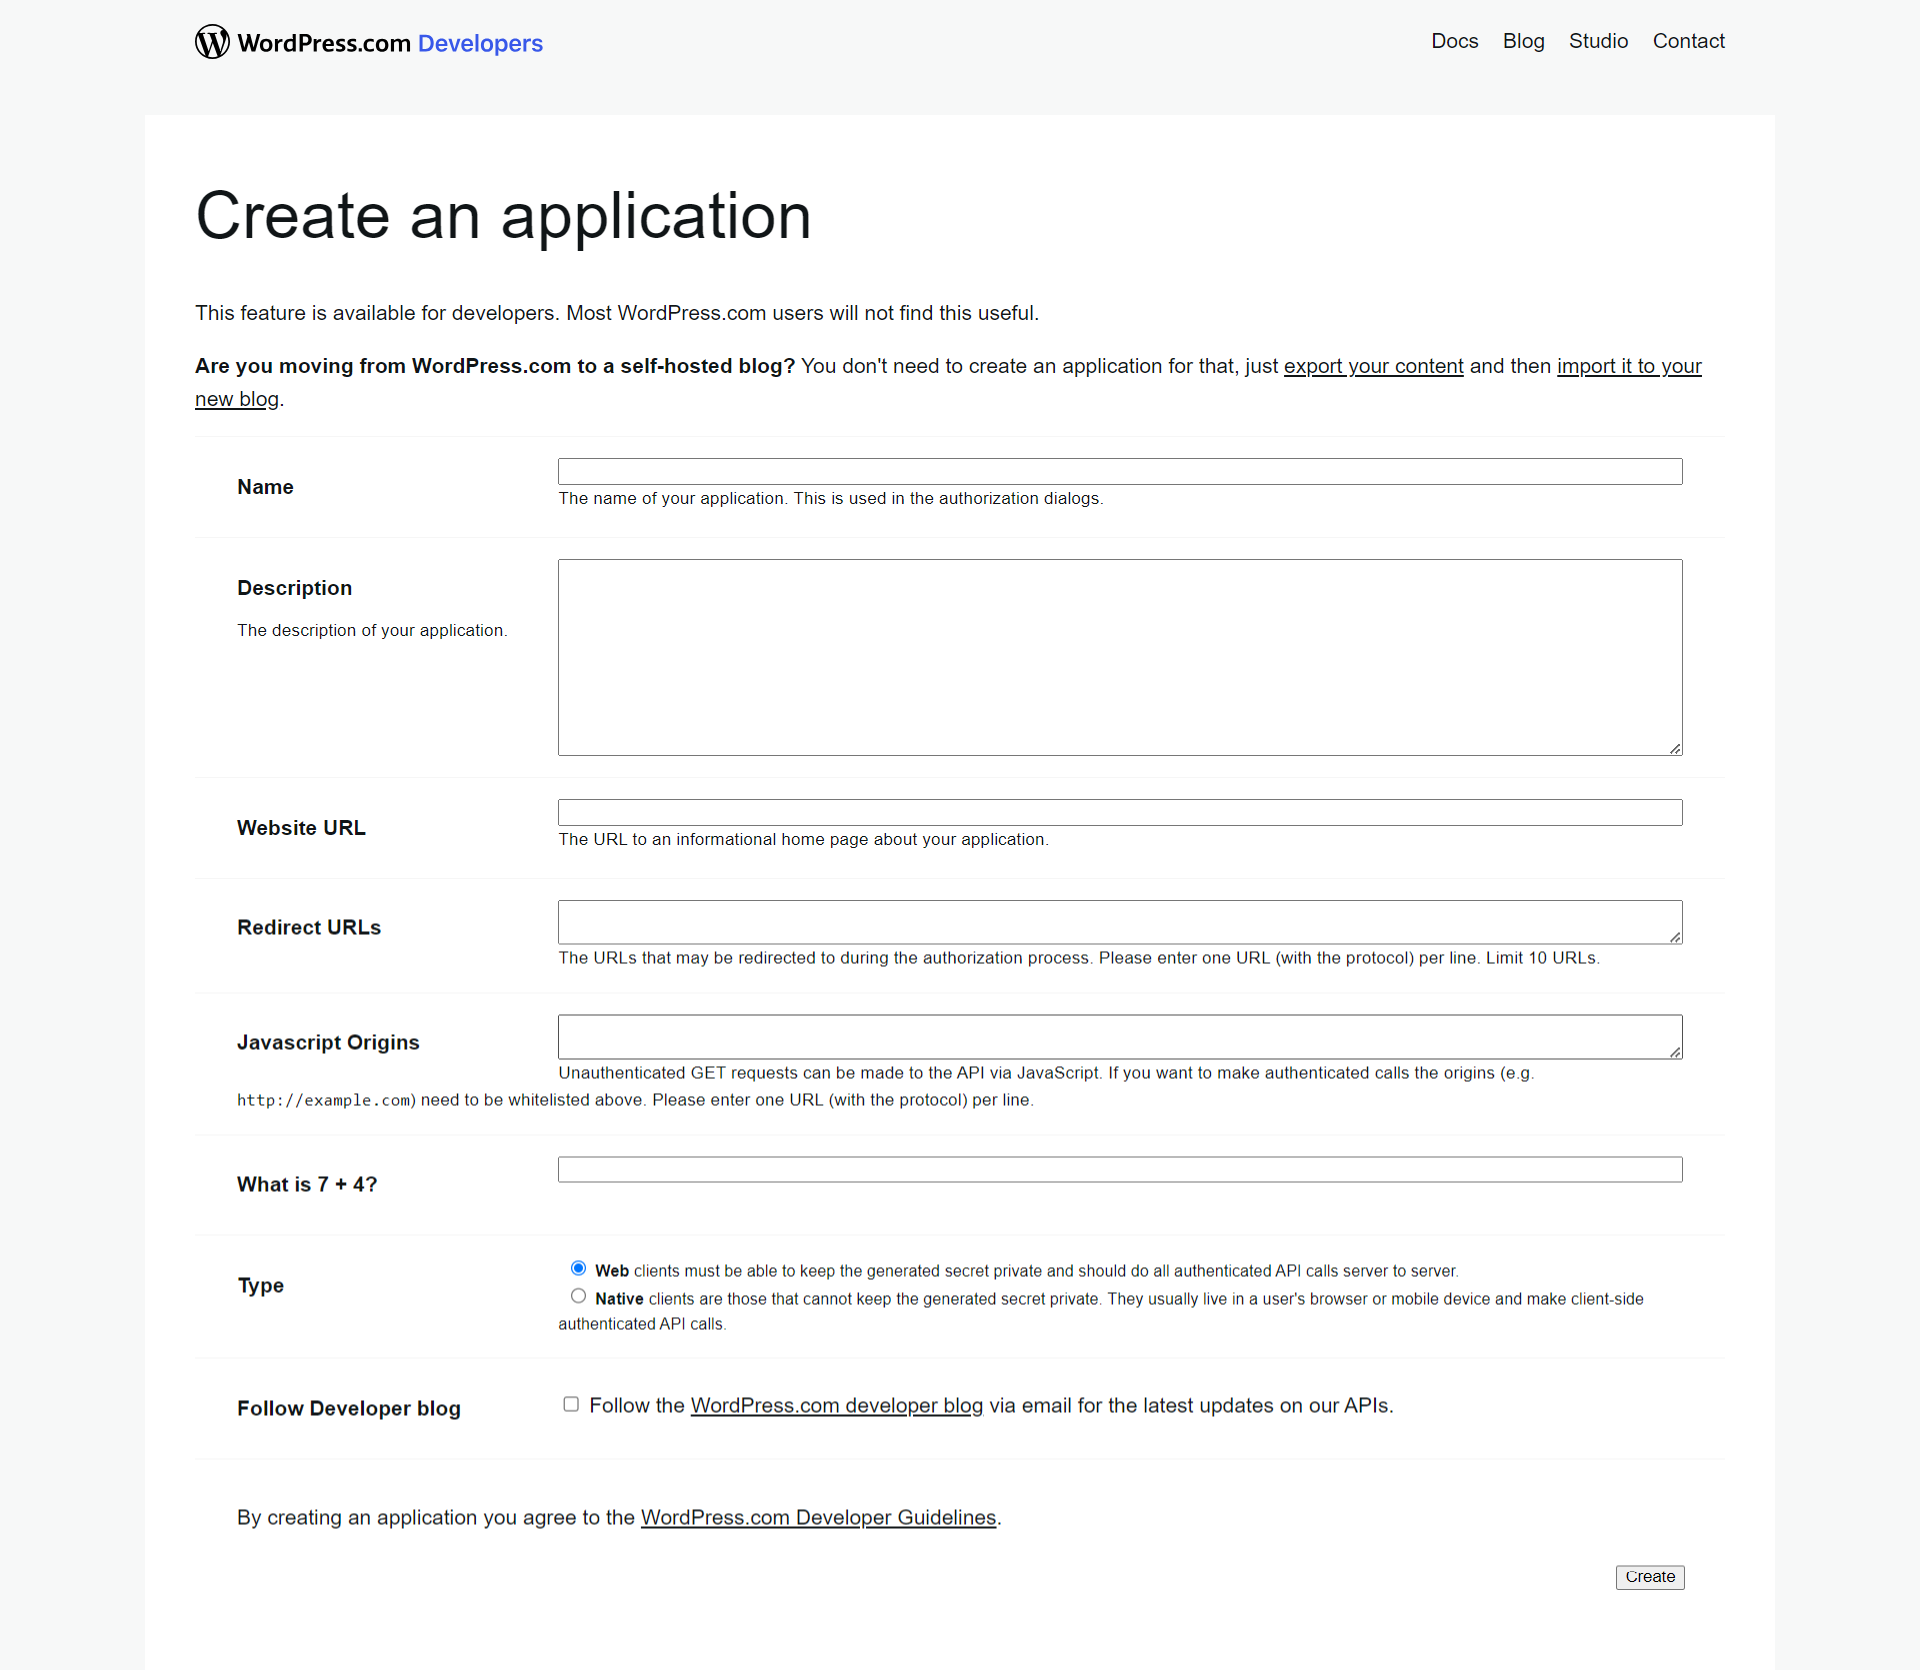
You must be logged in to your WordPress.com account to obtain the WordPress.com Application ID and Secret. First, log in to your WordPress.com account, then follow the link above to access the Developer page. The page should look similar to the one shown in the image above.
Name
Enter your application name. This name is displayed in the authorization dialogs.
Description
Enter a description for your application.
Website URL
Enter the website URL where you want to use WordPress.com Social Login.
Redirect URLs
Enter the URLs to which users will be redirected during the authorization process. Enter one URL, including the protocol, per line. You can add up to 10 URLs.
Javascript Origins
Enter the JavaScript origins that should be allowed to make requests to the API. To make authenticated API calls, the origin must be whitelisted. Enter one URL, including the protocol, per line.
Type
Select Web as the application type.
Click Create to create your application.
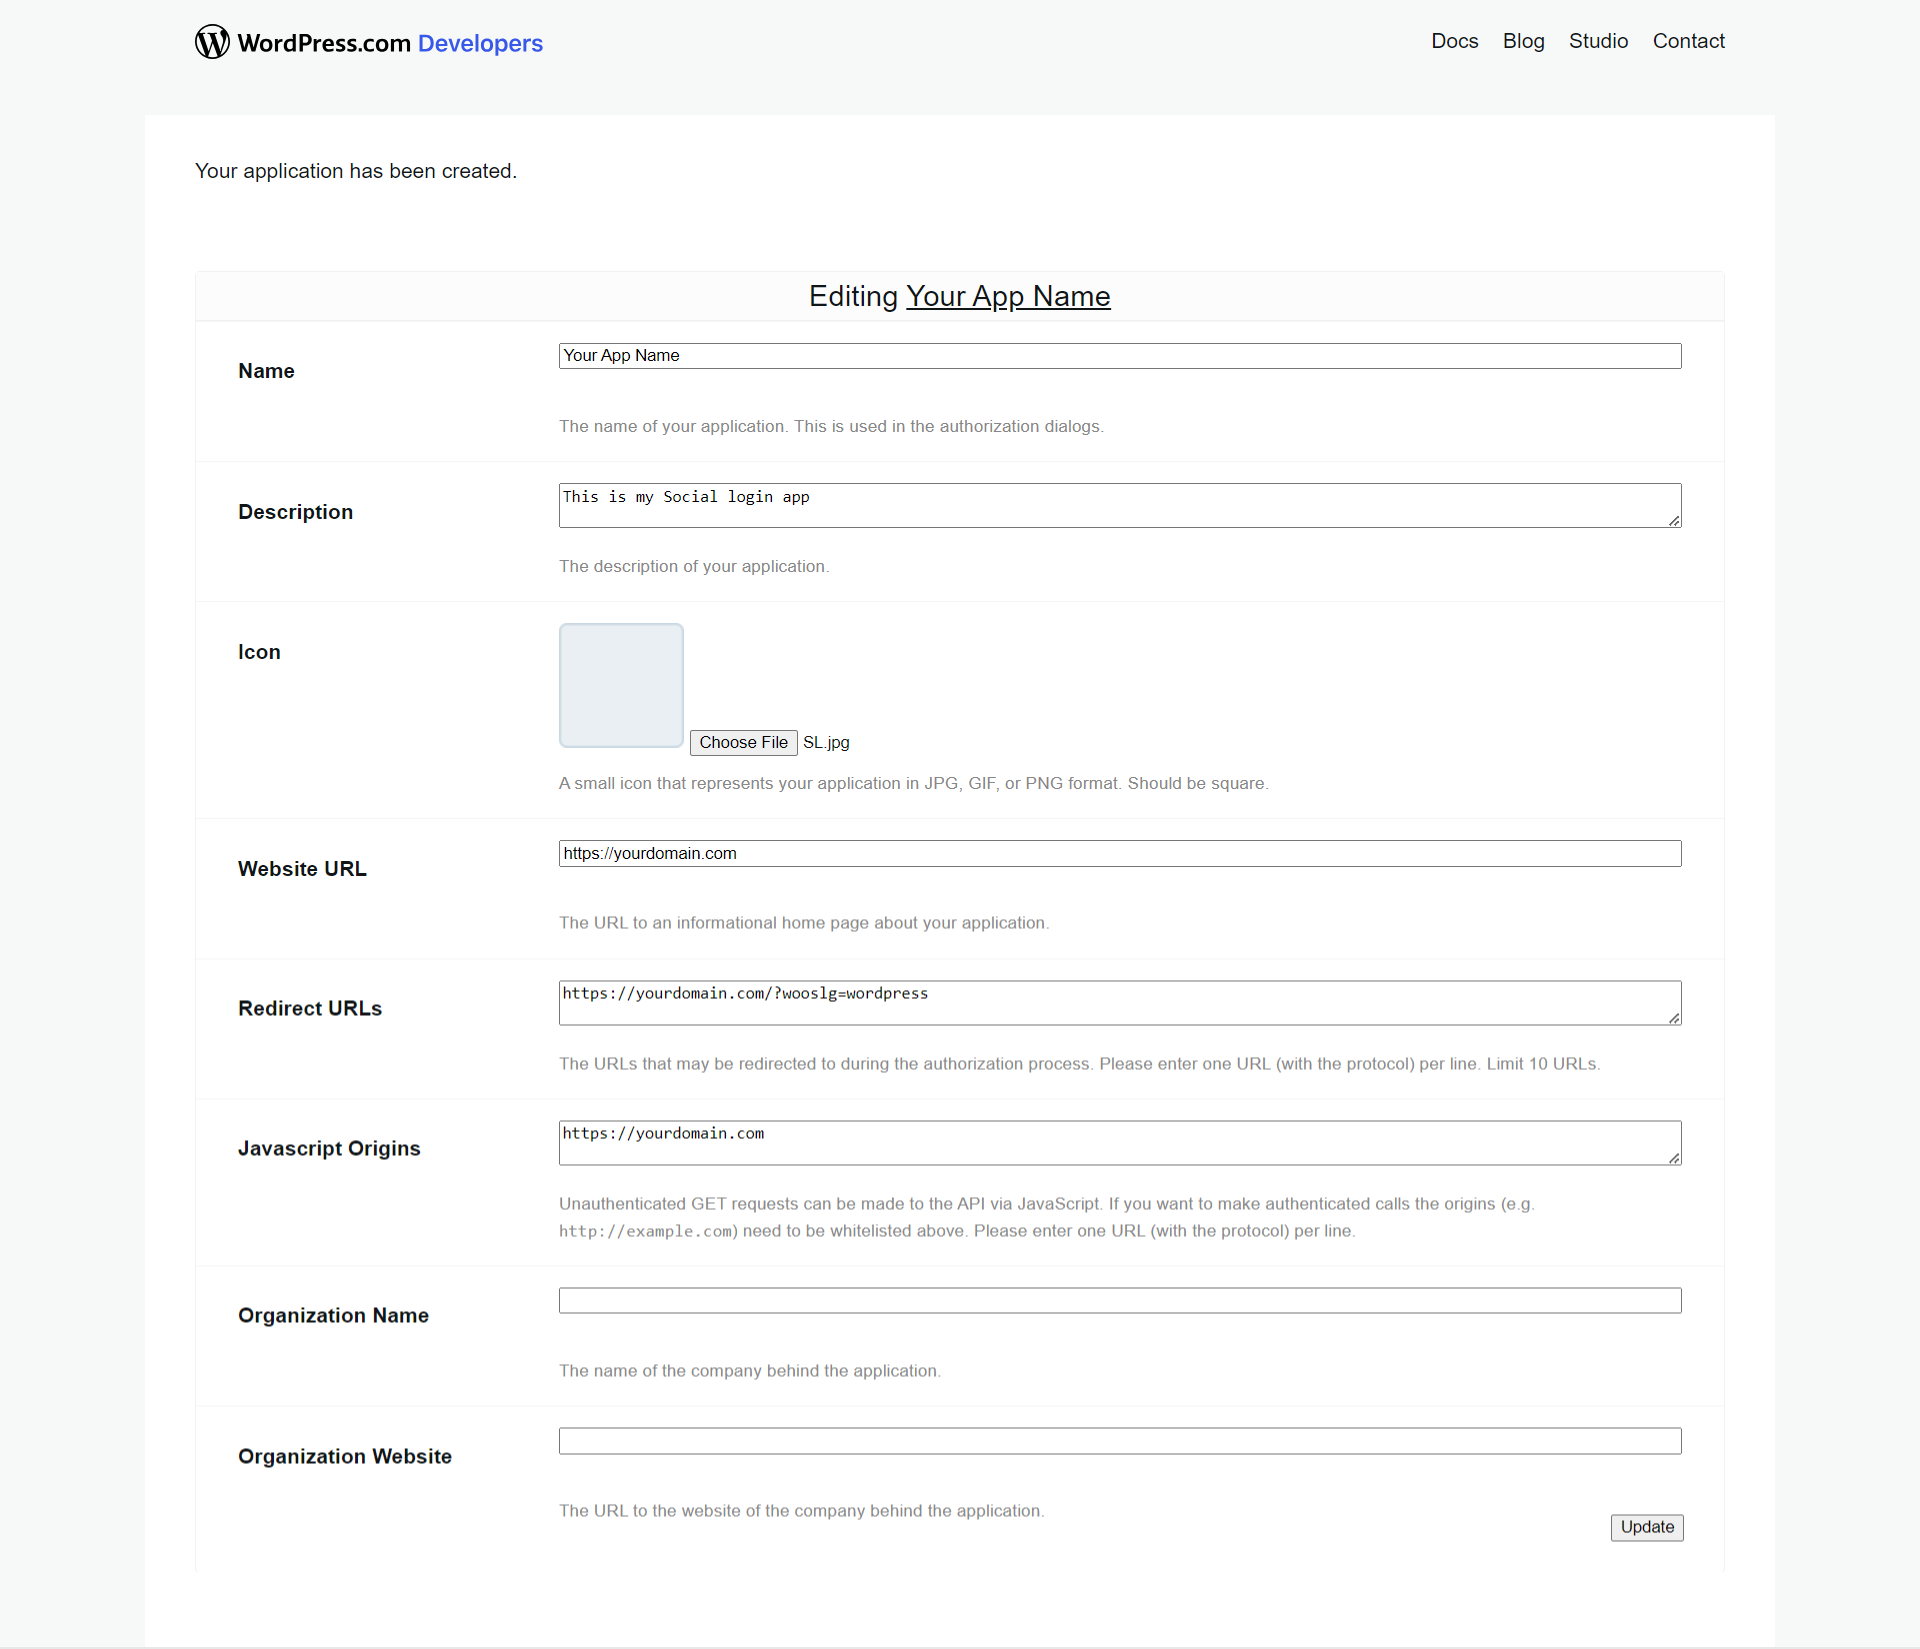
Once the application is created, you will be redirected to the application editing page, where you can update additional application details.
App Icon
Upload an icon for your application. This field is optional.
Organization Name
Enter your organization name. This field is optional.
Organization Website
Enter your organization’s website URL. This field is optional.
After entering the required details, click Update to save your changes.
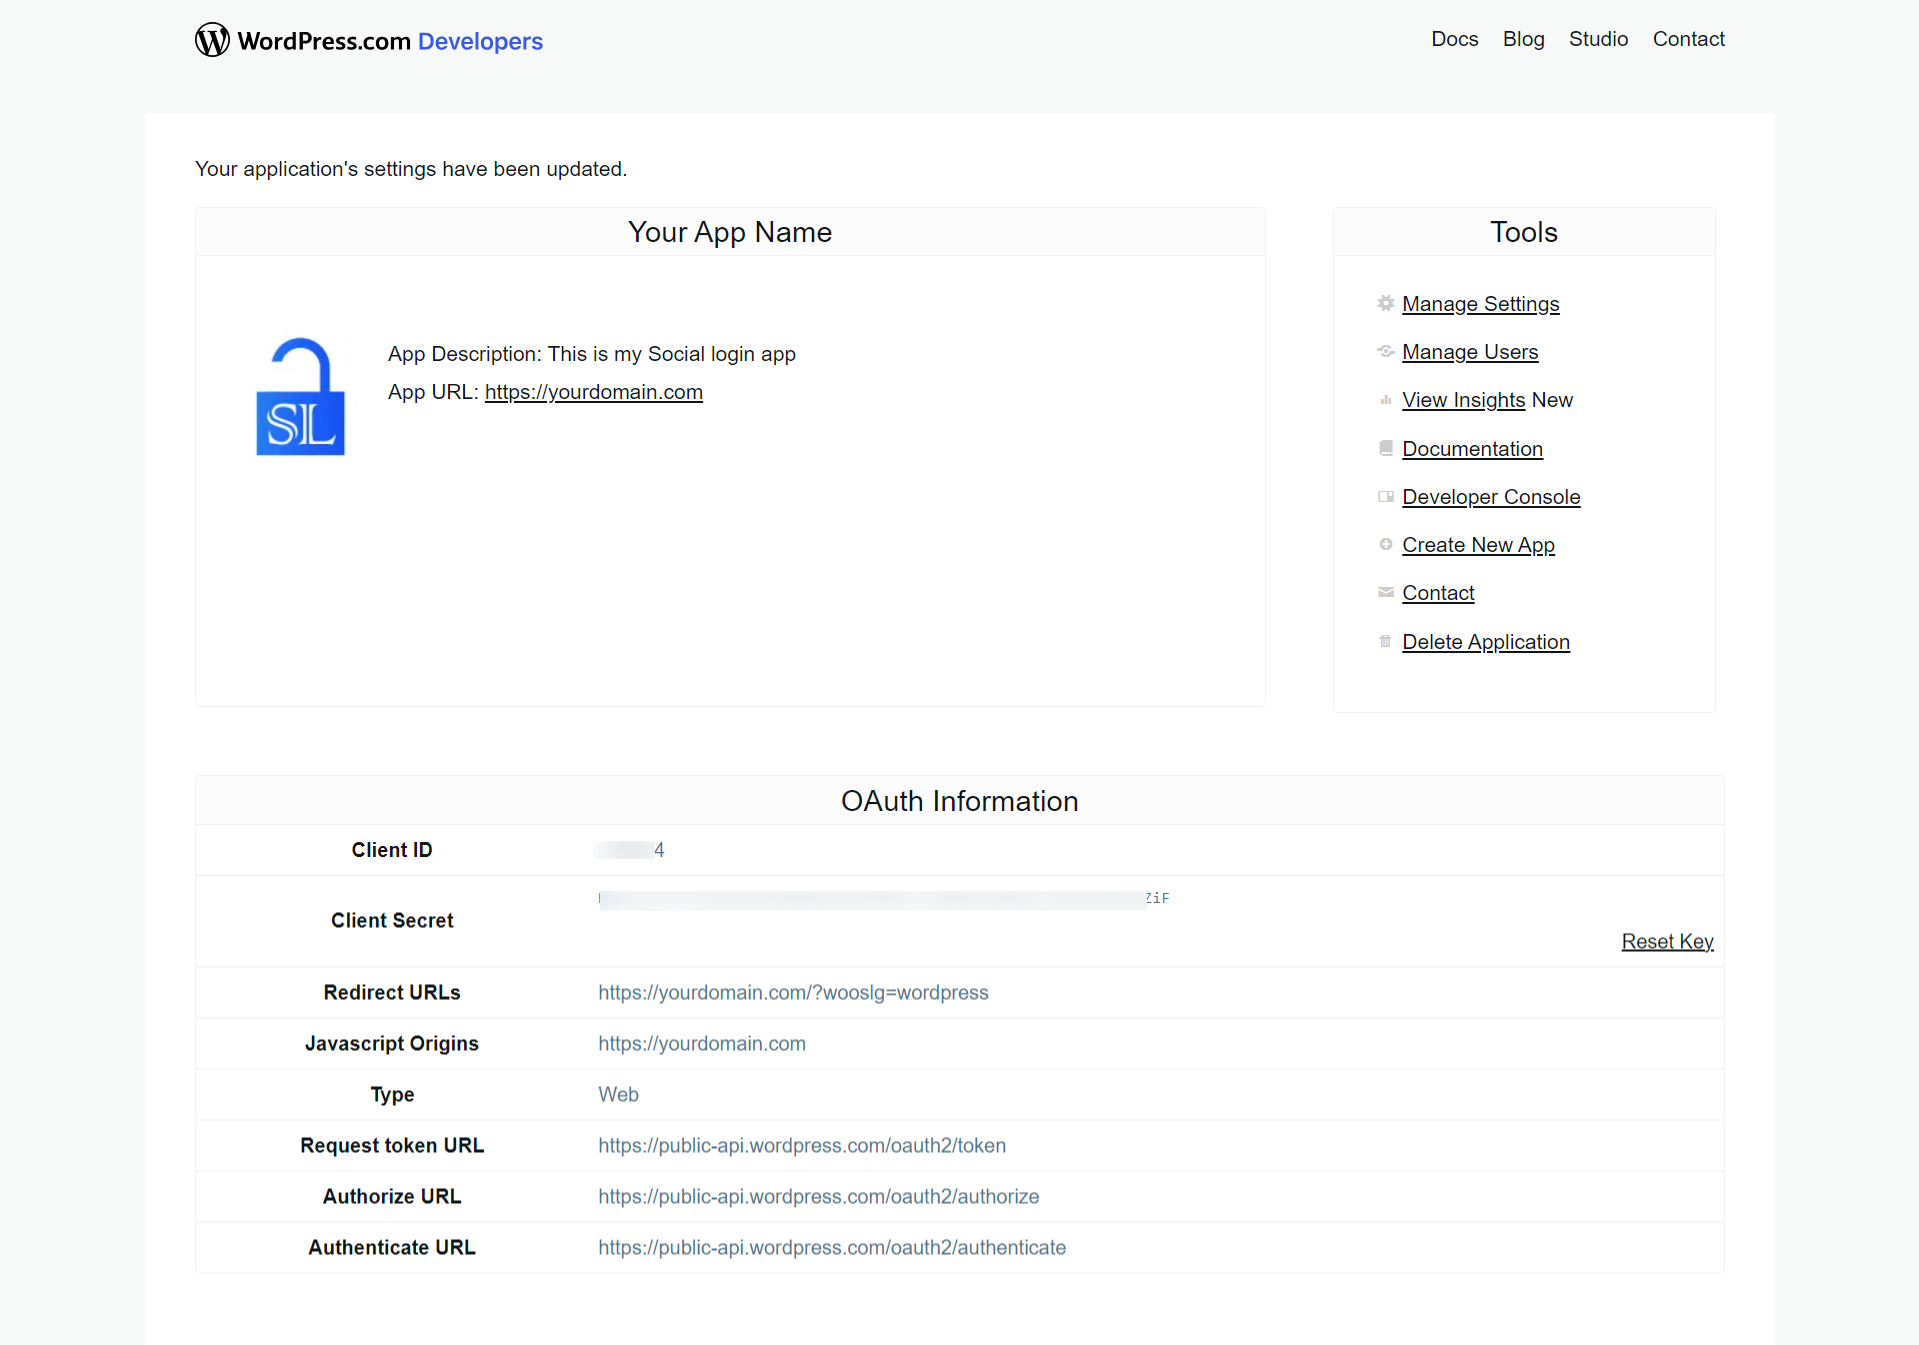
Now, copy the Client ID and Client Secret from your WordPress.com application and enter them in the WordPress.com App Settings section on the plugin settings page, as shown in the image below.
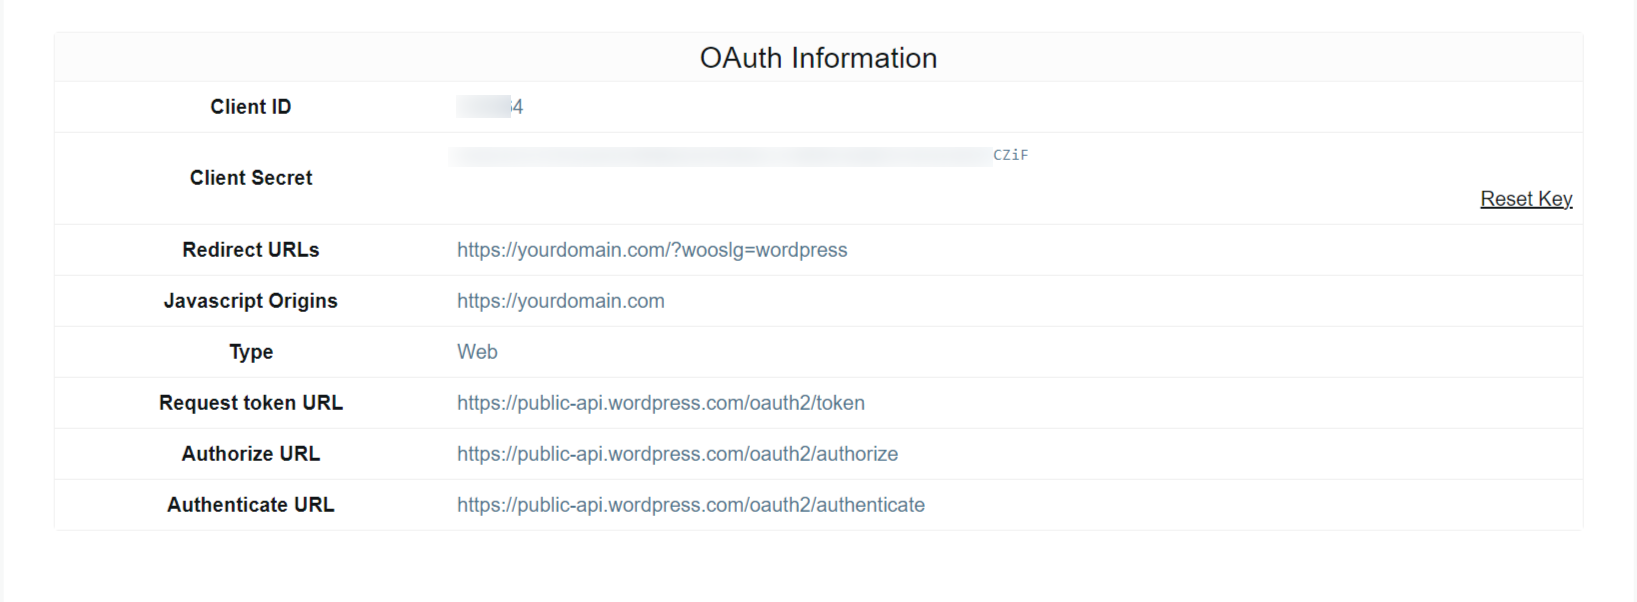
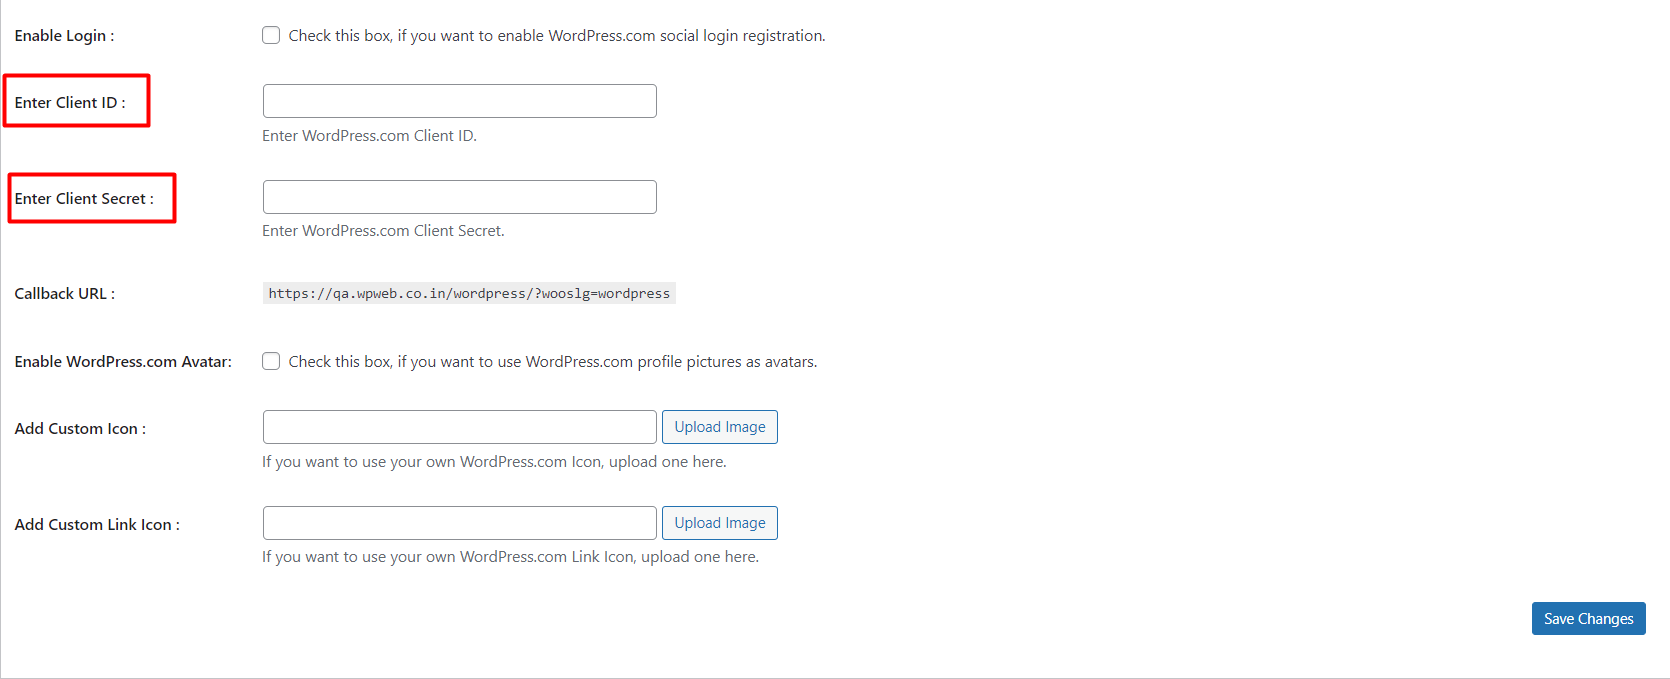
After entering the Client ID and Client Secret, click Save Changes on the plugin’s settings page.